• Do not connect the TV to the mains supply until you have completed all the connections.
• If you watch TV using a set-top box, simply connect your TV and set-top box via a HDMI cable and select HDMI in the Input Source menu.
Unpacking
1
Connecting the Aerial and the Mains Socket
4
Operating Your Remote Control
2
If items are missing, or damaged please contact Partmaster (UK only).
Tel: 0344 800 3456 for assistance.
Installing the Base Stand
3
Quick Start Guide
24” / 32” LED HD TV
LT-24C490 / LT-32C490 / LT-32C491
Thank you for purchasing your new JVC TV.
Your new TV incorporates the latest technology to enhance your viewing
experience. We would suggest that you allow about 20 mins for initial setup.
Please follow this guide for a successful first time installation.
Remove all packaging from the TV. Retain the packaging. If you
dispose of it please do so according to any local regulations.
1. Lay the TV down on a flat surface with the back side facing up, and ideally at the edge of a table so that the base of the TV slightly overhangs on it. Please
make sure a soft cushioned material (such as a towel or thick piece of foam) is placed beneath the screen. Leave the protective bag on your TV until you
have fully attached the TV stand.
2. Attach the TV stand to the TV. Align the screw holes, then secure with a screw driver (not included) using the 4 screws provided.
Installing Batteries
1. Press and lift the back
cover to open the
battery compartment of
the remote control.
2. Insert two AAA size
batteries. Close the
battery compartment
cover.
Operation Range
Point the remote control at the TV no
more than 5 metres from the remote
control sensor on the TV and within
60° in front of the TV. The operating
distance may vary depending on the
brightness of the room.
1. Connect one end of the RF coaxial cable to the aerial socket on the wall and the other end of the cable to the RF (75Ω) socket at the rear right side of your
TV.
2. Connect the mains cable to the mains socket after you have completed all the connections.
3. At this stage, the TV switches to standby mode. The red LED indicator will illuminate on the front panel of the TV.
4. In standby mode, press the button at the bottom of the TV or on the remote control to turn the TV on. The red LED indicator will turn off.
The latest eco-friendly power-saving technology will switch o the TV if device is
left on and idle for 4 hours or it does not receive an input signal for serveral minutes.
Please refer to “Eco Friendly / Auto Standby Function” section of the instruction manual
for more detail.
For Help and Support Call
UK: 0344 561 1234
Ireland: 1890 818 575
1
2
LAN RF
COMMON INTERFACE (CI)
HEADPHONES
USB
5V 500mA
Digital Output
HDMI2
RF coaxial cable
(not included)
OR
To the mains socket
SETUP
ANGLE
ZOOM STEP
MENU
TEXT
CANCEL
AUDIO
MIX
OK
SIZE
ASPECT S.MODE P.MODE GUIDE
LIST
PROG
MENU INPUT
BACK
EXIT
OK
S
TITLE
TV.RD
FAV
HOLD REVEAL SUBPAGE INDEX
GOTO SLOW REPEAT A-B
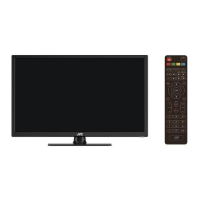
TV
Remote Control AAA Batteries x 2
Quick Start Guide
TV Stand Base Screw x 4
Instruction Manual
SETUP
ANGLE
ZOOM STEP
MENU
TEXT
CANCEL
AUDIO
MIX
OK
SIZE
ASPECT S.MODE P.MODE GUIDE
LIST
PROG
MENU INPUT
BACK
EXIT
OK
S
TITLE
TV.RD
FAV
HOLD REVEALSUBPAGE INDEX
GOTO SLOW REPEAT A-B
30° 30°
5M
Install the batteries correctly by following the polarity (+ and -) indications in the
battery compartment.
TV Stand Base Front
(included)