Do you have a question about the JVC LT-43C775A and is the answer not in the manual?
This document serves as a Quick Start Guide for the JVC 43" LED Smart HD TV with built-in DVD player, model LT-43C775(A). It provides essential instructions for initial setup, aiming to guide users through the process in approximately 20 minutes.
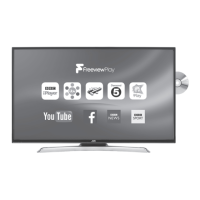
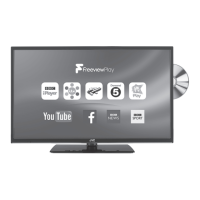
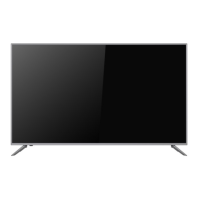
The JVC 43" LED Smart HD TV is a modern entertainment device designed to deliver a high-definition viewing experience. It integrates smart TV functionalities, allowing users to access a variety of online content and streaming services. A key feature is the built-in DVD player, which enables direct playback of DVDs without the need for an external device. The TV supports Freeview Play, providing access to catch-up TV services from major broadcasters like BBC iPlayer, ITV Hub, and others, alongside live television channels. It also includes popular streaming apps such as YouTube. The device is equipped with various connectivity options, including HDMI ports for external devices, a SCART input for older equipment, and a LAN port for wired internet connection. Wireless internet connectivity is also supported, offering flexibility in network setup. An integrated digital tuner allows for reception of digital terrestrial television broadcasts. The TV is designed with eco-friendly power-saving technology, featuring an "Auto Standby" function that automatically switches off the TV if it remains idle for 4 hours, contributing to energy efficiency.
The initial setup process begins with unpacking the TV and its components, which include the TV unit, stand neck, stand base, remote control with AAA batteries, screws for assembly, an instruction manual, and a quick start guide. Users are advised to inspect the TV for any damage upon unpacking.
Stand Assembly: The base stand assembly involves two main steps. First, the stand neck is fitted onto the base and secured with four supplied screws. Second, the assembled stand is attached to the TV. This requires laying the TV face down on a soft, cushioned surface, ideally with the base slightly overhanging the edge of a table. The stand is then slid under a lip on the TV's back, aligning the neck with screw holes, and secured with four additional screws. Caution is advised during this process to protect the fragile LCD display from pressure or sharp objects.
Remote Control Operation: The remote control requires two AAA batteries. Users need to slide open the battery compartment, insert the batteries ensuring correct polarity (+/-), and then slide the cover back until it clicks into place. The remote control is essential for navigating the TV's menus and functions.
Connecting to the Aerial and Power: To receive TV channels, an RF coaxial cable (not included) must be connected from the wall aerial socket to the ANT socket on the back of the TV. After all connections are made, the TV is plugged into a mains socket and switched on. The TV can then be turned on from standby mode using the power button on the remote control, indicated by a flashing LED.
Internet Connectivity: The TV offers both wired and wireless internet connection options, crucial for accessing smart TV features and Freeview Play.
First Time Installation and Channel Tuning: Upon the first power-on, the TV enters the "First Time Installation" menu. Users select their language and confirm pre-set settings for digital aerial, digital cable, and analogue reception. If using a set-top box via HDMI, users can select "Digital Aerial to NO" to prevent the TV from tuning channels directly. The TV then prompts for internet connection setup. After connecting to the internet, users confirm activation of Freeview Play. The TV then performs an automatic channel scan, tuning in all available TV and radio stations. If multiple regional signals are detected, a "Choose Region" screen appears, allowing users to select their primary, secondary, and tertiary regions (e.g., England, London, Greater London) to ensure correct local news services. After tuning, a "Scan statistics" screen displays the number of stations found, and an "Edit Channel List" allows for channel management.
The guide emphasizes the importance of proper handling during installation, particularly concerning the fragile LCD display. Users are instructed to use soft, cushioned material when laying the TV down for stand assembly and to avoid exerting pressure on the screen. For power management, the eco-friendly "Auto Standby" feature helps conserve energy by automatically switching off the TV after 4 hours of inactivity. The remote control's power button only puts the TV into standby; to completely disconnect power, the mains plug must be removed from the socket. Users are also advised to disconnect the TV from the mains socket when not in use for extended periods. Retaining the original packaging is recommended for potential future transport or disposal. If disposing of packaging, users should do so according to local regulations. In case of any damage observed upon unpacking, users are instructed to consult their dealer. The instruction manual provides more detailed information on features and maintenance, encouraging users to read it for a comprehensive understanding of their new TV.