MX-DVB10
1-15
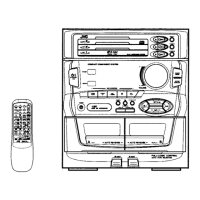
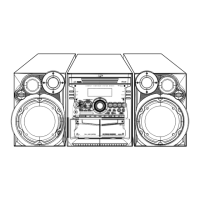
Remove the four screws marked A on the front of the
body.
Remove the front cover from the four holders marked
a that are fixing the front cover.
Pull out the front cover toward the front while
disengaging the four joints marked a.
1.
2.
3.
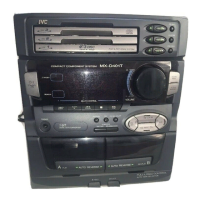
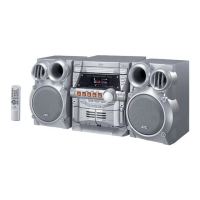
< Main Speaker >
Removing the front cover (See Fig.1, 2)
Prior to performing the following procedures, remove
the front cover.
Remove the two screws marked B on the front
cover.
Disconnect the yellow and black wires from the
speaker terminals on the squawker.
1.
2.
Removing the squawker (See Fig.2)
Prior to performing the following procedures, remove
the front cover.
Remove the four screws marked C .
Remove the woofer and disconnect the yellow and
black wires from the speaker terminals.
Remove the squawker and disconnect the yellow
and black wires from the speaker terminals.
1.
2.
3.
Removing the woofer (See Fig.2)
Because it is difficult to take away the cover,
insert a minus driver, etc. in the place between
the main body and the front cover as shown in
Fig.1 before removing the front cover. Exercise
care not to damage the main body and the front
cover when inserting the minus driver. For this
purpose, insert the minus driver together with
cloth and the like.
Note:
Fig.1
Fig.2
A
A
A
A
Front cover
B
Squawker
C
Joints a
Joints a
C
Front cover
Tweeter
Woofer
Holder a
Joints a
Holder a
Joints a