MX-J270V
1-6
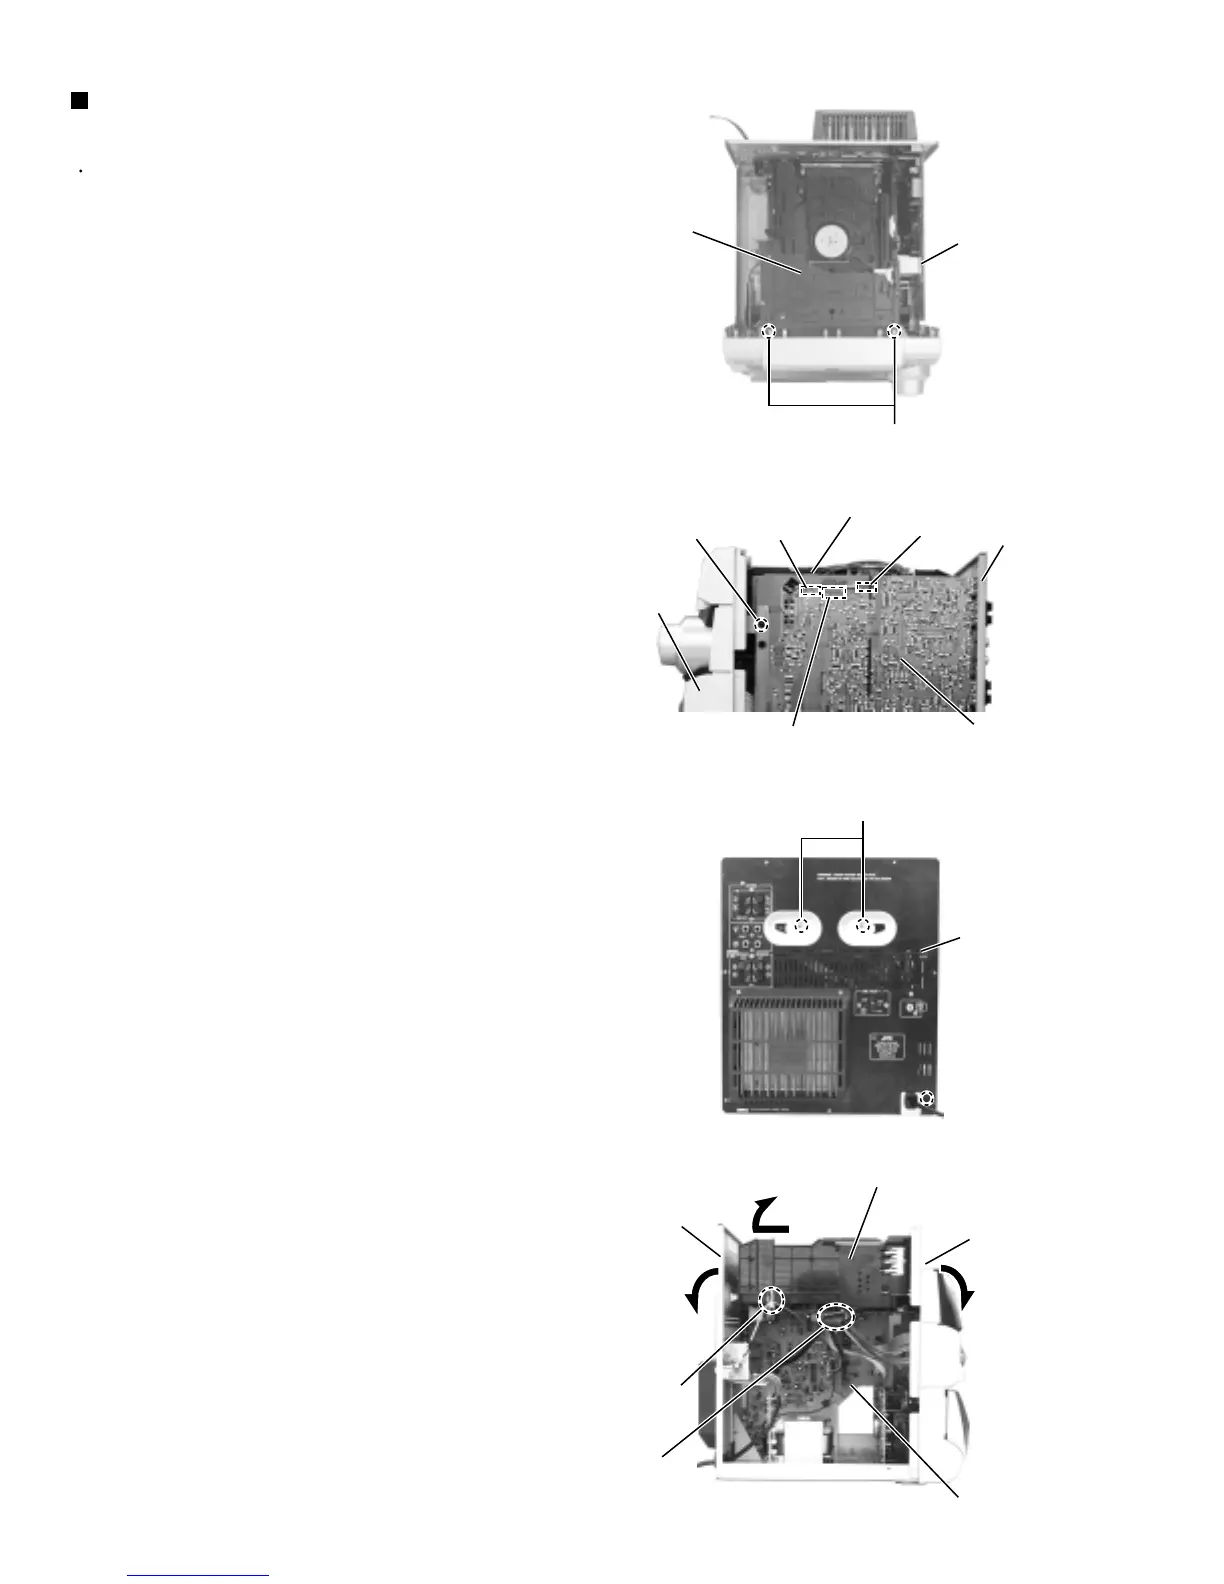
Prior to performing the following procedures, remove
the metal cover.
Disconnect the card wire from connector CN308 and
CN309 connecting the CD servo board and the main
board.
Disconnect the harness from CN310 on the main
board.
Remove the two screws C attaching the CD changer
mechanism assembly on the top of the body.
Remove the plastic rivet a fixing the main board to
the front panel assembly on the left side of the body.
Remove the two screws D from the rear panel.
Cut off the band b and band c which bundle two
harnesses coming from the MIC/headphone board
and one harness coming from the video board,
respectively.
Detach upward the rear part of the CD changer
mechanism assembly while pulling the front panel
assembly and the rear panel outward, then pull out
the front part backward and upward.
1.
2.
3.
4.
5.
6.
7.
Removing the CD changer mechanism
assembly (See Fig.4 to 7)
Fig.6
Fig.5
Fig.4
Fig.7
Pull outward
C
Main board
CN303
Plastic rivet a
CD changer mechanism assembly
Rear panel
Front panel
assembly
D
Rear panel
CD changer
mechanism
assembly
CD changer mechanism
assembly
Rear panel
Front panel
assembly
Pull outward
Main board
Main board
Band b
Band c
CN308
CN309
CN310

 Loading...