– 44 –
1
Insert a recordable MD into the MD loading slot
while the unit is turned on.
2
Press USB/LINE repeatedly to select “LINE” or
“DIGITAL IN.”
• Each time you press the button, the source changes as
follows:
• If you have changed the source names, the changed
names will appear.
3
Press REC TIME on the remote control to select the
recording length mode.
• Each time you press the button, the recording length
mode changes as follows:
The indicator corresponding to the selected recording
length mode lights up on the display.
• For the recording length mode, see “Stereo Long-
Hour Recording (MDLP)” on page 39.
4
Press REC START on the unit.
“SOUND SYNC. START!” appears in the main display
and the RECORDING indicator starts flashing, then
“REC STANDBY” appears in the main display.
• If you want to start recording manually, simply press
MD 3/8. In this case, Synchronized Recording is
canceled.
5
Start playback on the external equipment.
The RECORDING indicator remains lit up on the
display and the recording starts.
To stop recording, press 7.
“WRITING” flashes for a while.
SP REC LP2 REC
LP4 REC
BASS
RECORDING
GROUP
OVER
SP
LP
2
LP
4
RECORDING indicator
GROUP indicator
Recording length
mode indicator
OVER indicator
USB LINE
DIGITAL IN
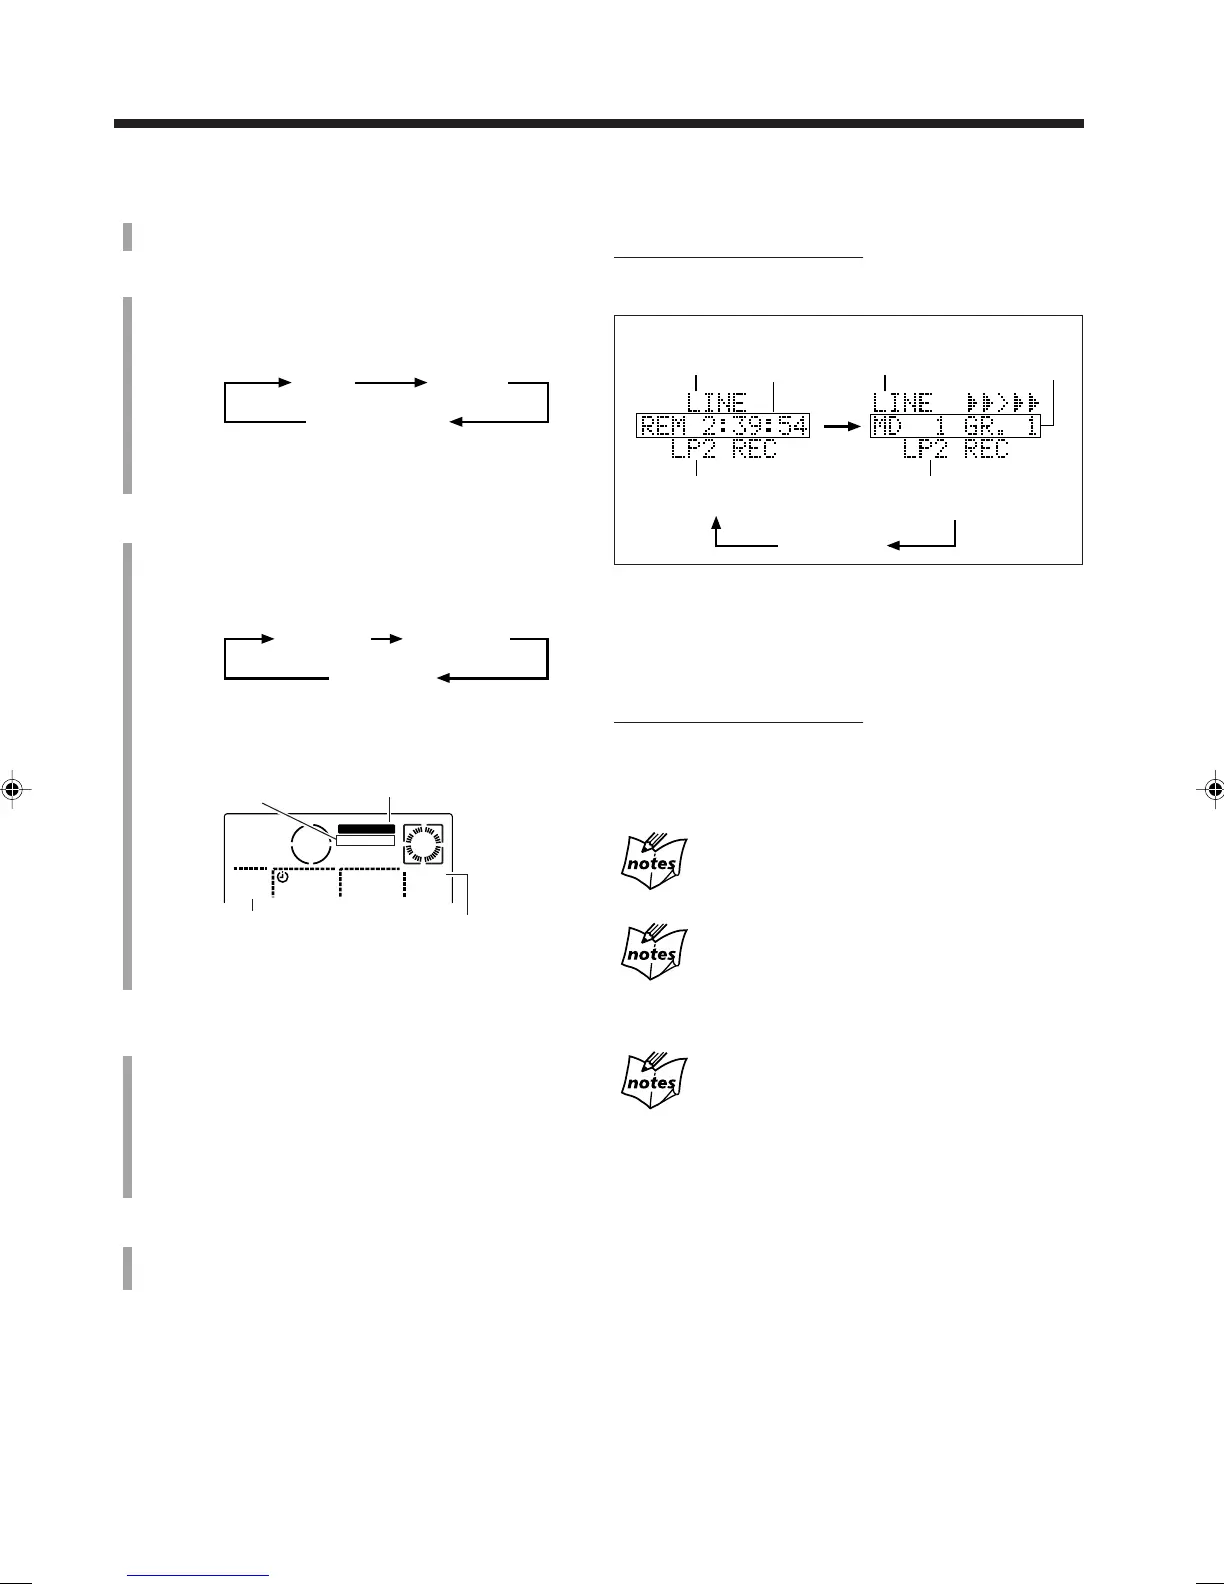
To change the information shown in the main display
while recording
On the remote control ONLY:
Each time you press DISP./CHARA, the information in the
main display changes as follows:
* When Group recording is activated.
** “0:00” flashes in the main display, before you set the
built-in clock (see page 11).
To put a track mark manually while recording
On the remote control ONLY:
Press SET at the place where you want to put a track mark.
“TRK MARKING” appears in the main display for a while.
• For details, see “About the track marks” on page 38.
If you press REC START with USB selected as the
source
“CANNOT RECORDING!” appears in the main display.
When recording from a DAT
Two track marks may be recorded at the beginning of the
recording. If this occurs, join these two track marks using the JOIN
function described on page 57.
About Sound Synchronized Recording
Sound Synchronized Recording stops automatically if no sound
comes into the unit for more than 30 seconds. In this case, the
blank portion on the MD is about 2 seconds.
Source
indication
Source
indication
MD track
number and
group number*
Remaining
recording
time of MD
Recording
length mode
Recording
length mode
Clock time**
EN37-44_CA-NXMD1R[B]f.pm6 01.8.20, 11:3444