(No.MB368)1-41
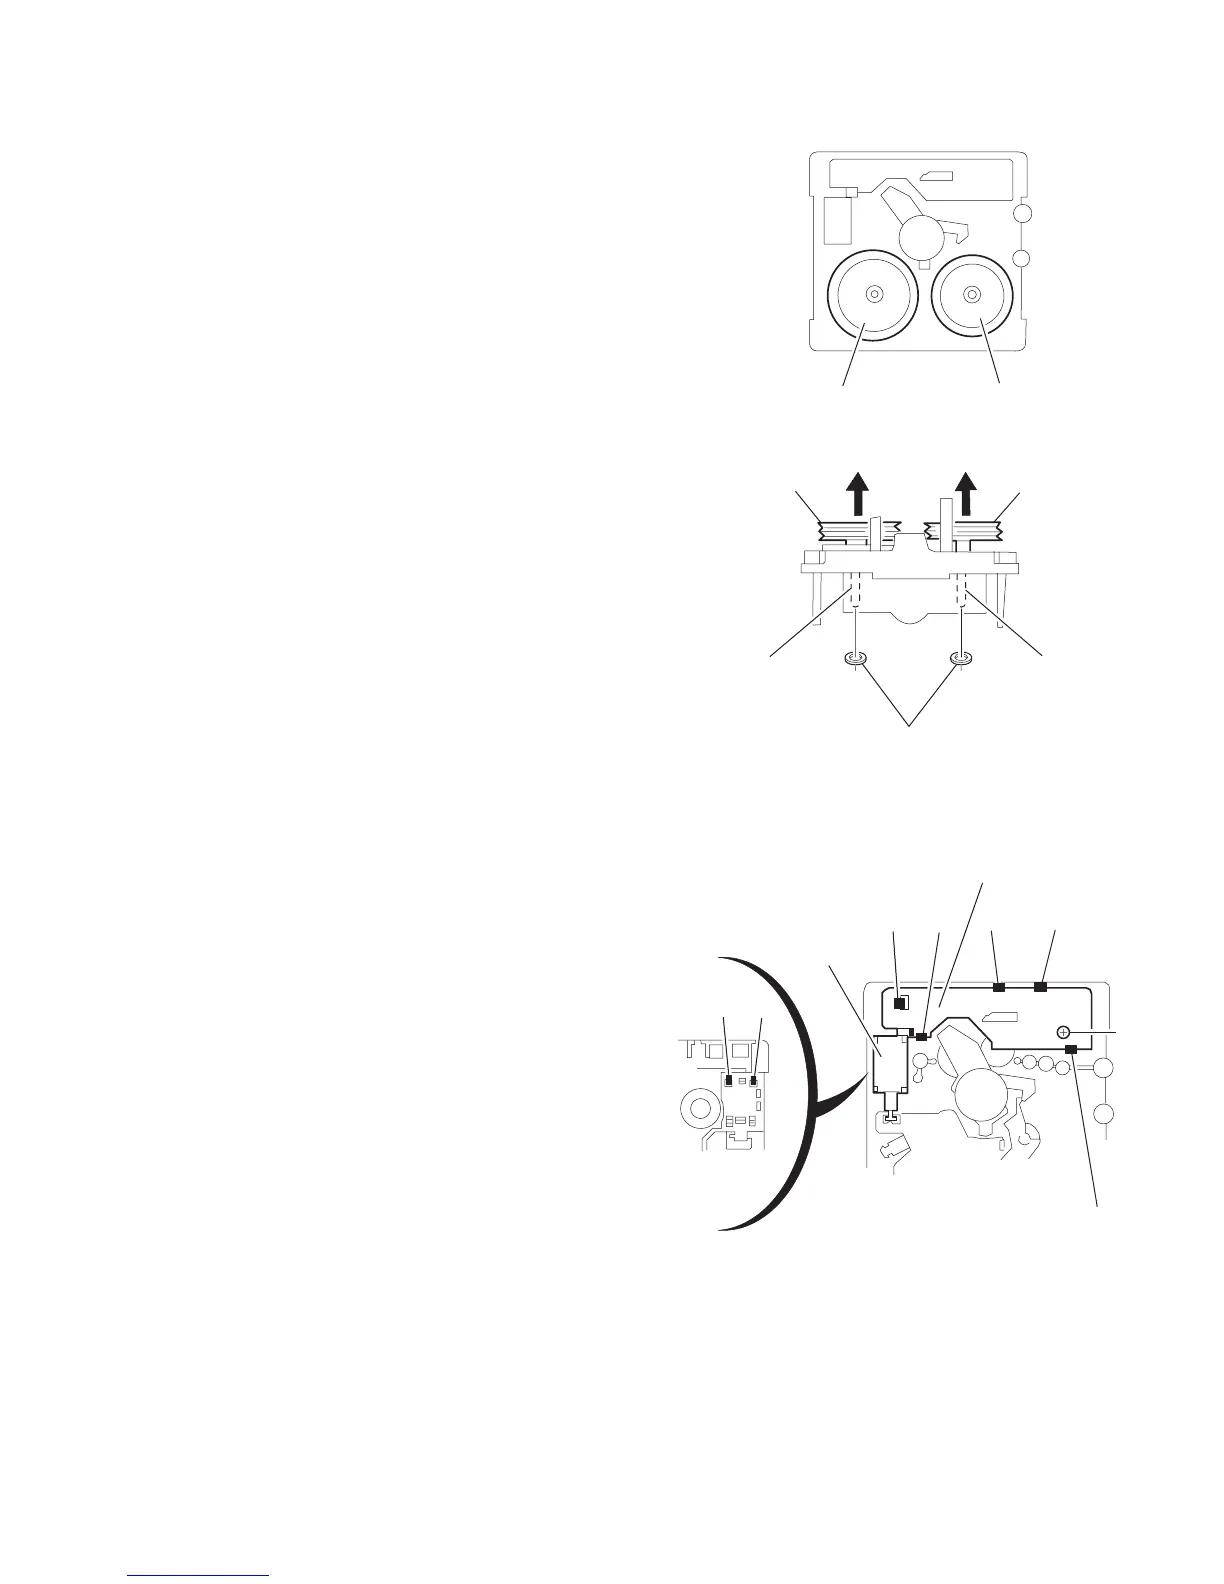
3.3.4 Removing the flywheel
(See Fig.8, 9)
• Prior to performing the following procedure, remove the head
amplifier board and the main motor assembly.
(1) From the front side of the cassette mechanism, remove the
slit washers attaching the capstan shaft L and R.
(2) Pull out the flywheels backward.
Fig.8
Fig.9
3.3.5 Removing the cassette switch board and solenoid
(See Fig.10)
• Prior to performing the following procedure, remove the head
amplifier board.
(1) Remove the screw C.
(2) Release the tab a, b, c, d and e retaining the cassette
switch board.
(3) Release the tab f and g attaching the solenoid on the cas-
sette switch board.
(4) The cassette switch board and solenoid come off.
Fig.10
Fly wheel R Fly wheel L
Capstan shaft R
Capstan shaft L
Fly wheel R
Slit washer
Fly wheel L
a
f
g
b
d
e
C
Cassette switch board
Solenoid
c