(No.YD125<Rev.001>)1-11
(5) Once again, the confirmation to execute HDD FORMAT is displayed. Perform the same procedure as step (4).
HDD FORMAT is executed.
(6) When the HDD FORMAT is completed, the confirmation for the completion of HDD FORMAT is displayed on the TV screen.
Press the [OK] button on the remote control.
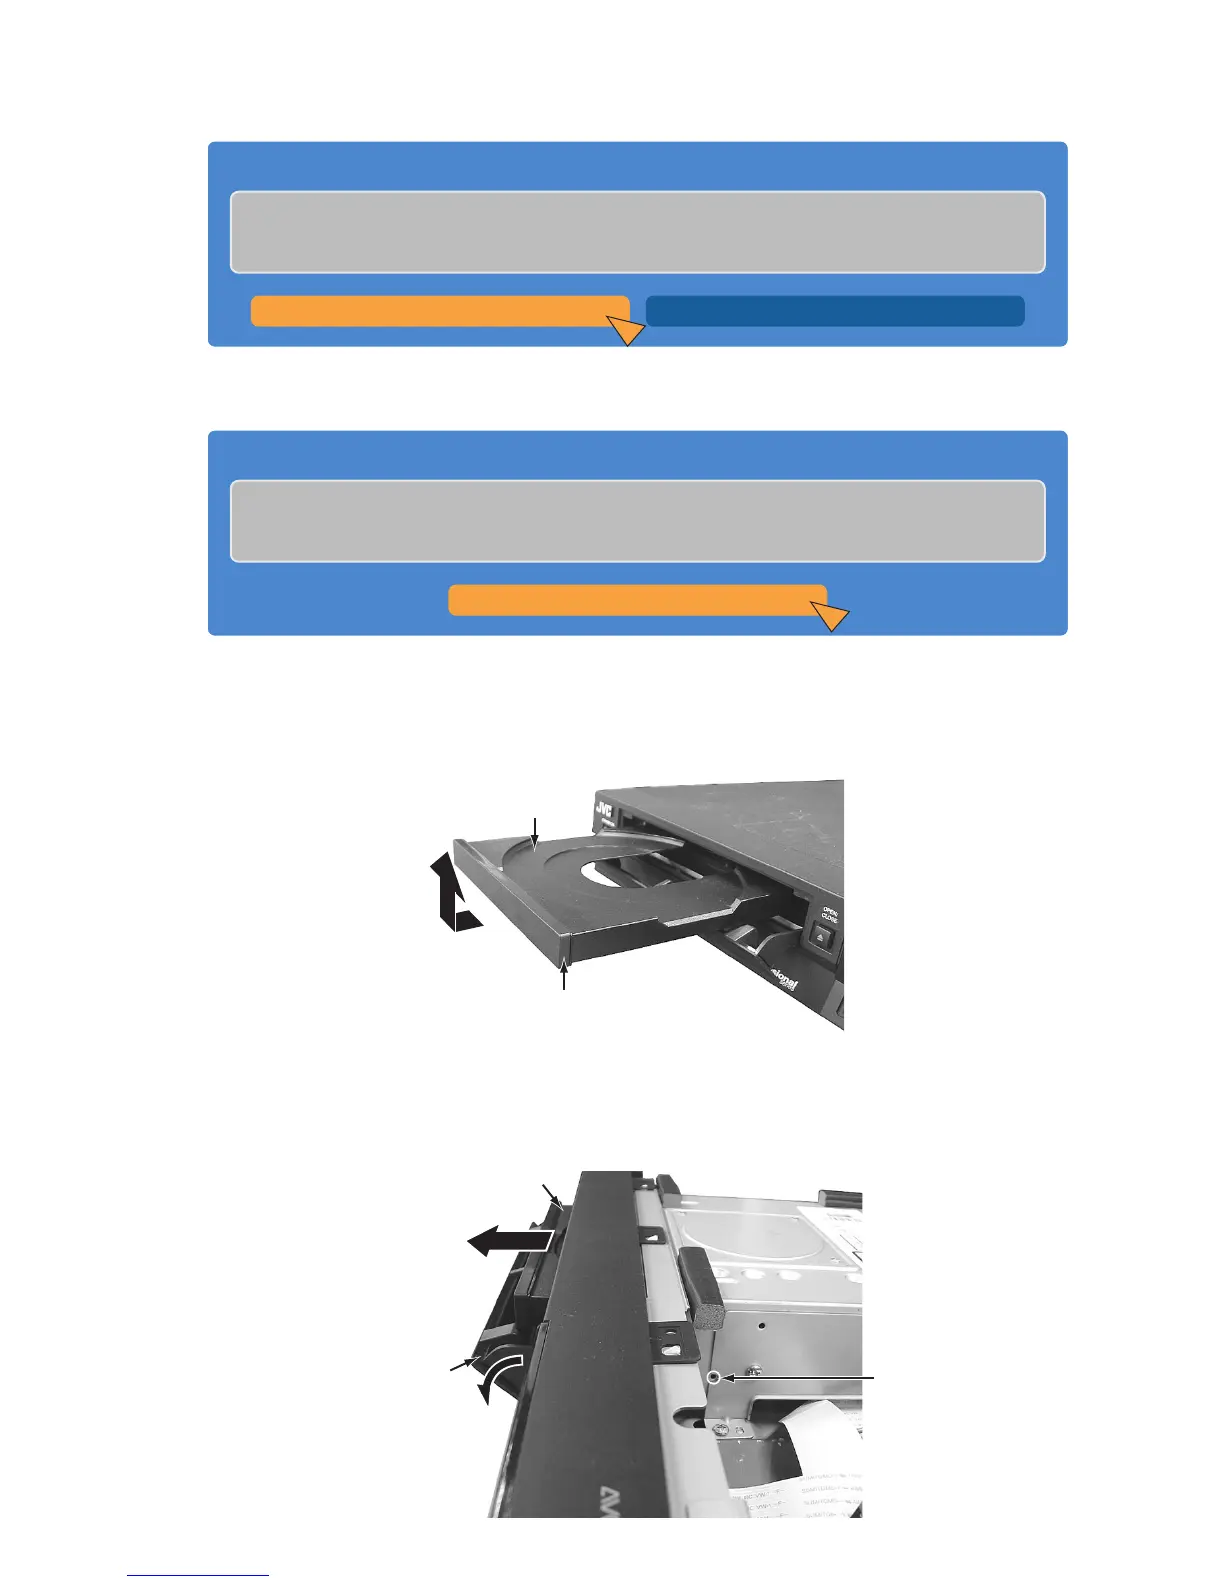
5.7 Exchanging the fitting
As the fitting that comes with the service drive unit cannot be used, make sure to attach a service fitting when the drive unit is ex-
changed.
The fitting that is removed from the old drive unit can be attached to the new drive unit.
The fitting can be removed by pulling upwards while opening out the lower part of the fitting outwards.
5.8 Taking out a disc
(1) Remove the top cover.
(2) Open the front door of the main unit manually.
(3) Insert a fine wire (e.g. a straightened paper clip) into the hole in the right side part of the drive unit.
(4) As the tray ejects a little, pull out the tray manually.
CONFIRM
THE HDD WILL BE FORMATTED
ALL RECORDED TITLES WILL BE ERASED
DO YOU WANT TO FORMAT?
FORMAT DO NOT FORMAT
CONFIRM
THE HDD HAS BEEN FORMATTED
OK
Fitting
Tray
Front door
Tray
Hole

 Loading...