1-10 (No.MB570)
3.1.3 Removing the Audio & Digital input board assembly
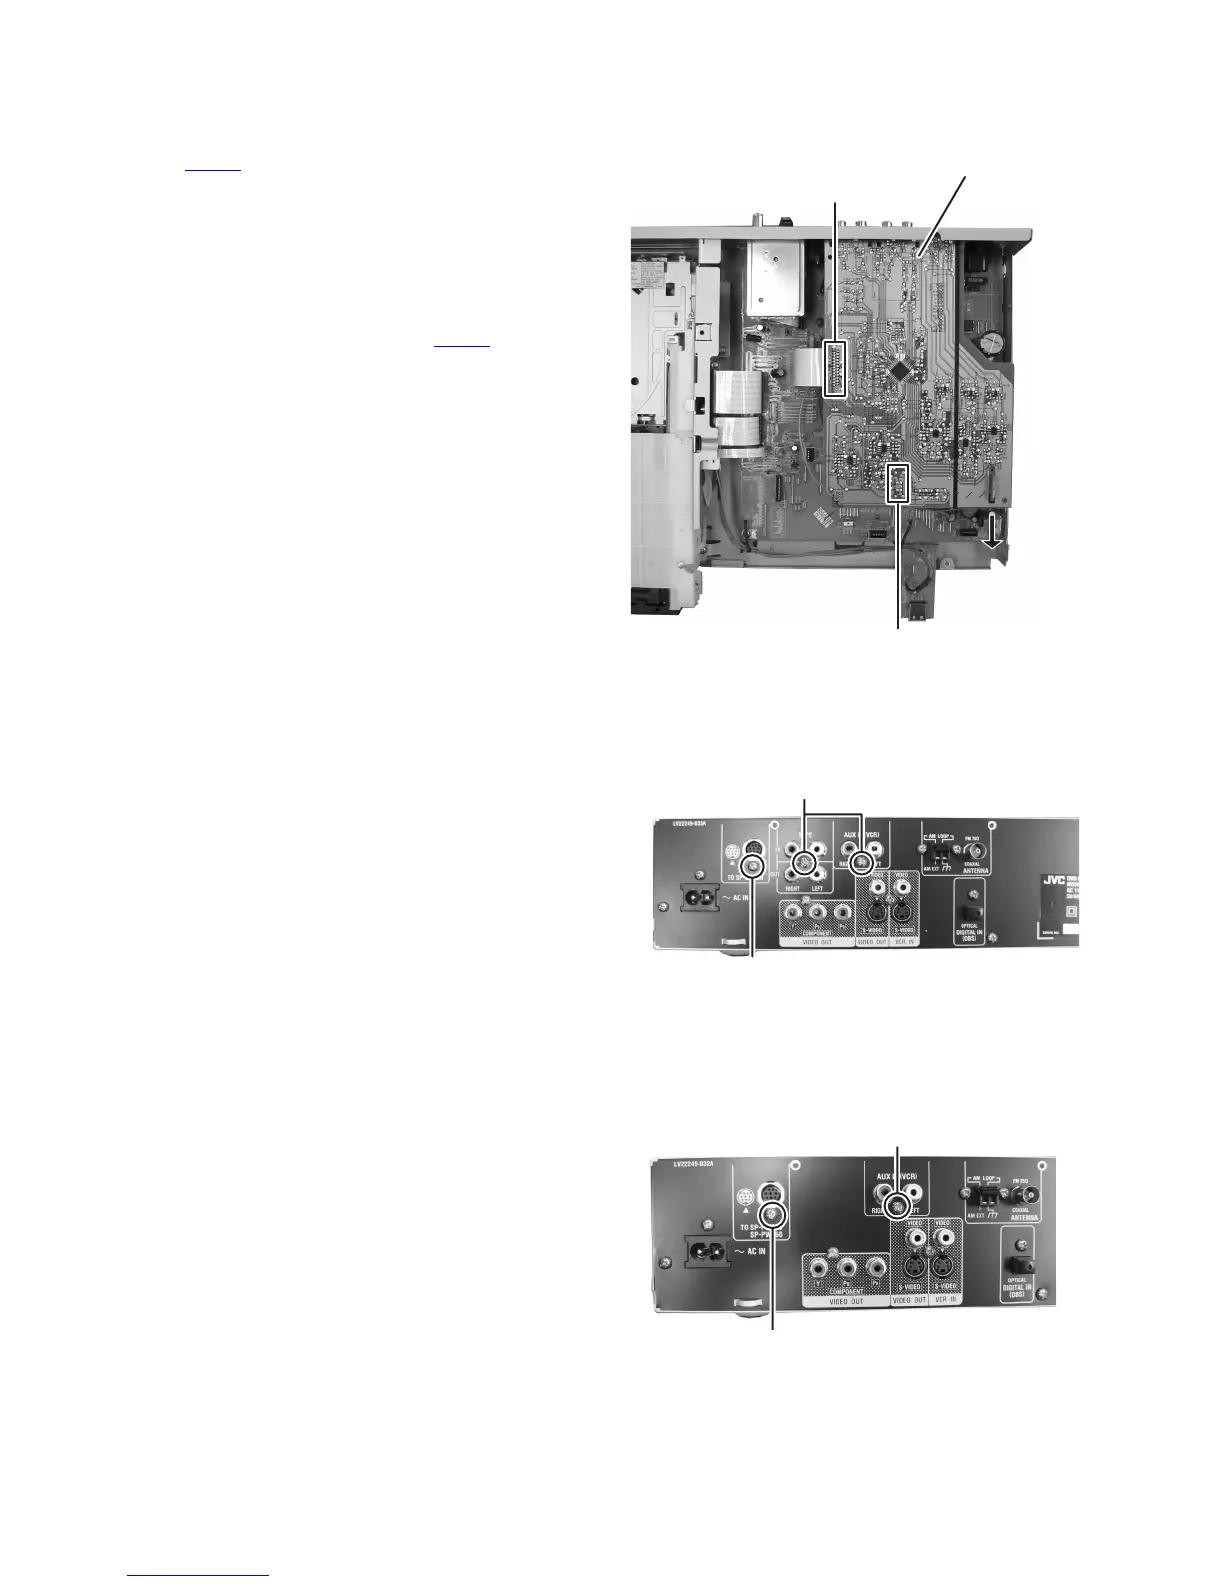
(See Fig. 6 to 8)
(1) Disconnect the card wire from Main board connected to
connector CN102 of the Audio & Digital input board assem-
bly. (See Fig. 6)
(2) For TH-C90, remove the one screw E and two screws F at-
taching the Audio & Digital input board assembly. (See Fig.
7)
(3) For TH-C60, remove the one screw G and one screw H at-
taching the Audio & Digital input board assembly. (See Fig.
8)
(4) Disconnect the board to board connector CN101
connect-
ed to connection board and then pull and lift up to direction
of the arrow then take out the Audio & Digital input board
assembly. (See Fig. 6)
Fig.6
Fig.7
Fig.8
Audio&Digital input board
CN102
CN101
E
F
G
H