(No.MB260)1-33
4.6 Upgrading of firmware (DVD UPGRADE)
The latest firmware for upgrading is updated in "Optical disc CSG" page in JS-net. At the time of service, compare the version of the
product and the latest version, and upgrade the old version into the latest version.
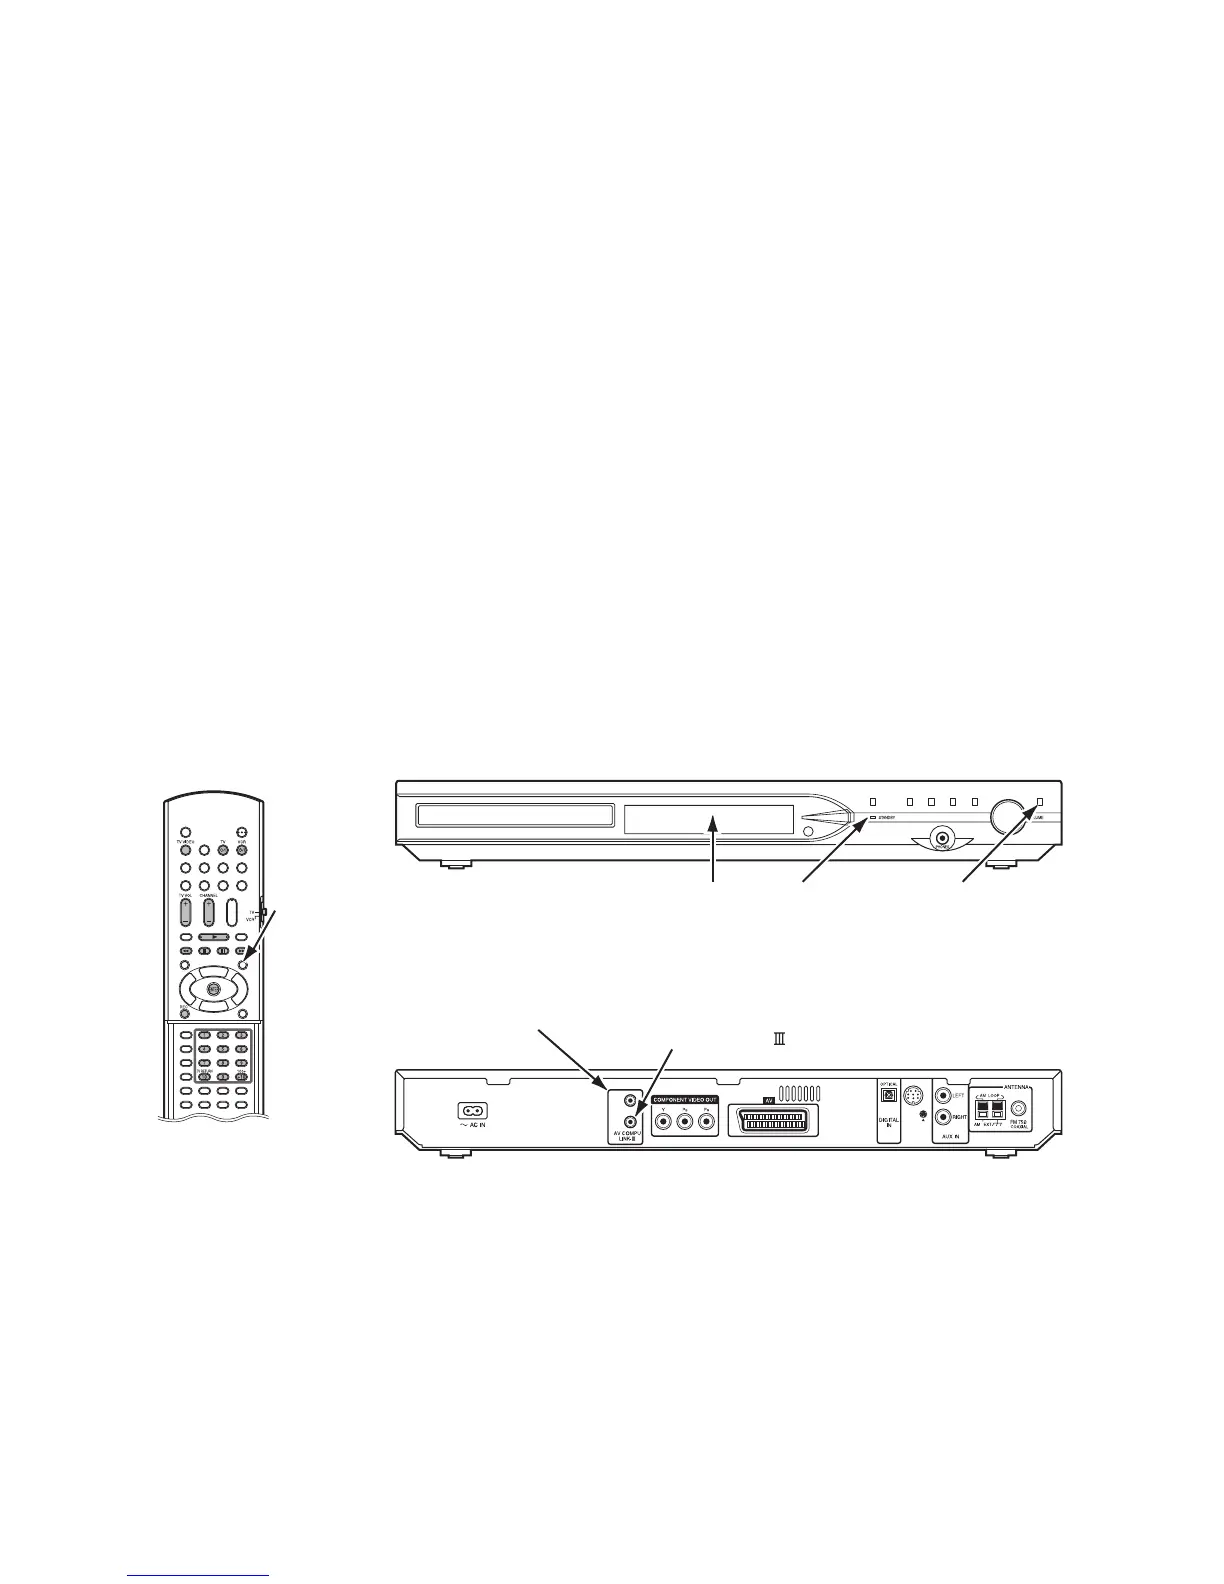
(1) Press "STANDBY/ON" key of the main body to turn it on.
(2) Push "OPEN/CLOSE" key of the main body, and insert the upgrade disc in the tray.
(3) When reading the data of the disc, the OSD screen is displayed "VERSION UP DISC", "PROGRAM & DESTINATION MODE"
and "READING..".
(4) When the screen changes from "READING.." to "WRITING..", upgrading starts.
(5) After writing the data of the disc, the screen is displayed "OPEN".
(6) Take out the disc, and press "STANDBY/ON" key of the main body.
(7) When the stand-by indicator is lighted, upgrading is completed.
(8) Set the main body at test mode, and confirm the version of the firmware. (Refer to "4.2 Method of displaying version firmware".)
4.7 Upgrading of system microcomputer (ROM CORRECTION)
(1) Press "STANDBY/ON" key of the main body to turn it on.
(2) Push "OPEN/CLOSE" key of the main body, and insert the upgrade disc in the tray.
(3) When reading the data of the disc, the OSD screen is displayed "VERSION UP DISC", "SYSCON UPG MODE" and "READ-
ING..".
(4) When the screen changes from "READING.." to "WRITING..", system data is written.
(5) After writing the data of the disc, the FL display of the main body is displayed "COMPLETE".
(6) Take out the disc, and press "STANDBY/ON" key of the main body.
(7) When the stand-by indicator is lighted, upgrading is completed.
(8) Set the main body at test mode, and confirm the version of the system microcomputer. (Refer to "4.2 Method of displaying ver-
sion firmware".)
4.8 Upgrading of DVD region
(1) Set the main body at test mode.
(2) Jig controller is connected to a terminal of AV COMPU LINK.
(3) Use the controller, and transmit the command of rewriting region to a module.
When the command is received as status, INFO segment of FL display.
FL display STANDBY/ON key
MENU key
(switch of mode)
OPEN/CLOSE key
(for upgrading of
system microcomputer
and firmware)
AV COMPULINK terminal
AV COMPULINK- terminal