(No.MB067)1-29
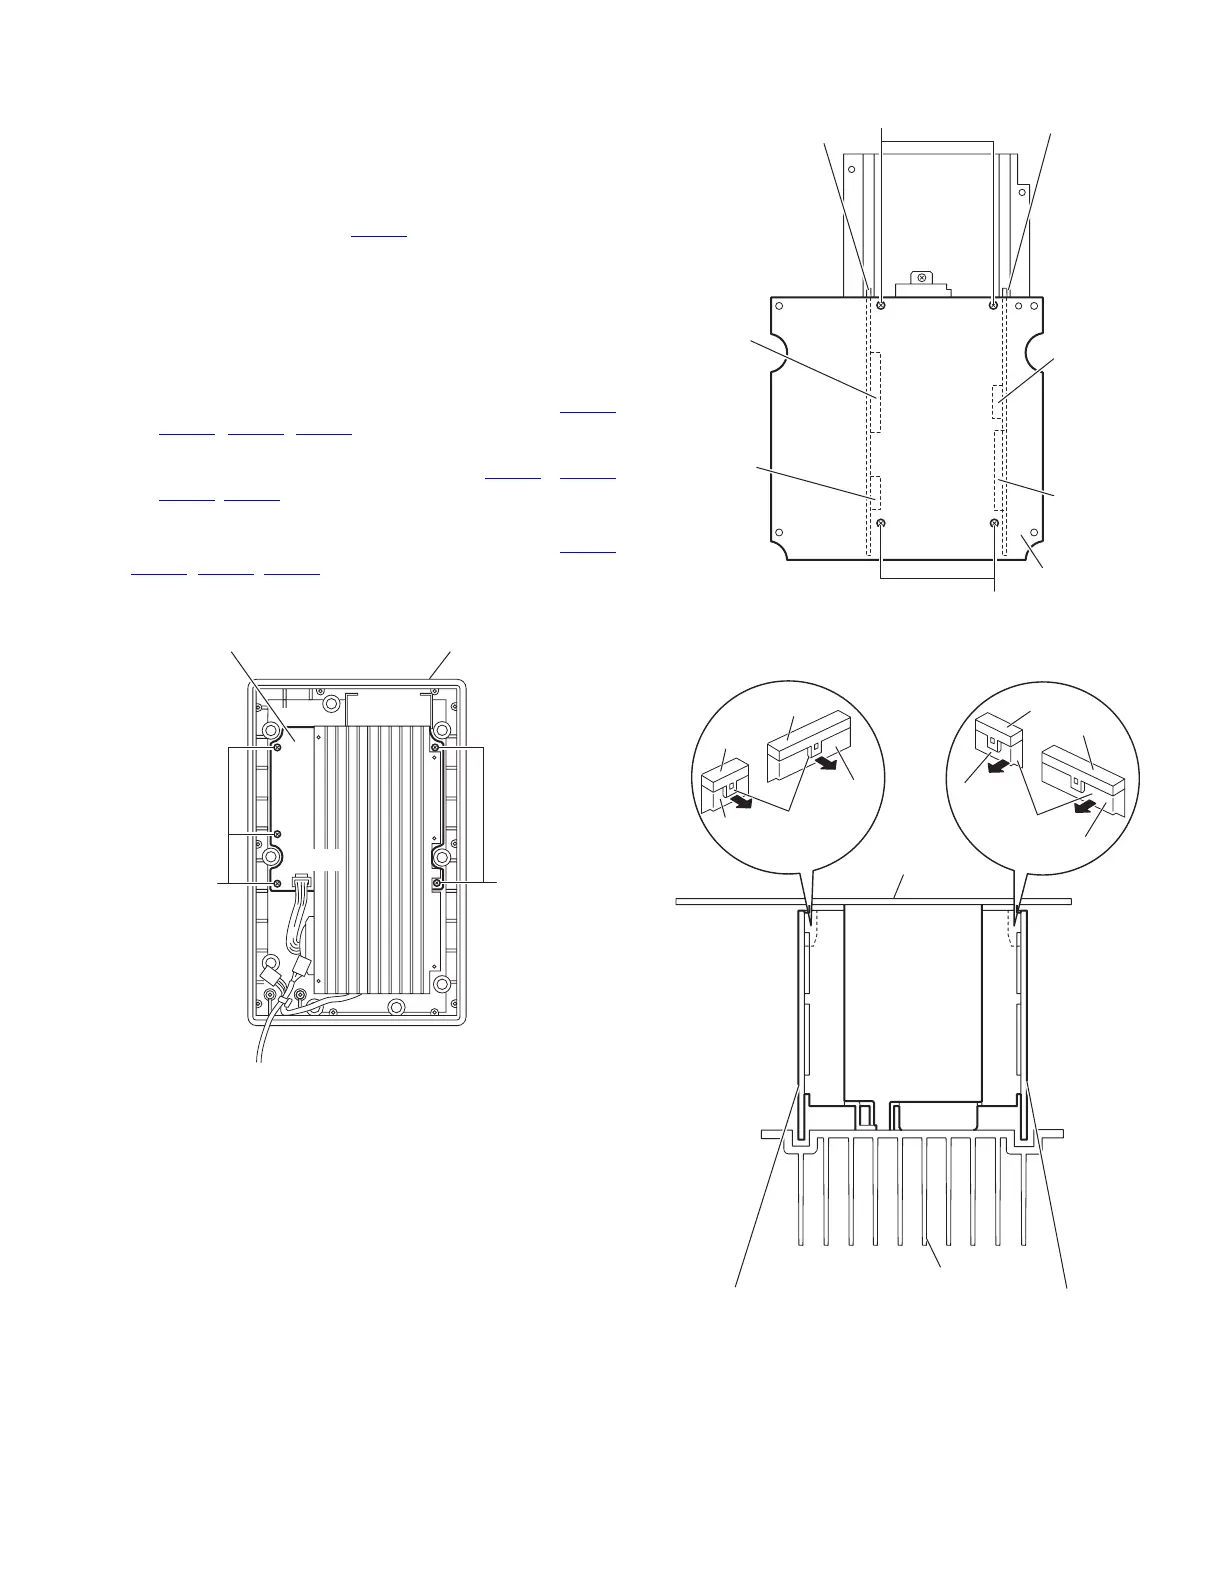
3.3.4 Removing the mother board
(See Figs.7 to 9)
• Remove the rear panel.
• Remove the amplifier assembly.
• Remove the speaker terminal board.
(1) From the inside of the amplifier assembly, disconnect the
wire from the connector CN151
on the mother board. (See
Fig.7.)
(2) Remove the five screws G attaching the mother board.
(See Fig.7.)
(3) Take out the mother board together the amplifier boards
(A,B) and heat sink.
(4) Remove the four screws H attaching the mother board.
(See Fig.8.)
(5) Release the claws a and b of the connectors (CN521
,
CN522
, CN531, CN532) on the mother board using the
flat-bladed screwdriver or a similar tool, disconnect the
mother board from the connectors (CN251
, CN252,
CN351
, CN352) on the amplifier boards (A, B). (See Fig.9.)
Note:
When releasing the claws a and b of the connectors (CN521
,
CN522, CN531, CN532) on the mother board, be careful not
to break the claws of the connectors.
Fig.7
Fig.8
Fig.9
GG
Mother board Amplifier assembl
CN151
CN521
CN522
Mother board
Amplifier board (A)
Amplifier board (B)
CN531
CN532
H
H
Mother board
CN532
CN352
CN531
CN351
Claws b
Amplifier board (B)
Amplifier board (A)
Heat sink
CN521
CN522
CN252
CN251
Claws a
 Loading...