29
• When you record tracks into “NEW GROUP” in step 4 of
“Recording from a Disc” on page 28, you can give a group
title before starting to record.
1 After selecting “NEW GROUP” in step 4 of
“Recording from a Disc” on page 28...
2 Edit the group title by following step 5 in the left
column.
3 Finish the procedure.
Recording starts.
See page 44 for more information about the warning
messages shown on the display.
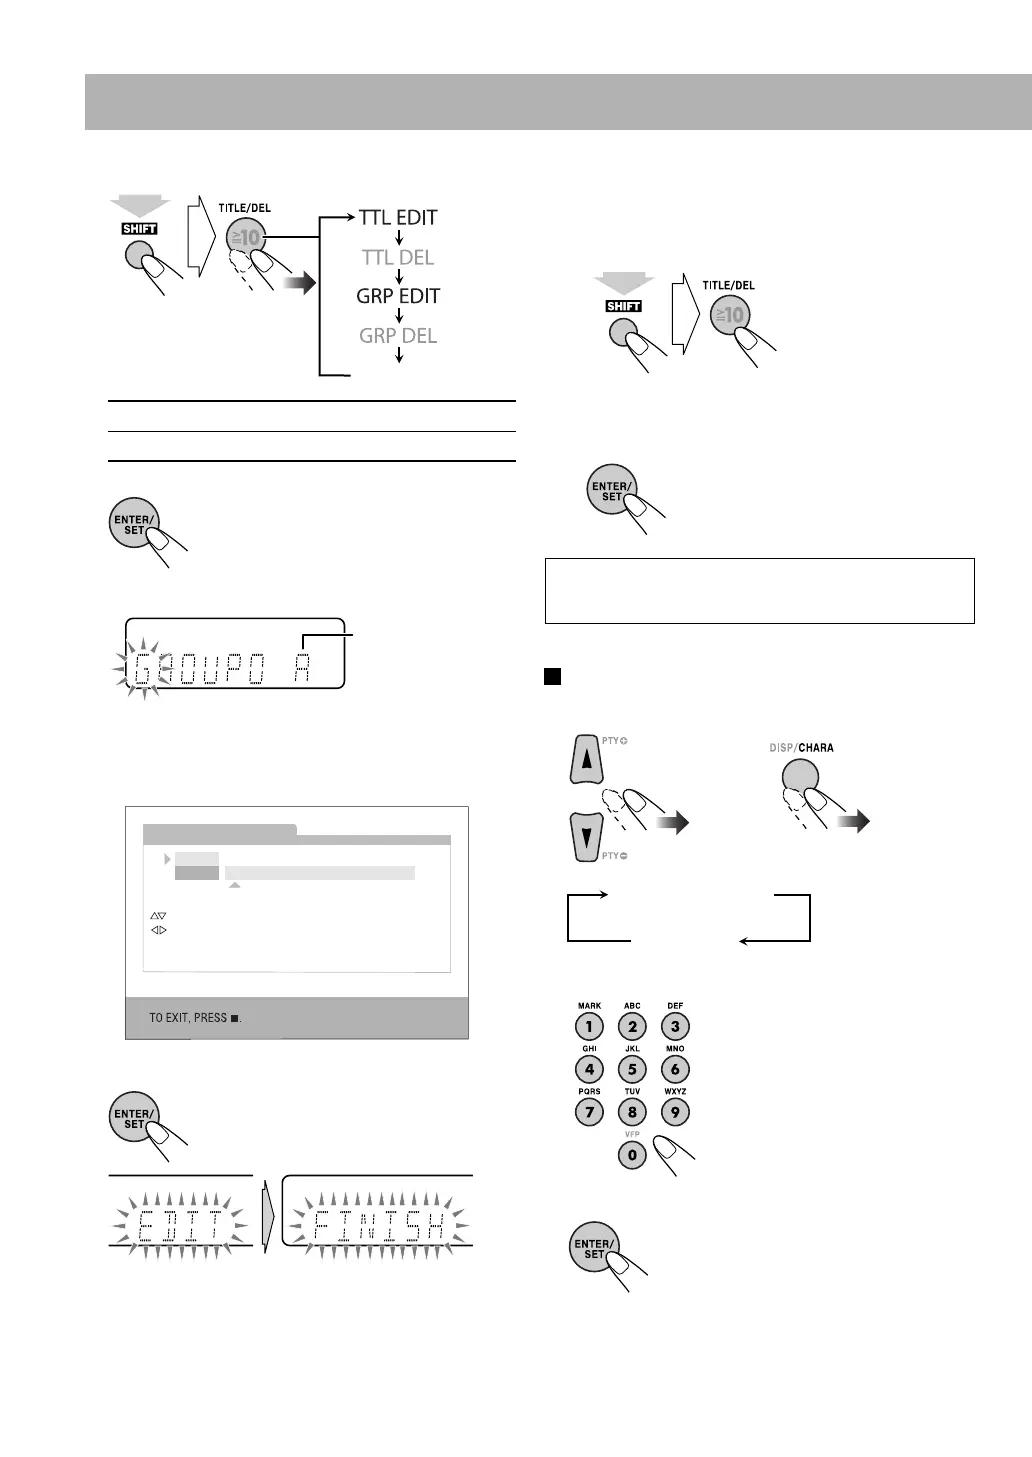
How to enter titles
1 Select the character type.
2 Enter a character.
• Several characters are assigned
to one button. Press the button
repeatedly until the desired
character is displayed.
• For available characters, refer to
“Available Characters” on page
30.
3 Confirm the entry.
• “NO NAME” appears on the display if no characters is
entered in step 2. Enter a title.
3 Select the track/group title editing mode.
TTL EDIT
For editing a track title
GRP EDIT
For editing a group title
4 Confirm the selection.
5 Enter a title.
• For entering a title, see “How to enter titles” on the
right column.
• You can also enter a title using the TV on-screen.
6 Finish the procedure.
To give title to other groups/tracks, repeat steps 2 to 6.
(Canceled)
(while holding...)
GROUP TITLE EDIT
ABCDE
01234
GROUP01
[0 – 9] KEY ENTER LETTERS
[CANCEL] DELETE A LETTER
[ENTER] REGISTER NEW NAME
CHANGE CHARACTER TABLE
MOVE CURSOR
Ex.: When “GRP EDIT” is selected in step 3
A (upper case)
1 (number)
or
Character type
EN_UX-G950V[B]5.indb 29EN_UX-G950V[B]5.indb 29 08.4.18 5:32:29 PM08.4.18 5:32:29 PM
 Loading...