1-19
UX-L40R/UX-L30R
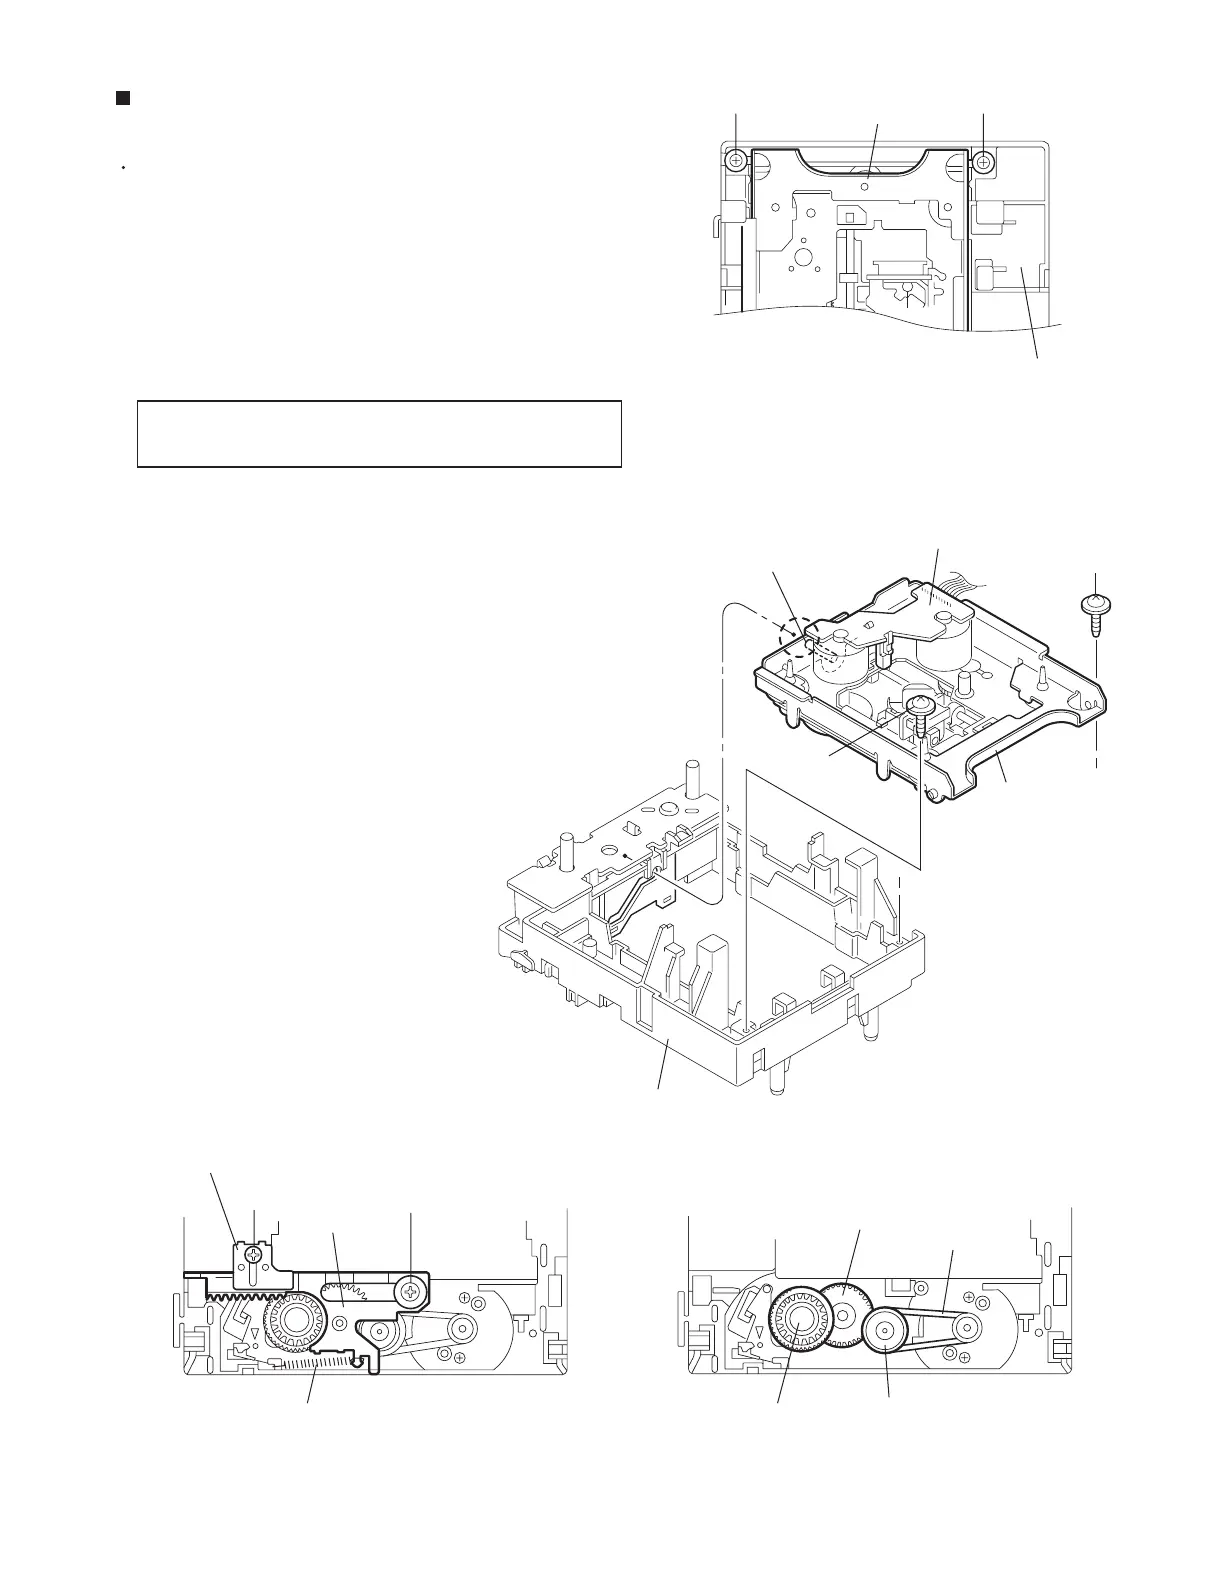
Prior to performing the following procedure, remove
the CD servo board.
Remove the two screws F attaching the CD base on
the bottom of the loading base.
Remove the rear part of the CD base upward and
pull out the shaft e of the CD base from the camplate
on the front side of the loading base.
1.
2.
Remove the leaf spring on the upside of the loading
base.
Remove the screw G attaching the cam plate fitting.
Remove the screw H and the cam plate upward.
Remove the belt from the C.D. gear (1).
Pull out the C.D. gear (1), (2) and (3) respectively.
3.
4.
5.
6.
7.
Removing the C.D. gear (1), (2) and (3)
(See Fig.10 ~ 13)
The CD mechanism assemly comes off
with the CD base.
REFERENCE:
Fig.10
Fig.11
Fig.13Fig.12
(Bottom)
CD base
F F
Loading base
Loading base
CD base
e
CD mechanism assembly
F
F
H
Cam plate
G
Cam plate fitting
Spring
C.D. gear (3)
C.D. gear (2)
C.D. gear (1)
Belt
 Loading...