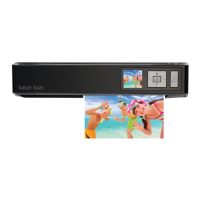
mini PhotoScanner
User Manual mini PhotoScanner
Connecting to a PC
By connecting the mini PhotoScanner to the PC, you can access the scanned
images on the SD card directly, or you scan directly to the hard drive.
1. Insert the provided CD into the PC and install the ‘Scan To PC’ software.
Connect the mini PhotoScanner to the PC using the supplied USB cable.
Press and hold the power button for 0.5 seconds to turn on the scanner.
The PC will now detect the scanner. Double click the ‘Scan To PC’ icon on
your desktop. You will now see the following screen –
On ‘Save Type’ select ‘Scan To PC’, press the ‘Browse’ button to select a
different save folder. You can also save to the SD card, if you have one inserted,
by selecting ‘Memory Card’. All saved photos and documents will be saved in a
folder titled ‘Photo1’. Each scanned image is given a file name with the prefix
‘scan’ followed by a 4 digital sequential number in the order the images are
stored. For example Scan0001, Scan0002, etc.
pg8
 Loading...