Do you have a question about the Kaiser Baas X3 and is the answer not in the manual?
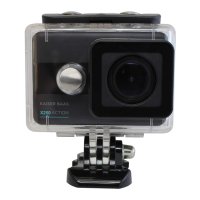
Details and diagrams related to the camera's waterproof casing and its components.
Instructions and tips for charging the camera's battery.
Information on recommended MicroSD card types, size, and formatting.
Steps to power the camera on and off using the designated button.
Explanation of how to navigate menus and modes using camera buttons.
Introduction to the camera's video recording mode and its basic operation.
Details on available video resolutions, frame rates, and aspect ratios.
Introduction to the camera's photo capturing mode and basic operation.
Available photo resolutions, MP count, and aspect ratios.
Options to turn camera WiFi on/off and related settings.
Advice on maximizing battery life and performance.
Answers to frequently asked questions regarding camera operation.
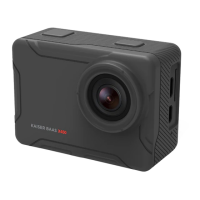
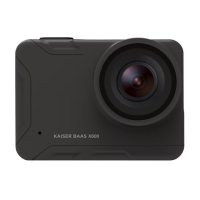
The Kaiser Baas X3 is an action camera designed for capturing videos and photos in various environments, including underwater with its waterproof case. This user guide provides comprehensive instructions for operating, maintaining, and troubleshooting the device, ensuring users can maximize its performance and longevity.
The X3 camera primarily functions as a portable video and photo capture device. It offers two main modes: Video Mode and Photo Mode, each with a range of customizable settings to suit different shooting scenarios. The camera is equipped with a lens, an LCD screen for navigation and preview, and various ports for connectivity and charging. Its design emphasizes durability and versatility, particularly with the inclusion of a waterproof case that extends its usability to wet conditions.
In Video Mode, the camera can record continuously, with options for loop recording at specified intervals (2/3/5 minutes). Loop recording is useful for continuous surveillance or dashcam-like applications, where older footage is overwritten by new recordings when the memory card is full. The camera also supports time-lapse video, a creative technique that captures footage at very low frame rates (1/2/5/10/30/60 seconds intervals) to show rapid changes over time, such as sunsets or blooming flowers. A unique feature is Motion Detection, which allows the camera to start recording automatically when it senses movement within its field of view. This mode is particularly effective when the camera is stationary, such as on a tripod, and will record for 10 seconds after motion ceases. Audio recording levels can be adjusted (Off/50%/75%/100%), with 100% being the default.
Photo Mode offers several ways to capture still images. Users can take single photos by clicking the Record/Confirm button. The camera also features a Cap Timer Mode, which allows for single photos to be taken at set intervals (3/5/10/30/60 seconds) after the capture button is pressed. For rapid action sequences, Photo Burst Mode enables capturing multiple photos in quick succession (3/5/10 photos/second).
The camera's system settings provide extensive control over its operation. Users can manage WiFi connectivity, set the date and time, and configure auto-shutdown intervals (1/3/5 minutes) to conserve battery. The beep sound can be toggled on or off, and the interface language can be selected from English, Spanish, Portuguese, French, German, Italian, Russian, and Japanese. The TV output mode (NTSC/PAL) can be chosen, and exposure levels can be manually controlled within a range of -2 to +2. The frequency (light source) can be set to 50/60Hz to prevent light strobing in footage, though Auto is the default. AUTO_DVR (Driving Mode) transforms the camera into a dashcam, automatically switching on and recording in LOOP mode when a power source is detected. Other settings include Delay Power Off (5/10/20/30/60 seconds), OSD (On Screen Display) toggle, Status LED disable option, RF Remote Control enable (remote sold separately), WiFi LED disable option, Image Rotation (useful for inverted camera positions), Auto Screensaver (30seconds/1/3/5 minutes), and Date Stamp (Date/Time/Date & Time). The camera also allows for MicroSD card formatting and resetting to factory settings.
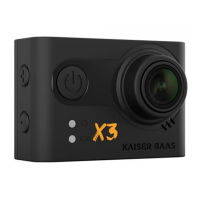
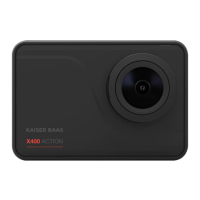
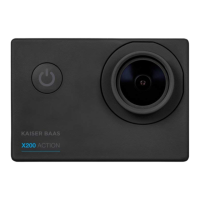
The X3 camera is designed for ease of use with a straightforward button layout. The front Power/Toggle button cycles through camera modes and settings, and also serves as a back/cancel button for menu items. The top Record/Confirm button initiates/stops video recording, captures photos, and confirms/selects menu options. The +/- buttons are used for scrolling up/down in settings and for zooming in/out in Video/Photo mode.
Before first use, it is recommended to fully charge the battery, which takes approximately 2.5 hours with a 5V 0.5/1A charger. The rear status LED turns red during charging and off when complete. A MicroSD card (Class 10 or higher, UHS-1 or higher for content above 1080P@60FPS, maximum 32GB) is required and should be formatted before initial recording.
The waterproof case is integral to the camera's outdoor and underwater capabilities. It features a screw and port that allow for charging or powering the camera while it remains protected. This is particularly useful for extended shooting sessions or long time-lapses when connected to a power bank. To open the port, rotate the cover anti-clockwise, and clockwise to close. It is crucial to remember that the charge cable and port are water-resistant, not waterproof, and should not be submerged.
Playback of captured footage can be done by connecting the camera to a PC or Mac via the supplied USB cable, where it appears as an external device. Alternatively, a MicroSD card reader can be used. For viewing on a larger screen, the camera can be connected to an HDTV using a Micro HDMI – HDMI cable, mirroring the camera's display at up to 1920x1080i @ 60fps.
For remote control, the Kaiser Baas X3 can be connected to a smartphone via WiFi using the KB Action App. After downloading the app, users switch on the camera's WiFi (from Advanced Settings), connect to the camera's WiFi ID (KB-X3) using the default password (1234567890), and then launch the app to connect.
Proper maintenance is essential for the X3 camera's performance and longevity. Users are advised to:
Battery life can be maximized by turning off WiFi, enabling the LCD Screensaver, capturing at lower video resolutions and frame rates, and avoiding exposure to extreme cold or hot temperatures. Only use KB official batteries and compliant 5V/1A wall chargers.
In case of a frozen camera, restarting by holding the power button or removing/reinserting the battery is recommended. If the MicroSD card is not read, ensure it is formatted and check compatibility. For choppy playback, consider if the computer meets HD playback requirements or try recording at a lower resolution. If audio is low/muffled, especially in the waterproof case, try using the camera without the case for better performance. For any further issues, Kaiser Baas support can be contacted via their website or email.
| Water Resistance | 30m with waterproof case |
|---|---|
| Wi-Fi | Yes |
| Photo Resolution | 12MP |
| Field of View | 170 degrees |
| Screen | 2.0" LCD |
| Storage | MicroSD card |
| Battery Life | Up to 90 minutes |
| Battery | 900mAh |
| Ports | Micro USB |