11
2.2.5 Auto Connect
Step 1: Check if the firmware of dosing pump is 1.1.10 and above, if below 1.1.10
version, follow firmware upgrade tutorial to upgrade the firmware;
Step 2: Install the latest version of the dosing pump App on the mobile phone and
connect to the home router WiFi;
Step 3: Power on dosing pump, waiting for the startup to complete and then the
indicator light is always on.
Step 4: Click the button on the back panel, at this point the indicator lights flashing,
and the dosing pump into auto connect setting... state;
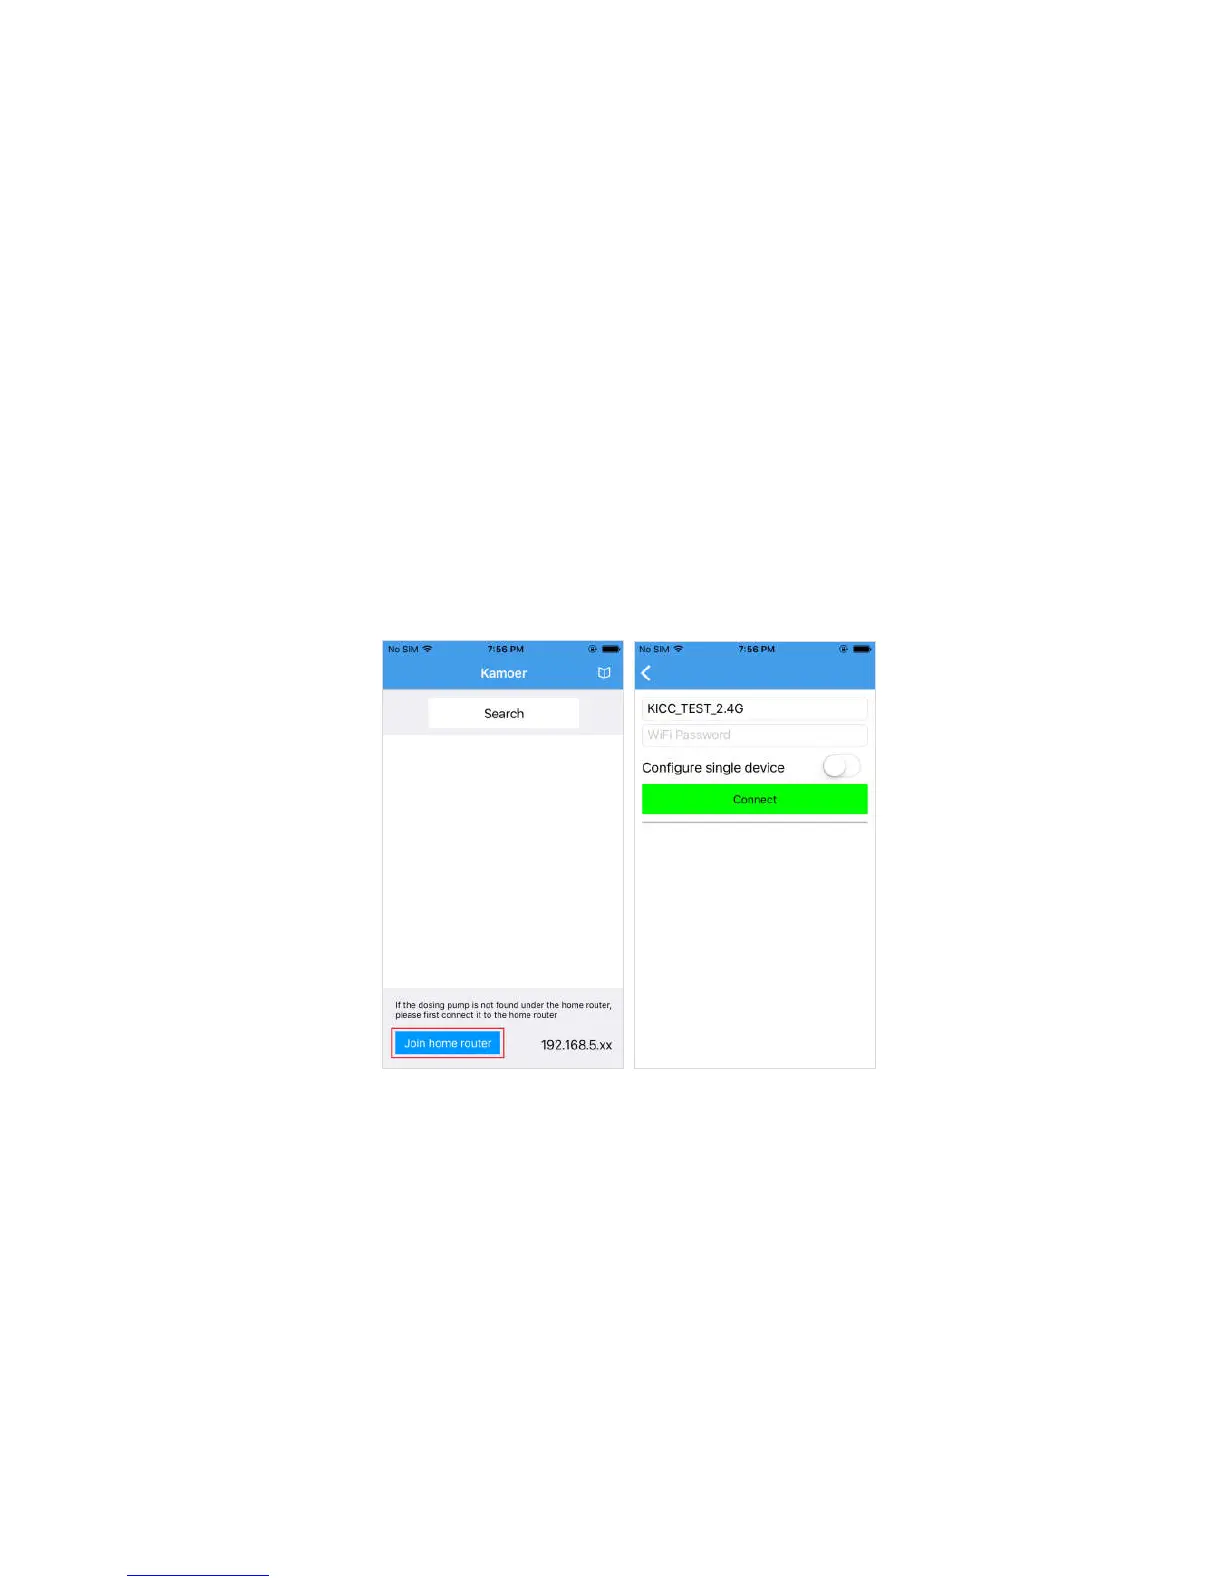
Step 5: Open App, click the lower left corner of "Join home router” into auto connect
page;
Step 6:
a. Enter your home router password in the WiFi password entry box;
b. click the Connect button to start a connection, showing "connecting ...";
c. If the connection is successful, the dosing pump will ring and back to the "Run"
page;
d. App shows auto connect successful and back to the device search page;
Step 9: The list of devices in the search page shows the dosing pump that has been
searched, click on the dosing pump, and enter the control interface.
Note:
a. Auto Connect only need to be configured one time, if configured
successfully as long as the mobile phone and dosing pump connected to
the same home router, you can find the dosing pump in the device search
page.
b. Using PC to log in, simply change the IP address in the "Network
Connections" page of the login software to the same as the dosing pump IP
address shown on the Mobile app search device page.
c. If auto connect fails, the dosing pump performs a WiFi reset, starting with
step 1th.