Do you have a question about the Kampa Travel Pod Xpress and is the answer not in the manual?
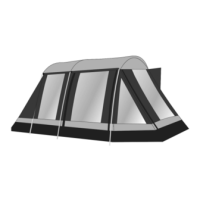
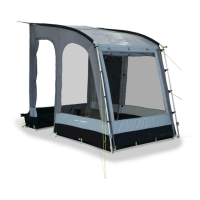
| Hydrostatic Head | 6000mm |
|---|---|
| Material | Polyester |
| Height | 210 cm |
| Connection Height | 180 - 210 cm |
| Color | Grey |
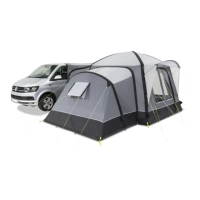
| Type | Awning |
| Waterproof Rating | 6000mm |
Read instructions carefully before setup and retain for future reference. Consider insuring against accidental/storm damage.
Explains condensation vs leaking and the need for seam sealant on main seams and damaged taping.
Advises noting how the awning is folded upon receipt to make repacking easier.
Store awning opened out and fully dry in a ventilated, dry place to prevent mildew.
Wash dirty awnings with clean water and a soft brush; do not scrub or use detergents.
Protect poles from damage and store dry. Ensure sections are fully inserted and avoid over-stressing.
Treat zips with care, use two hands to close/open, and never tread on or force them.
Carry a spares kit including silicone spray, seam sealer, repair tape, guy ropes, and pegs.
Flysheet repairs should be done by a recommended company to avoid invalidating the warranty.
Designed for light/moderate weather and touring use; take down in strong winds/snowfall.
Recommend a trial setup to familiarise yourself with the awning, its setup, and limitations.
Do not cook in the awning or use naked flames. Read the fire precautions label sewn inside.
Check contents against the list: flysheet, poles, groundsheet, clamps, and carry bag.
Contact your supplying dealer if you are missing any parts.
A video showing the awning being folded can be seen at the provided URL.
Reverse setup: unpeg, untie guy lines, remove groundsheet, undo pole tapes, remove poles, close blinds/doors.
Detailed instructions with illustrations for folding the awning into a compact shape.
Use general purpose pegs or dealer-stocked types. Drive pegs at a 45° angle away from the pegging point.
Pegs can be sharp; keep children away and wear protective footwear.
Use pre-attached guy lines for tension, adjusting with runners. Secure with suitable pegs.
Guy lines are a trip hazard; keep children away from the awning area.
Main seams are taped; consider seam sealant for other seams or damaged taping.
Prolonged sunlight weakens fabric; use shaded sites. UV degradation is not covered by warranty.
Improve condensation by ensuring adequate ventilation. Condensation is not covered by warranty.
Detailed steps for assembling the poles and inserting them into the awning structure.
Instructions on how to attach the groundsheet securely using the sewn-in corner clips.
Guides on how to properly guy the awning for stability and shape.
How to roll down the front window blind and secure it into the pocket below.
Quickest method: throw guy lines over the vehicle and peg or tie to wheels.
Secure method for vehicles with gutters: slide pole into sleeve and rest in gutter.
Use 'figure of 8' profile or driveaway kit to attach beading to vehicle gutter or awning rail.