Assembly InstructionsWallaby II
19
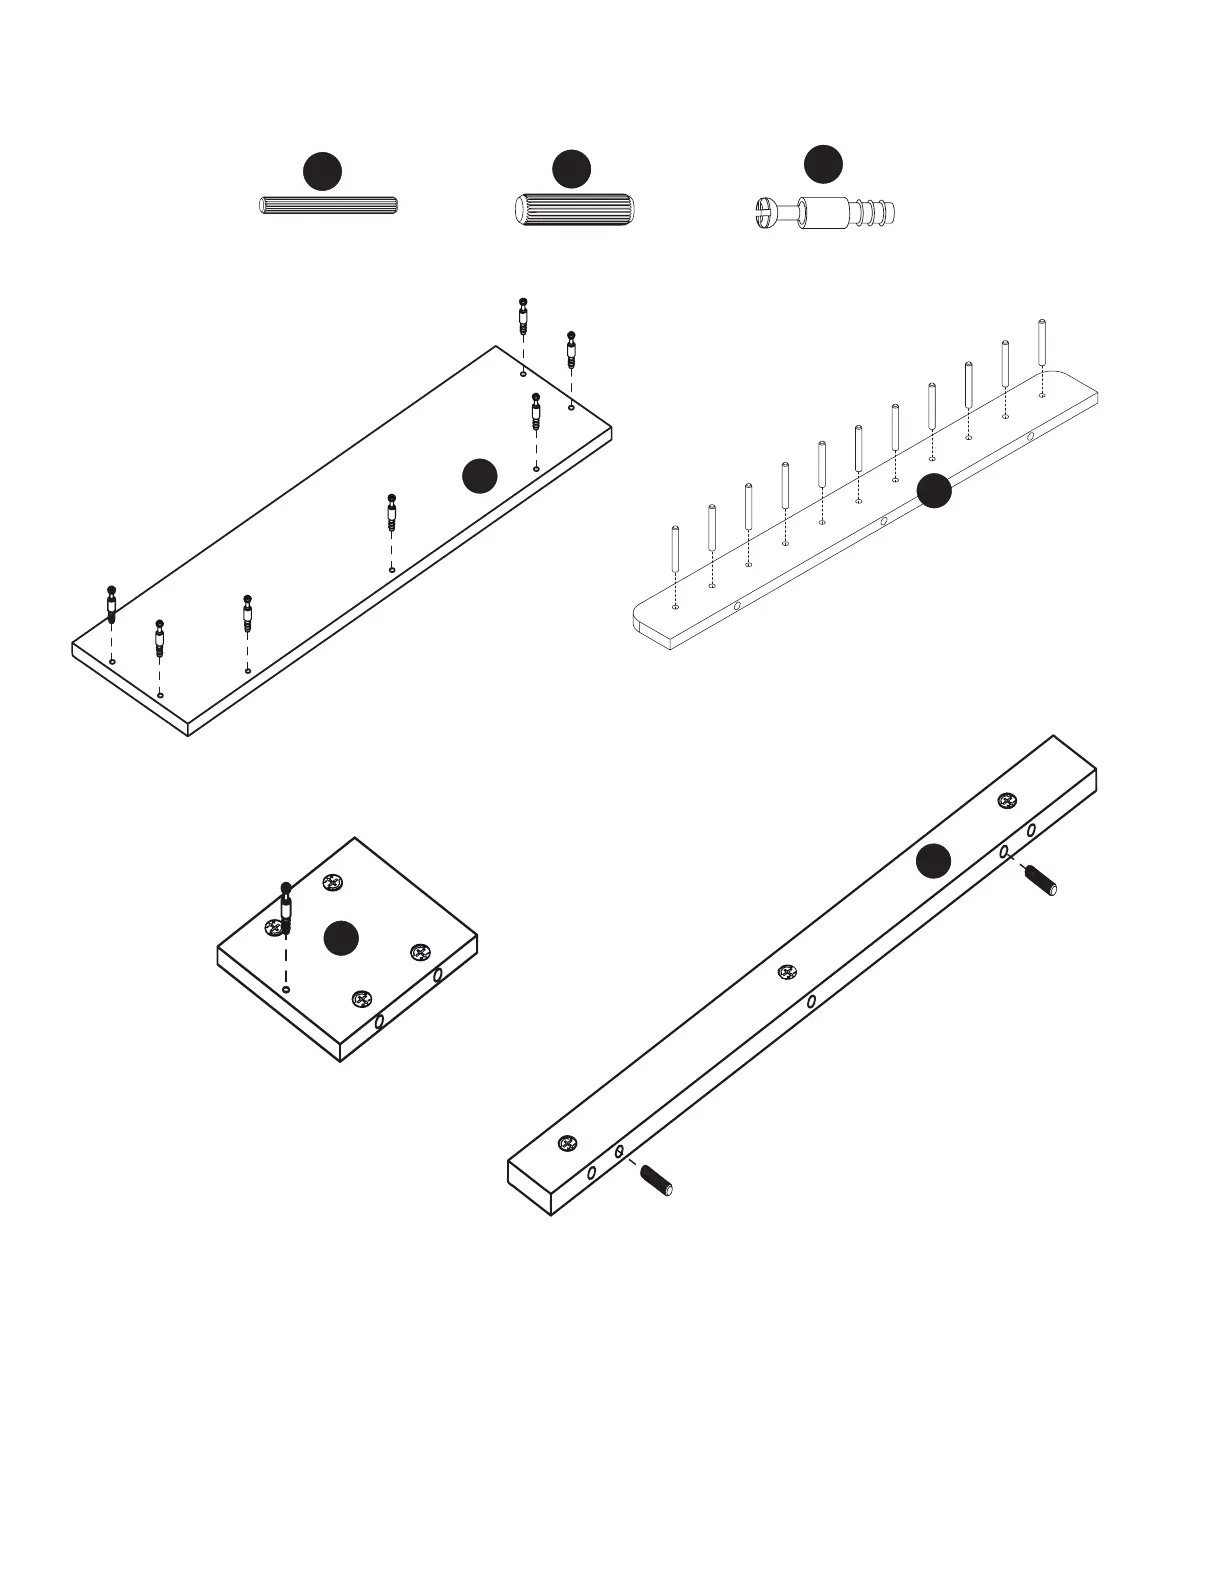
Step 6: Doors
6x50 Dowel Pin x33
8x30 Dowel Pin x2
6x25 Cam Bolt x9
x3
x2
Prepare Panels K1, K3, K4 and V2b as shown above.
Insert 11 d2 Dowel Pins into Panel K4. Repeat x3
Insert 7 c3 Cam Bolts into Panel K1
Insert 1 c3 Cam Bolt into Panel K3 Repeat x2
Insert 2 d1 Dowel Pins into the edge of Panel V2b
NOTE:
c3 Cam Bolts are somewhat smaller than the c1 Cam Bolts used
thus far. While c1 Cam Bolts will screw into pre-installed metal
cam anchors, c3 Cam Bolts screw directly into the Panel.