Do you have a question about the Kapture KPT-722 and is the answer not in the manual?
Insert the Micro SD Card into the camera slot, ensuring correct orientation for the metal contacts.
The device automatically powers on and records when the car starts, powered by the car's DC power.
Stop recording by pushing the OK button; menus are inaccessible during recording.
G-Sensor saves accident footage as 'Locked' files, which must be unlocked via the Protect menu.
Footage can be manually locked by pressing the PROTECT button during recording.
The built-in microphone can be muted or unmuted in VIDEO mode by pushing the DOWN button.
The screen can be put into Screen Saver mode by pressing the MODE button while in VIDEO mode.
Connect via Mini USB Cable or Micro SD Card adapter to retrieve videos and photos.
Files are stored in the "CARDV" folder, with front camera files marked "A" and rear camera files marked "B".
Save video files to your computer for smoother playback prior to reviewing them.
Cycle between VIDEO and PLAYBACK modes using the MODE button.
Access respective menus by pushing the MENU button; select files before accessing PLAYBACK menu.
Use UP/DOWN for navigation, OK for selection/confirmation, and MODE to exit menus.
Push MENU twice to access the SETUP menu for general settings.
Highlight Date/Time, use UP/DOWN for numbers, OK to confirm and move between fields.
Time is in 24-hour format; DD/MM/YY fields change date display. Use MENU to save and exit.
Ensure VIDEO mode, highlight Plate Number, use UP/DOWN for characters, OK to confirm.
Highlight Car Plate Stamp, use UP/DOWN for OFF/ON, push OK to confirm.
Older video files are overwritten when the memory card is full. Set video block time for new files.
In VIDEO menu, highlight Loop Recording, use UP/DOWN to set video length (OFF for longest possible loops).
Monitors bumps/shakes, logs footage as 'Locked' to prevent overwriting.
In VIDEO menu, highlight Gravity Sensing, use UP/DOWN to set sensitivity (High for small bumps, Low for larger activity).
Monitors activity using G-Sensor while parked; records 60 seconds of footage if activity is detected.
In VIDEO menu, highlight Parking Monitor, use UP/DOWN to set OFF or ON, push OK to confirm.
Monitors on-screen movement, starts recording when detected, stops after 10 seconds of no movement.
In VIDEO menu, highlight Motion Detection, use UP/DOWN to set sensitivity (High for small movement, Low for larger activity).
Manually start and stop recording using the OK button.
Footage can be manually locked by pressing the PROTECT button.
Use UP button in VIDEO mode to cycle through front view, rear view, or picture-in-picture display.
Microphone mute can be toggled with the DOWN button.
LED Lamp modes can be cycled through using the MENU button.
In VIDEO mode, use the PHOTO button to capture still images.
Higher resolution provides more detail but uses more storage; lower resolution saves space.
Turn the rear view camera recording on or off.
Defines the length of time before a new video file is created; OFF for longest loops.
Select resolution for photos to enhance detail. Options range from 12MP to 2MHD.
Adjust exposure to counter balance high/low light conditions for brighter or darker footage.
Choose from 4 preset lighting settings (Auto, Daylight, Cloudy, Tungsten/Fluorescent) to optimize lighting.
WDR extends the dynamic range of captured footage for better detail in varied lighting.
Set motion detection sensitivity to High (small movements) or Low (larger activity) to trigger recording.
Uses battery and G-Sensor to monitor activity after parking; records 60 seconds when triggered.
Adjust the sensitivity of the G-sensor for logging footage as Locked based on detected activity.
Turn the built-in microphone on or off to mute/unmute audio recording.
Enable or disable date stamping on the captured footage.
Enter your car's plate number to stamp it onto the footage.
Use UP/DOWN buttons to navigate, OK to select videos and photos.
Highlight a file, press OK to select, then press MENU to access the PLAYBACK Menu.
Allows deletion of selected or all photos and videos stored on the Micro SD Card.
Lock or unlock selected or all videos and photos stored on the Micro SD Card.
Format the inserted Micro SD Card, deleting all photos, videos, and data.
Cycles through photos and footage thumbnails, holding each image for a set duration.
Enter date and time (24Hr clock) to stamp onto footage using UP/DOWN and OK buttons.
Set time delays for the device powering up after receiving power or powering down after inactivity.
Sets the amount of inactivity before the KPT-722 powers down.
Mute control for key beeps on the device.
Control for turning the back-light on/off for the device's controls.
Control for the LEDs on the front of the camera.
Changes output format (NTSC/PAL) and screen Hz setting (50Hz/60Hz).
Select the desired menu language from the available options.
Format the SD card or restore factory settings for the device.
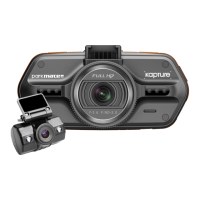
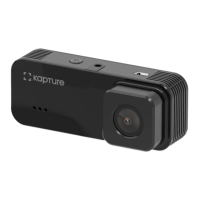
Features a 2.7" screen and a 160° lens.
Records FHD 1080P front video and HD 720P rear video; supports .MOV format and .JPG photos.
Supports Micro SD Card up to 32GB capacity; features a 500mAh battery capacity.
Includes USB Mini port and supports English, Chinese, and Russian languages.
Goods have guarantees that cannot be excluded under Australian Consumer Law for major failures.
Product is warranted against defects for 12 months from purchase, excluding alterations, accident, misuse, abuse, or neglect.
Return product to retailer with proof of purchase; retailer contacts Directed Electronics for repair/replacement.
| Resolution | 1080P |
|---|---|
| Display | LCD |
| Loop Recording | Yes |
| G-Sensor | Yes |
| Night Vision | Yes |
| Memory Card Support | Up to 32GB Micro SD Card |
| Storage | Micro SD Card |
| Battery | Rechargeable Lithium Battery |