– 2
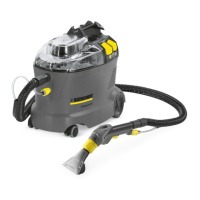
Illustrations on Page 2
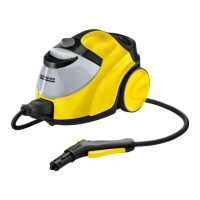
1 Cover
2 Fresh water tank
3 Carrying handle
4 Spray/suction hose
5 Fresh water hose
6 Suction hose
7 Manual nozzle for upholstery cleaning
8 Dirt water reservoir, detachable
9 Fresh water connection
10 Suction hose connection
11 Fluff filter
12 Fresh water strainer
13 Hook for spray/suction hose
14 Switch for vacuuming
15 Switch for spraying
16 Transport bracket for manual nozzle
17 Mains cable with mains plug
see Figure 1
Insert the holder for the floor nozzle (option-
al) into the appliance and lock into place.
see Figure 2
Insert the suction hose into the suction
hose connection on the appliance.
Insert the coupling of the fresh water
hose into the fresh water connection of
the appliance and lock into place.
Connect the suction hose to bender of
the manual nozzle.
Connect the coupling of the fresh water
hose to the bender and lock into place.
* not included in the delivery
see Figure 3
Mix fresh water and detergent in a clean
container (use the concentration rec-
ommended for the detergent).
몇 Warning
Health risk, risk of damage. Observe all in-
dications on the detergent used.
Note
Warm water (max. 50°C) will increase the
cleaning effect.
For considerate treatment of the environ-
ment use detergent economically.
Fill detergent solution into the fresh wa-
ter reservoir. The fill level must not ex-
ceed the "MAX" mark.
Insert dirt water reservoir into the appli-
ance and attach lid.
Plug in the main plug.
see Figure 4
Press the suction switch to turn on the
suction turbine.
Press the spray switch to turn on the de-
tergent pump.
Caution
Risk of damage. Check the object to be
cleaned prior to using the appliance in an
inconspicuous place for colour fastness
and water resistance.
see Figure 5
Use the lever on the bender to spray on
detergent solution.
Run across the surface to be cleaned in
overlapping paths. Pull the nozzle back-
wards (do not push).
see Figure 6
During nozzle changes, the manual
nozzle can be inserted into the holder
for the manual nozzle.
If the dirt water reservoir is full, switch
off the suction and spray switches.
Remove the lid.
see Figure 8
Overview of the appliance
Start up
Selecting the nozzle
Upholstery, wall rugs,
automobile interior
cleaning
Hand nozzle
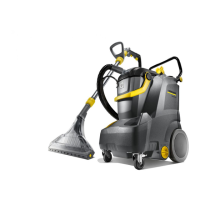
Carpeting Floor nozzle *
Stairs Carpet nozzle
*
Operation
Empty the dirt water reservoir.
11EN
 Loading...