328 080000 01 65
Specifications subject to change without notice.
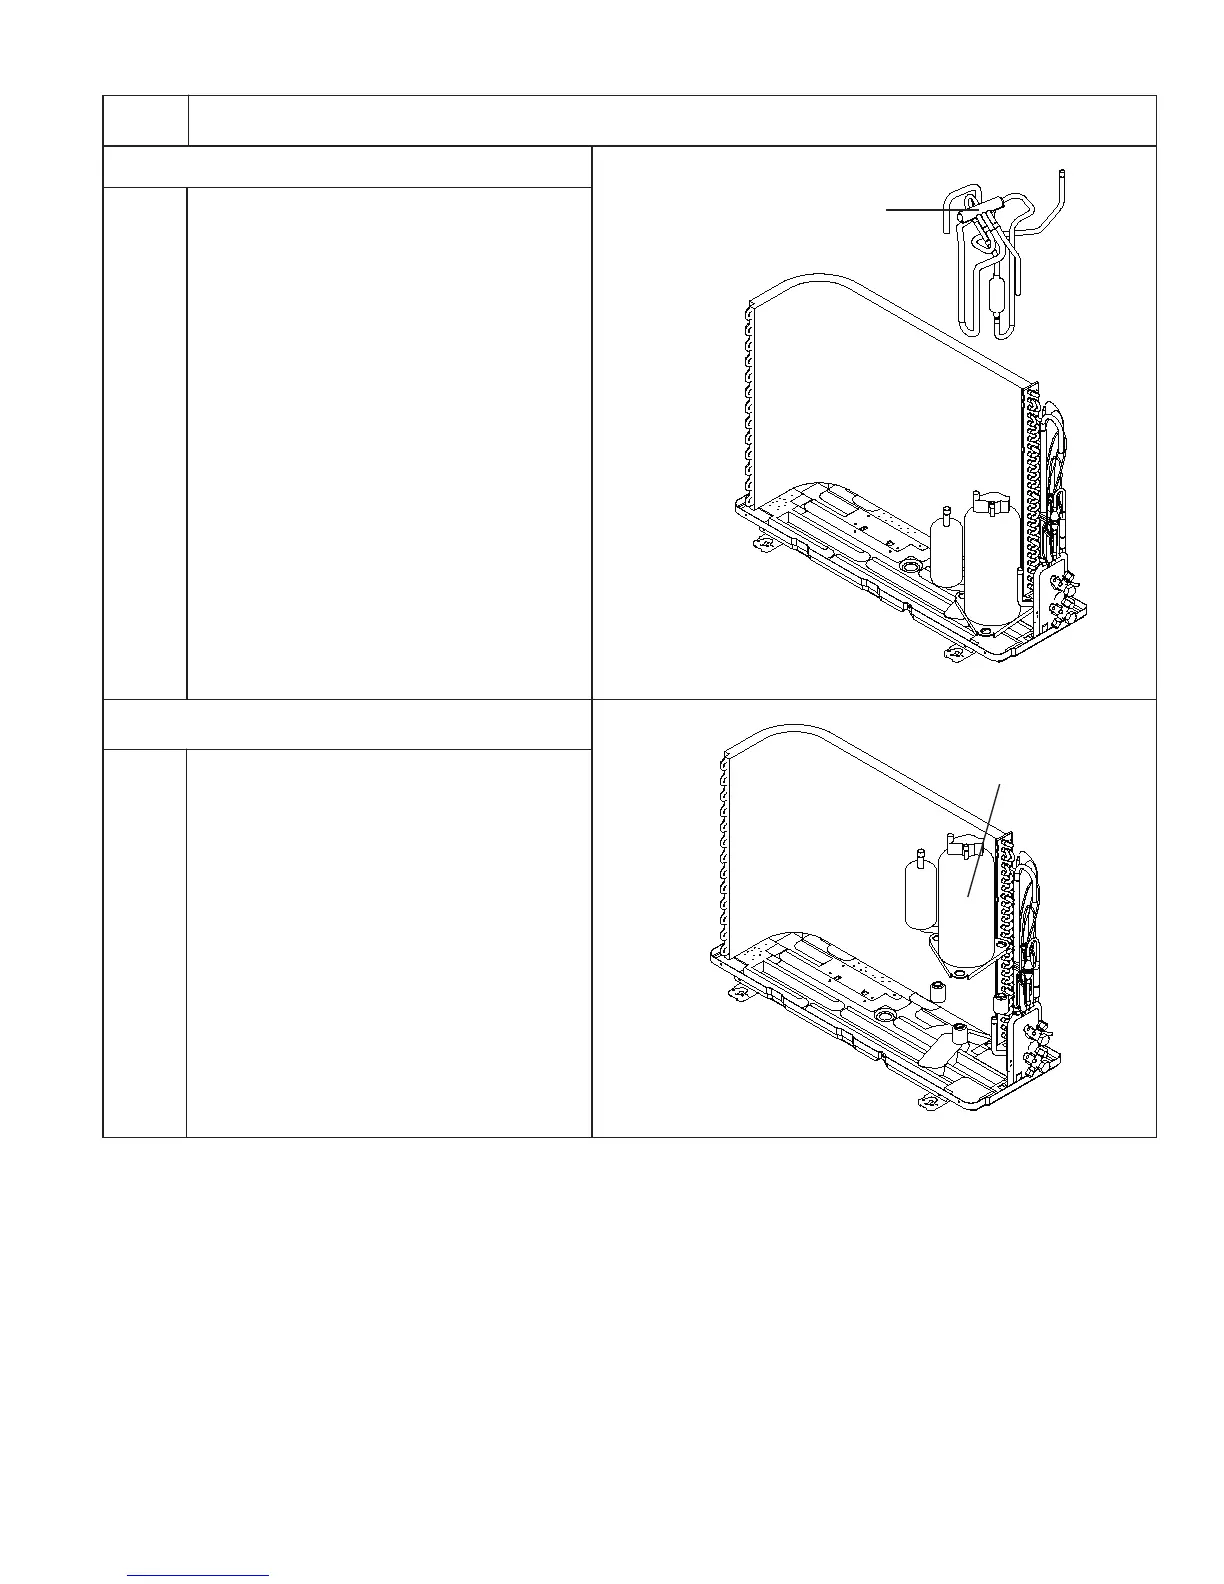
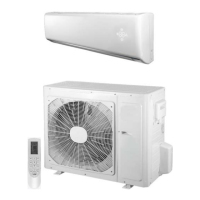
DISASSEMBLY INSTRUCTIONS OUTDOOR UNIT 9−12 (CONT)
10.Remove the 4-way valve assy
11.Remove the compressor
ProcedureSteps
Unscrew the fastening nut of the 4-way
Valve Assy coil and remove the coil. Wrap
the 4-way Valve Assy with wet cotton and
unsolder the 4 weld spots connecting the
4-way Valve Assy to remove.
NOTE: Refrigerant should be discharged first.
The welding process should be performed as quickly
as possible and keep the wrapping cotton wet at all
times. Be sure not to burn out the compressor
lead-out wire.
Remove the compr essor’s 3 footing screws
and remove the compressor.
4-way valve assy
compressor