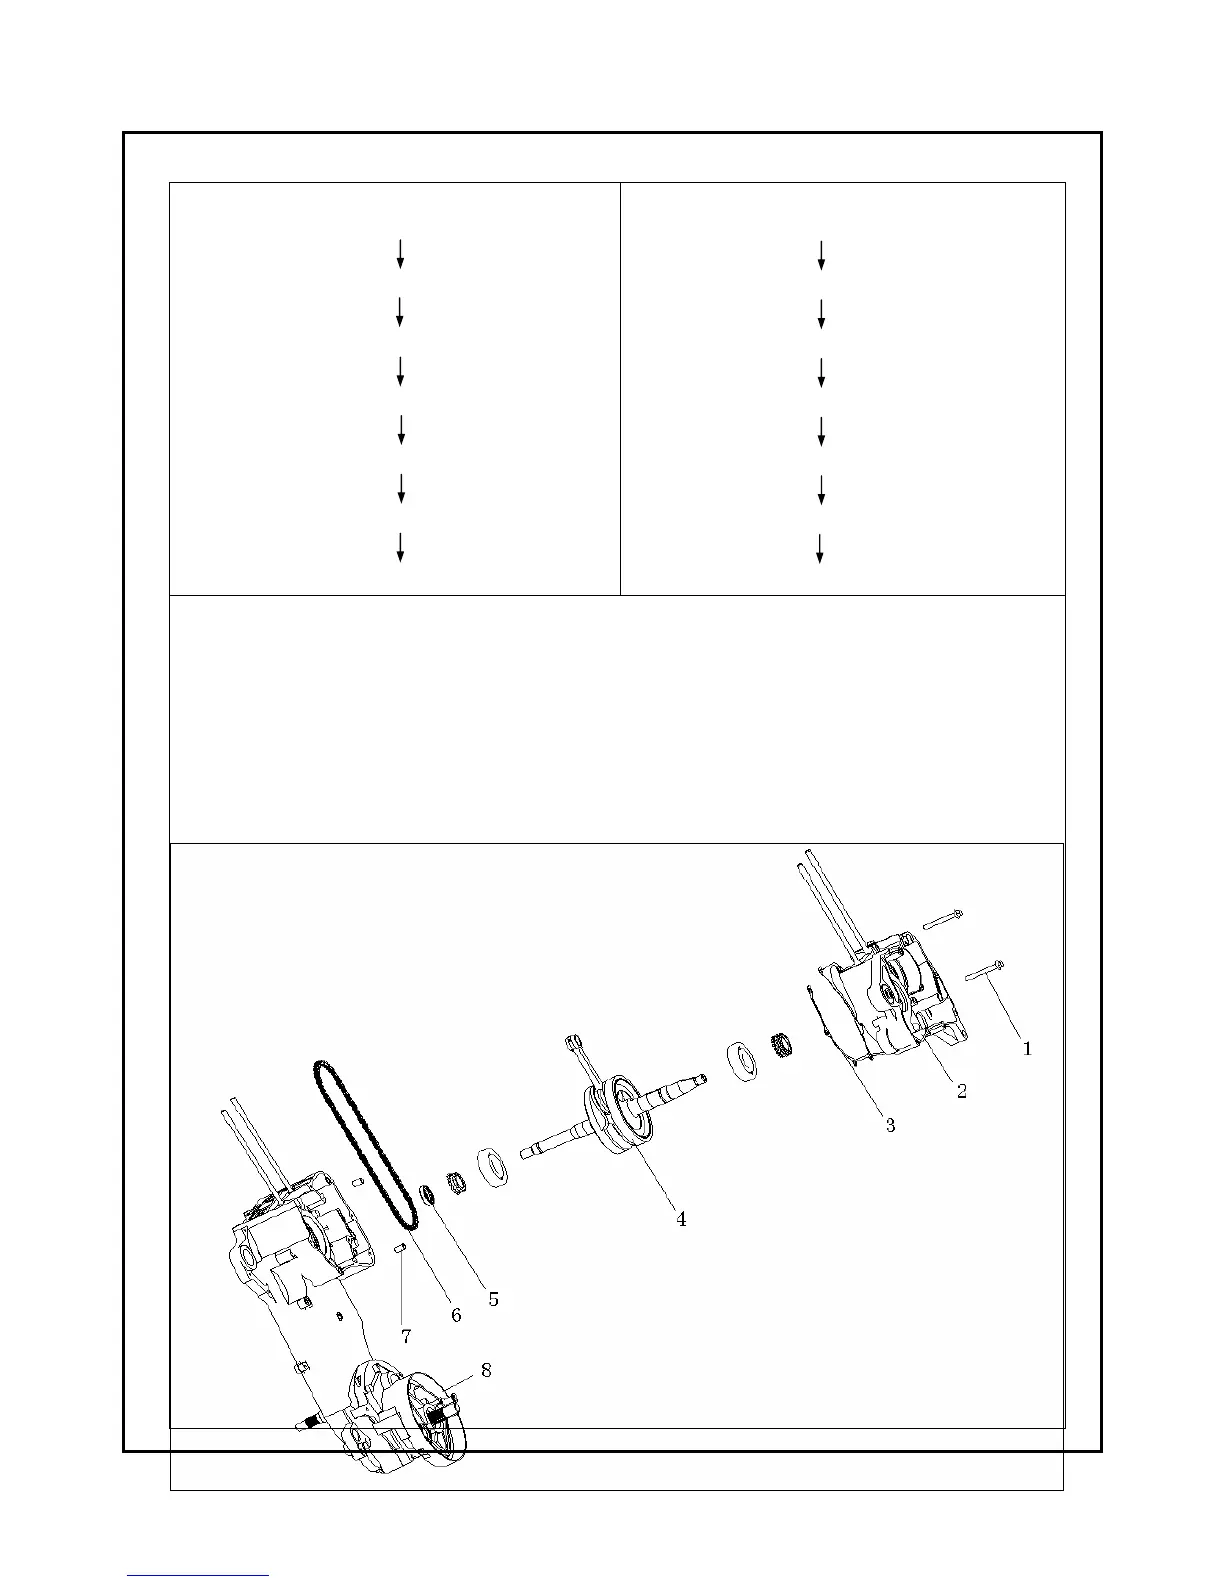
EasyManuals Logo

KEEWAY ARN125 User Manual

KEEWAY ARN125
85 pages
To Next Page IconTo Next Page
To Previous Page IconTo Previous Page
Page #30 background imageLoading...
Page #30 background image
30
i . C R A N K C A S E I N S TA L L AT I O N
REMOVAL
Bolt1
Right crankcase assy.2
pin7/gasket3
Crankcase assy.4
chain6
Left crankcase assy.8
Oil seal(5
IN INSTALLATION
Left crankcase assy.8
chain6
Crank assy.4
Pin7/gasket3
Right crankcase assy.2
Bolt1
Oil seal5
Notice
1 When installing crankshaft, remember to daub left crankcase bearing with some little oil, and then vertically push
the oil into bearing hole, cover chain with crankshaft gear; crankshaft connecting rod turns freely, and feel that axial
clearance exists for connecting big rod.
2 It is permitted to decompose or assemble left and right crankcase with wood hammer or rubber hammer, but never
with metal hammer, otherwise crankcase may be damaged.
3 Crankshaft connecting rod can turn freely after composing the case, and without block
4 Bolt touque10~12 NM

Table of Contents

Questions and Answers:

Question and Answer IconNeed help?

Do you have a question about the KEEWAY ARN125 and is the answer not in the manual?

KEEWAY ARN125 Specifications

General IconGeneral
BrandKEEWAY
ModelARN125
CategoryScooter
LanguageEnglish

Related product manuals