Do you have a question about the Keiser M3 and is the answer not in the manual?
Explains the display of RPM, power (Watts/kcal), and heart rate.
Details elapsed time, trip distance, odometer, and gear indicators.
Steps for protecting the screen and safely opening the computer casing.
Properly routing wires and seating the circuit board within the housing.
Securing the wire connector and routing it correctly down the handlebar neck.
Detailed steps to calibrate the computer using shifter lever movements.
Securing the metal mount to the display and hanging it under the handlebars.
Coiling the wire and attaching the unit to the handlebar neck.
Steps for securing the computer mounting screw and sliding the unit into place.
Performing the shifter lever sequence to calibrate the computer display.
Checking for low battery indication and replacing AA batteries.
Aligning and securing the handlebar assembly to the handlebar post.
Lowering bike onto frame, adding washers, and torquing acorn nuts.
Preparing pedals, applying Loctite, and torquing them to specification.
Ensuring correct shifter position and preparing flywheel for installation.
Unlatching and removing the belt cover, then safely removing the belt from the pulley.
Aligning belt grooves, installing belt, and checking final alignment.
Using heat for bearing installation and applying Loctite to the axle.
Steps for riding the bike to test computer functions and resistance.
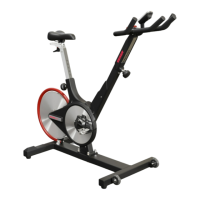
| Resistance System | Magnetic |
|---|---|
| Drive System | Belt Drive |
| Adjustability | Seat and Handlebar |
| Weight Capacity | 300 lbs |
| Heart Rate Monitoring | Polar compatible |
| Seat Adjustment | Vertical and Horizontal |
| Handlebar Adjustment | Vertical |
| Pedals | Dual-Sided (SPD and Toe Cage) |
| Type | Indoor Cycle |
| Display | LCD |
| Dimensions | 49 x 26 x 45 inches |
| Weight | 85 lbs |
| Display Metrics | RPM, Watts, Heart Rate, Time, Distance |
| Power Source | Battery |