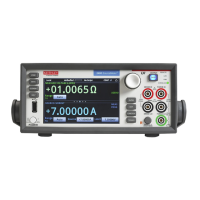
Figure 3. Rear-panel connections for the leakage current test.
Figure 4. Rear-panel connections insulation resistance test.
Measuring leakage current
The following application demonstrates how to use the Model
2450 to measure the leakage current of a 1nF capacitor by
sourcing a voltage and measuring the resulting current using the
front panel or over the remote interface. The remote interface
examples show SCPI commands and TSP commands.
This application sets the Model 2450 to source 20V and
measure the resulting leakage current as a function of time. The
instrument takes current measurements for a specific period.
For this test, you will:
• Reset the instrument.
• Set the instrument to read the rear terminals.
• Select the source voltage function and measure
current function.
• Set the magnitude of the voltage source.
• Turn on autoranging.
• Set the measure delay.
• Use the Duration Loop trigger model template to make
readings for a specified time period.
• Turn on the source output.
• Take readings for a specified period of time.
• Turn off the source output.
NOTE: When you use the Model 2450 to measure small current
values, ensure that the device under test is electrostatically
shielded. If the capacitor rating is greater than 20nF,
enable the high capacitance mode for best results.
For more information about making optimized
capacitor leakage measurements and minimizing noisy
measurements, see the Keithley Instruments Low Level
Measurements Handbook, available on the Keithley
Instruments website (http://www.keithley.com).
Set up the leakage current application
using the front panel
To set up the application from the front panel:
1. Use the test leads to make the connection from the capacitor
to the rear panel of the Model 2450, as described in
Device connections.
2. Reset the Model 2450.
a. Press the MENU key.
b. Under System, select Manage.
c. Select System Reset, and then select OK.
3. Press the TERMINAL FRONT/REAR switch to set the
instrument to use the rear-panel terminals (R is displayed to
the left of the switch).
4. Press the HOME key.
5. Press the FUNCTION key.
6. Under Source Voltage and Measure, select Current.
7. Select the button next to Source (at the bottom of the screen).
8. Enter 20 V and select OK.
9. Press the MENU key.
10. Under Trigger, select Templates.
11. Next to Templates, select Duration Loop.
12. Next to Duration, enter a soak time of 30s and select OK.
13. Next to Delay, enter 0.2 s , and select OK.
14. Press the HOME key to return to the Home screen.
15. Press the TRIGGER key to turn on the output and
make measurements. The output is turned off when the
measurements are complete.
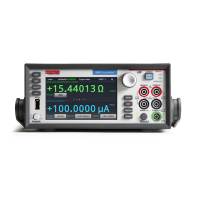
Figure 5. Viewing the leakage current measurement on the front-panel.
 Loading...

