11
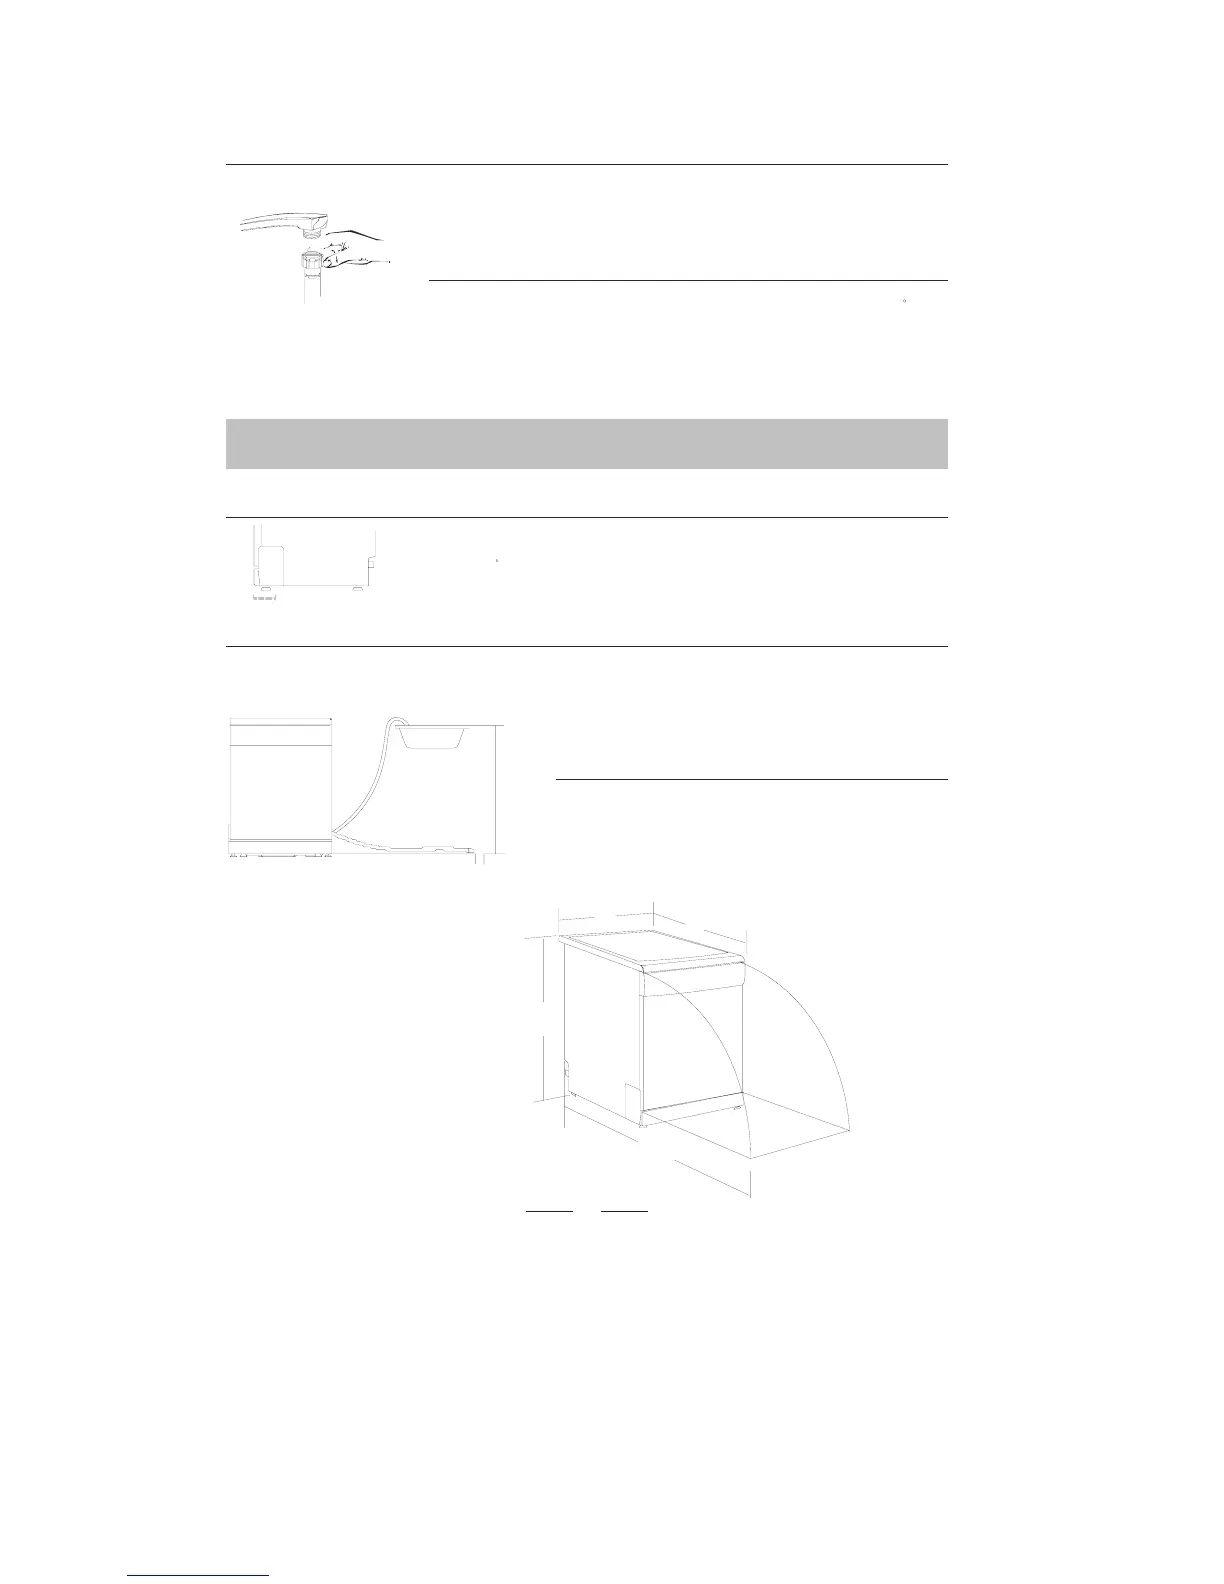
How to Drain Excess Water
From Unicouple Hoses
If the sink is 34 or higher from the floor, the excesswater in Unicouple hoses
cannot be drained directly into the sink. It will be necessary to drain excess
water from hoses into a bowl or su itable container that is heldoutside and lower
than the sink.
Cold Water Connection
Connect the col d water supply hose to a thr ea ded 3/4(inc h) connector and make sure that it is
fastened tightly in place.
If the water pipes are ne w or hav e not bee n us ed for an extende d pe riod of time, let the water
run to make sure that the water is clear and free of impurities. If thi s precaution is not taken,
there is a risk tha t the water inl et can get blocked and damage the appliance.
Hot Water Connection
The water sup ply to the applia nce can also be connected to the house hot water line
(centralized system, heating system),as long as it doe s not exc ee d a temperature of 60 C.
In this cas e, t he wash cycle ti me will be shortene d by about 15 minutes and the wash
efficiency sli g htly reduced.
The connectio n must be made to the hot water line following the same procedures as those
for the connection to the cold water line.
DIMENSIONS(mm)
Drain hose Connection
Con nector of Mod elⅡ
Inse rt th e dra in hose into a dra in pipe w ith a m inim um diame ter of 4 cm , or let it run i nto the s ink , m aki ng sure to a void be n di ng
or c rimping it. Use the special plastic support that comes with the appliance. The free end of the hose mus t be at a height
betw een 40 and 100cm and must not be immersed in water.
Positioning the Appliance
Levelling the Appliance
Once the appli ance is pos iti oned,adjus t the feet (screwing them in or out) to adjust the
height of the dishwasher, mak ing it level. In any case ,the appliance should not be inclined
mor e than 2 .
Position the appliance in the desired loc ation. The back should rest against the wall behind it, and the sides, along the adjacent
ca bine ts or wa ll . The di shwa she r is equippe d w ith wa ter s upply and drain hoses that can be posi tioned to the right or the left to
facilitate proper installation.
Max 1000mm
Mi n 4 00mm
600
580
850
1135