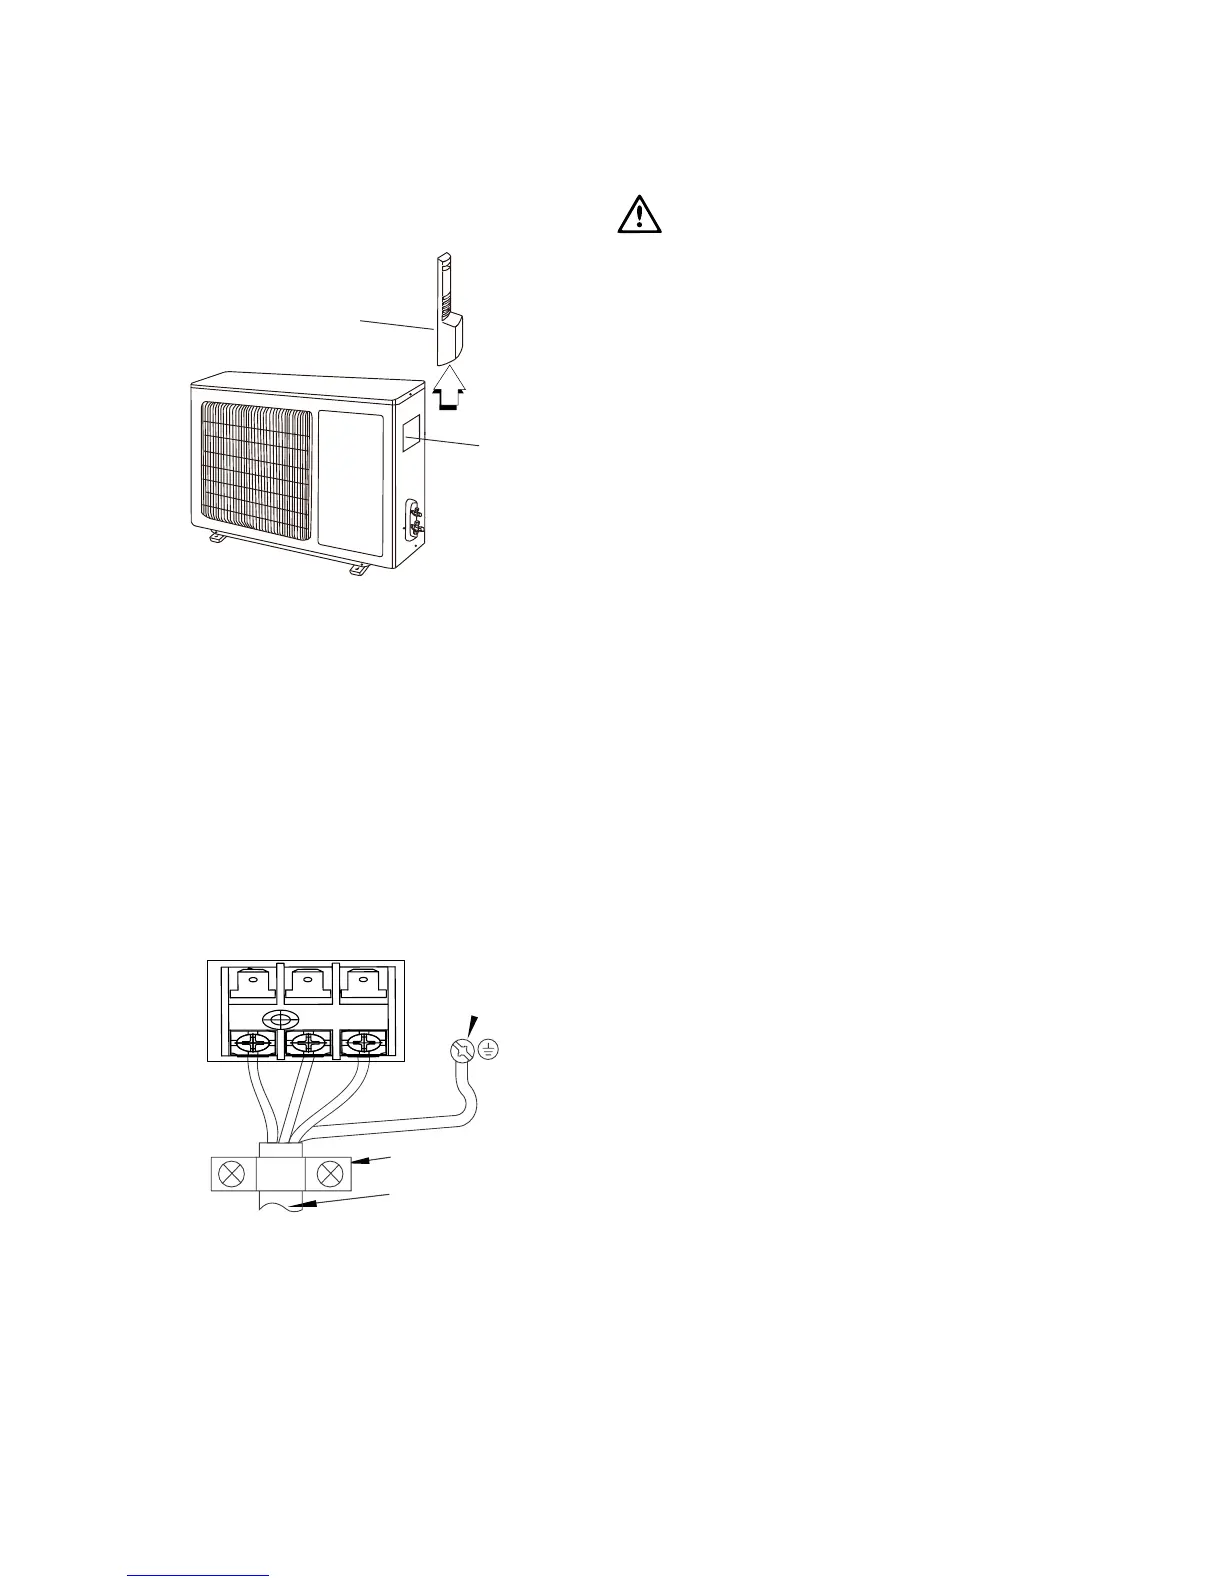
2. Take off wire cable clamp. Connect and screw the power
connection cable and signal control wire (for reverse cycle
models only) onto the terminal block following corresponding
identification numbers and colours on the terminal blocks of
indoor and outdoor units.
3. To prevent water from entering, make a trap (“U”) in the
connection wires (see page 16).
4. Wrap wires that are not connected with insulating tape so that
they do not touch any electrical or metal parts.
5. Fix the power connection wires with wire clamps.
6. Reinstall the handle.
KSV26CRE, KSV26HRE, KSV35CRE, KSV35HRE models
blue black brown
to outdoor unit
cable clamp
earthing wire
(green & yellow)
caution
After confirming the above conditions, prepare the wiring as follows:
• The screws which fasten the wiring to the terminal block may
come loose from vibrations during transportation.
• Check and make sure all screws are well fixed. Otherwise, it
could cause burn-out of the wires.
• Be sure the circuit capacity is sufficient.
• Ensure the starting voltage is maintained at over 90% of the
rated voltage marked on the nameplate.
• Confirm that the cable thickness is as specified in the power
source specification.
• Always install a Residual Current Device (RCD) in wet or
moist area.
• The following may be caused by voltage drop: vibration of a
contactor, which will damage the contact point, fuse blowing,
disturbance of the normal function of the overload.
• The means for disconnection from a power supply shall be
incorporated in the fixed wiring and have an air gap contact
separation of at least 3mm in each active (phase) conductor.
Note: Powered accessories cannot be connected to these
wiring points.
Installation
Kelvinator Air Conditioning Installation instructions 21
 Loading...