Do you have a question about the Kemper 345 and is the answer not in the manual?
Alerts users to the safety-alert symbol and the need for precautions and safe operating practices.
Emphasizes reading safety messages, maintaining signs, and operating the machine properly.
Explains the meaning of DANGER, WARNING, and CAUTION signal words used with safety symbols.
Guidance on wearing appropriate clothing and safety equipment, including hearing protection.
Importance of checking road and general operating safety before using the machine.
Warning against feeding crop by hand/foot and clearing obstructions while the machine is running.
Emphasizes keeping guards and shields in place and properly installed at all times.
Warning to stay clear of moving elements like rotors, drums, and cutting units during operation.
Caution against clearing obstructions with hands while the machine is running.
Guidelines for safe maintenance procedures, including disengaging power and removing keys.
Warning about entanglement in rotating drivelines and the need for shields.
Safety precautions for servicing machines, including tying hair and removing jewelry.
Guidance on properly supporting the machine or attachment before working on it.
Warning about penetrating skin with high-pressure fluids and seeking immediate medical attention.
Instruction to replace missing or damaged safety signs and consult the manual for placement.
Highlights the manual's importance for safe operation and adherence to safety rules.
Safety instruction to shut off the engine and remove the key before repair or maintenance work.
Safety warning to stay clear of the unit during operation to avoid personal injury from moving parts.
Caution against touching moving parts and notes that rotating blades do not stop immediately.
Warning to stay clear of rotating drums to prevent injury from entanglement with arms, legs, or clothing.
Instructions for adjusting the unit's tilt frame or rigid frame for flat ground engagement.
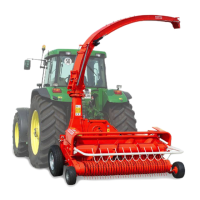
Step-by-step instructions for attaching the unit with a tilt frame to the forage harvester.
Step-by-step instructions for attaching the unit with a rigid frame to the forage harvester.
Instructions for connecting the drive shaft for 330 and 345 units to specific forage harvester types.
Instructions for connecting the drive shaft for 360 and 375 units to specific forage harvester types.
Important note to carry out preparation steps before attaching the unit to the harvester.
Instructions for installing the mounting rail, supplied separately, onto the forage harvester first.
Step-by-step instructions for driving the harvester, engaging retainer hooks, and tightening rods.
Instructions for locking rear jackstands and removing the front jackstand when attaching the unit.
Explanation of the preset channel width for KRONE harvesters and unit configurations.
Procedure for adjusting the unit's channel width by turning the feed plate and scraper assembly.
Procedure for installing the front jackstand before attaching the unit for the first time.
Step-by-step instructions for placing the unit on jackstands and attaching it using suspensions.
Procedure for connecting hydraulic hoses to the forage harvester's left side connections.
Instructions for connecting the drive shaft to the harvester drive and unit input gear box.
Procedure for installing the front jackstand before detaching the unit.
Step-by-step instructions for lowering, shutting down, disconnecting, and driving out the unit.
Requirement to secure dividers with accident prevention device and use additional clearance lights.
Procedure for locking the tilt frame to prevent uncontrolled movements during public road driving.
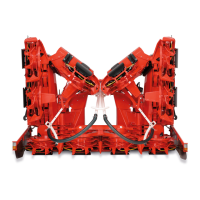
Describes the cutting and feeding system, and how stalks are processed and conveyed.
General guidelines for starting the harvester, operating speed, and handling turns and wagon changes.
Explanation of length-of-cut transmission and drive speed adjustments on CLAAS harvesters.
Table to determine length-of-cut adjustment based on lever positions and cutterhead knives.
Tables for determining length-of-cut adjustment for Type 492 with 24 and 20 knives.
Tables for determining length-of-cut adjustment for Type 493 with 28 and 24 knives.
| Brand | Kemper |
|---|---|
| Model | 345 |
| Category | Farm Equipment |
| Language | English |