Service
KM00321,0000299 1924FEB101/1
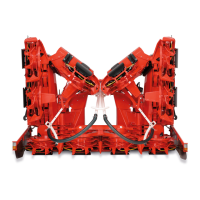
Disassemble Slip Clutch
If it is not possible to rotate the slip clutch by hand as
described under Main Drive Slip Clutches WaterCooled
(Optional on 345 and 360, Standard on 375) it must be
disassembled and cleaned.
Procedure:
1. Remove slip clutch from rotary harvesting unit. See
Remove Slip Clutch in this Section.
2. Tighten nuts (A). This will reduce pressure on the
clutch disks.
3. First remove locking collar (I) from housing (B).
4. Then remove all slip clutch parts from housing (B).
5. Clean all parts, especially friction disks (C, E). Replace
worn parts.
6. Reassemble all parts.
7. Install locking collar (I) as shown in Torque Settings
below.
8. Loosen nuts (A) to the end of thread.
9. Reinstall slip clutches on the rotary harvesting unit.
Torque Settings:
IMPORTANT: The specified torque must not be
exceeded. See torque table in Main Drive
Slip Clutches WaterCooled (Optional on
345 and 360, Standard on 375).
The torque value is set by positioning the profile (F)
towards the outside and engaging the locking collar lugs
in the outer recesses (G) of housing (B).
A—Nut
B—Housing
C—Friction disk
D—Coolant reservoir 1.3 L
(0.34 US gal.)
— 0.65 L (0.17 US gal.) of
water
— 0.65 L (0.17 US gal.) of
antifreeze
E—Friction disk
F— Profile
G—Outer recess
H—Inner recess
I— Locking collar
KM1000160 —UN—16OCT07KM1000161 —UN—16OCT07KM1000996 —UN—31AUG09
505
040810
PN=100