EN
2. USE
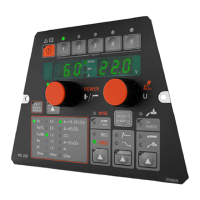
FastMig MR 200 and MR 300 panels are supposed to be used only with synergic power sources
FastMig M 320, 420 or 520. MR 200 panel can be mounted to MXF 63 (200 mm wire spool) wire
feeder and MR 300 panel to MXF 65 and 67 (300 mm wire spool) wire feeders.
2.1 Connecting and mounting the panels
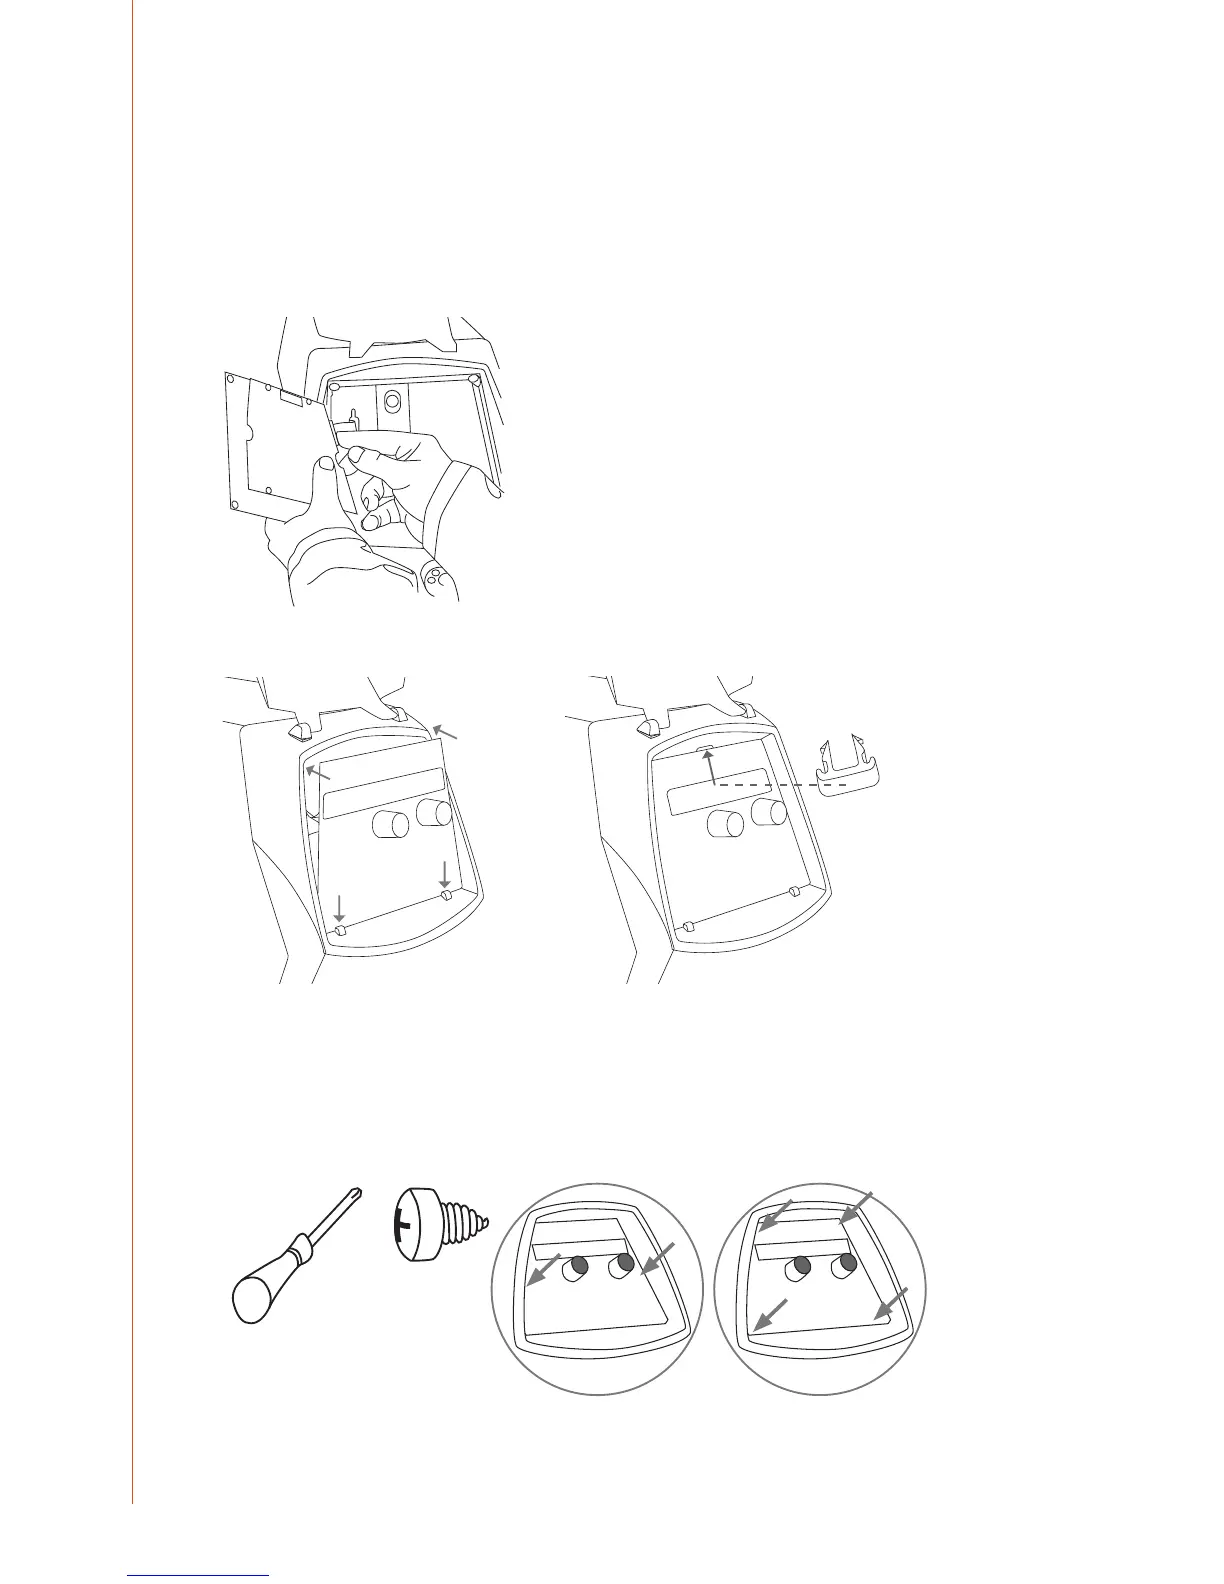
Fasten the ribbon cable connector from the MXF wire feed unit to the function panel.
MXF 65
1.
2.
1. Place the bottom edge of the panel behind the securing clips on the machine. Remove
the xing pin from the top edge with, for example, a screwdriver. Then gently push
the upper part of the panel into place. Make sure that the cables do not get damaged,
continue gently pushing the upper part of the panel until it clips into place.
2. Finally secure the panel into place with the additional black plastic security clip provided
(MXF 65 only). Ensure that the clip is positioned correctly. You will notice that the clip
does not seat snuggly if it's positioned upside down.
MXF 63 + MXF 67
MXF 63 MXF 67
+
FastMig MR 200, MR 300
4
 Loading...