6 – TTC 130, TTC 130F, TTC 160, TTC 160S, TTC 220, TTC 200W,
TTC 250W, TTC 250WS/0109
© COPYRIGHT KEMPPI OY
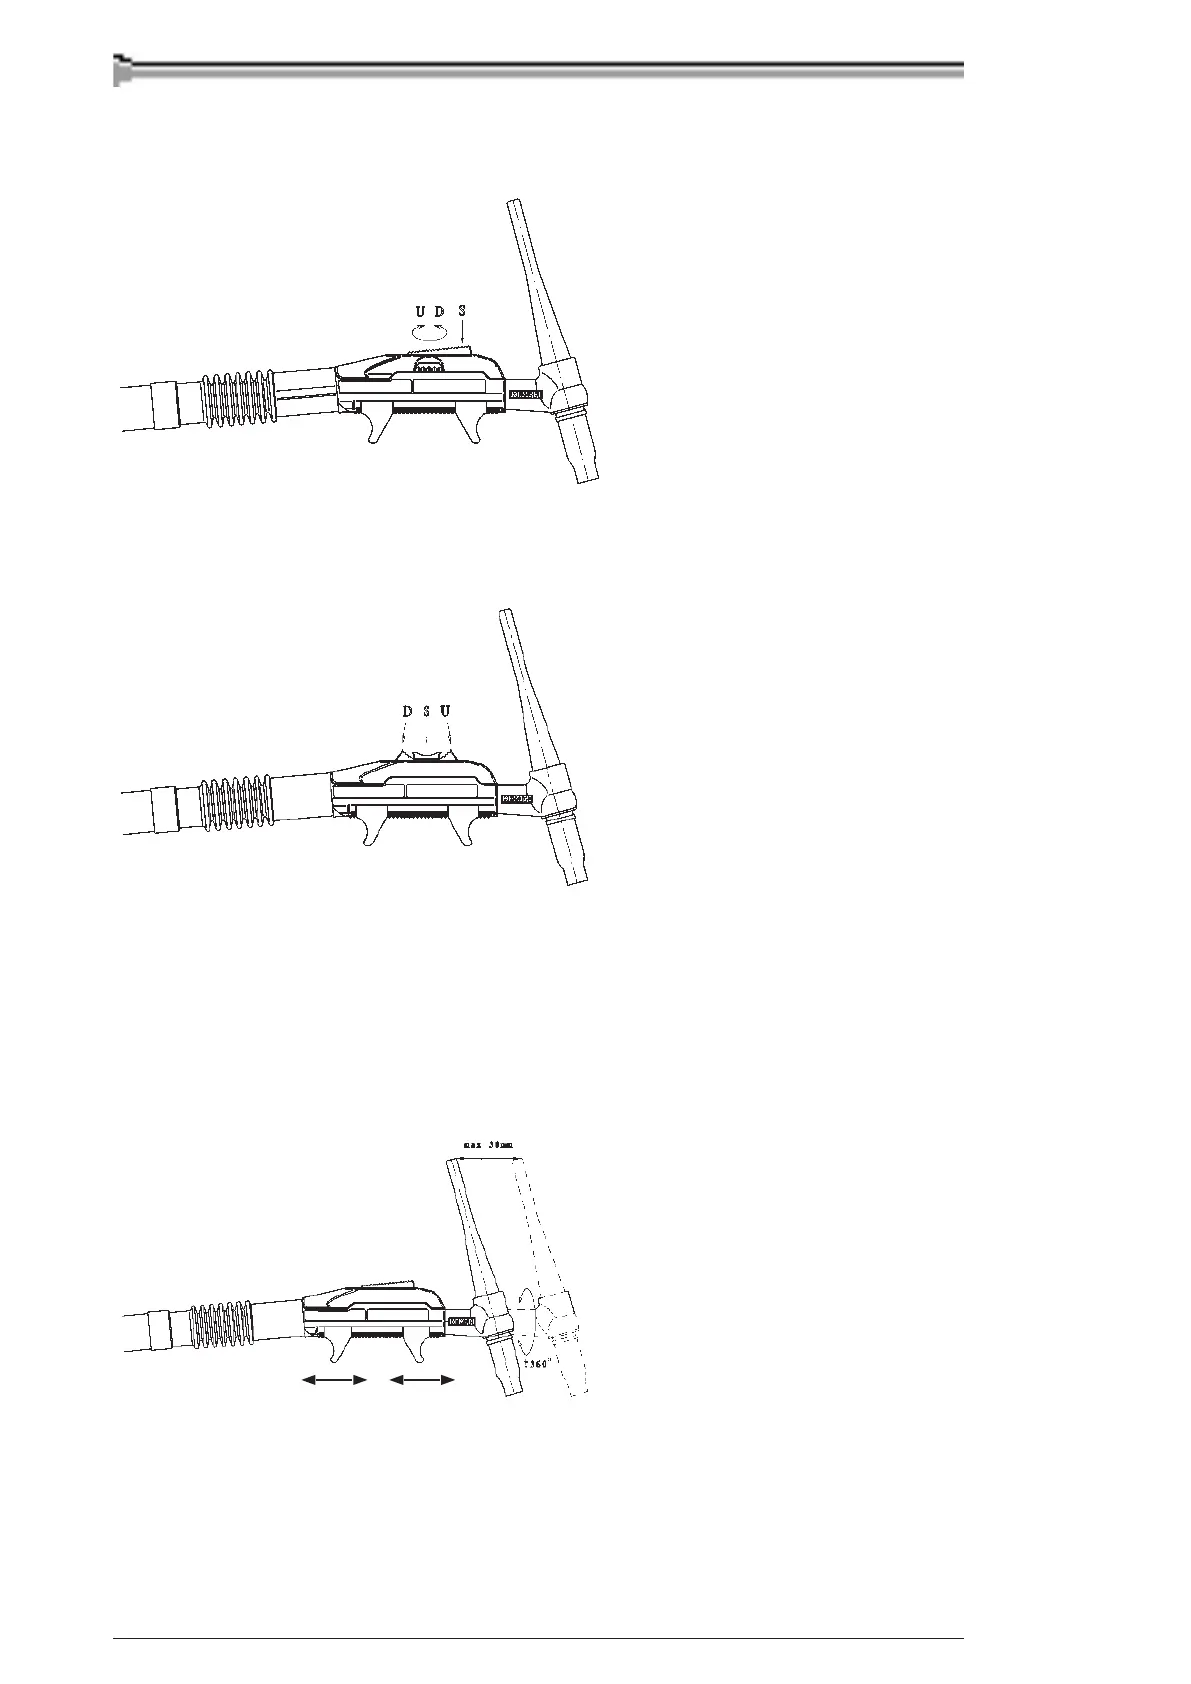
RTC 10 (code 6185477)
Besides the start-switch there is a potentiometer for controlling the welding current.
S = start
U (clockwise) = welding current
will slope-up
D (anticlockwise) = welding current
will slope-down
RTC 20 (code 6185478)
Besides the start-switch there is a seesaw switch for controlling the welding current.
S = start
U = welding current
will slope-up
D = welding current
will slope-down
Assembly instruction is delivered with the regulators.
2.3. ADJUSTMENT OF TORCH BODY AND GRIPS
You can draw the torch neck outwards from inside the handle in approx. 30 mm length in order
to grow reach or to minimize heat radiation to welder’s hand. You can also twist the torch
body 360° in regard of the handle. Twisting of neck makes the length adjustment easier. Before
starting to weld make sure that the parts being exposed to voltage at the back end of the neck
body are not visible.
You can without tools move or twist grips on the lower surface of the handle into such position
you like that you can get a steady hold on the torch. You can also easily remove one or both of
the grips through the front end of the handle.
 Loading...