10
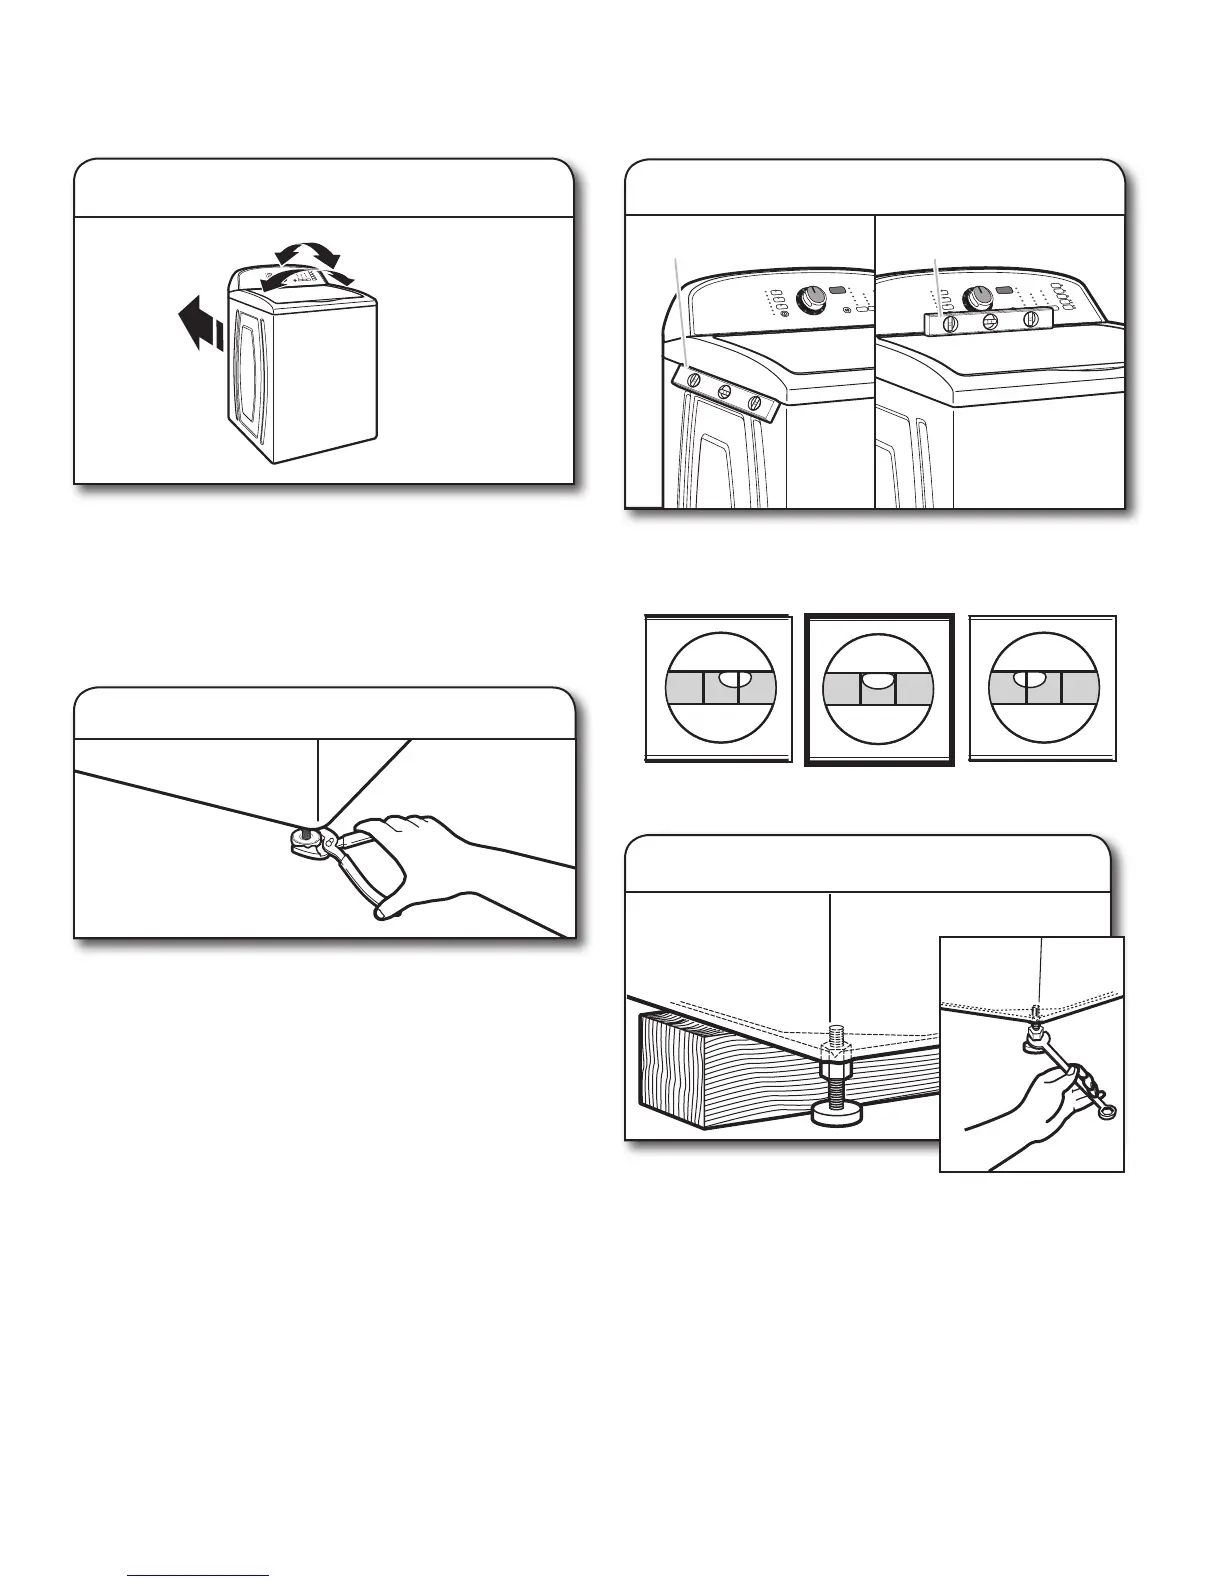
If the washer is not level, move
the washer out slightly, tip back
and prop up the front of the washer with a wood block. Adjust
the right front foot by loosening the locknut with a 9/16" or
14 mm open-end wrench, then twisting the foot up or down as
needed. After the washer is level, make sure all 4 feet are in
rm contact with the oor by gently rocking it back and forth
and side to side. Adjust the feet if necessary, then using the
wrench again, turn the locknuts counterclockwise on the foot to
tighten to the washer cabinet.
HELPFUL TIP: You may have to adjust the back feet to level the
washer. If you are installing the washer in a tight or hard-to-
reach area, you may have to move the washer out to reach the
feet comfortably. You may wish to lock the back feet before
moving the washer back into place.
IMPORTANT: If the locknuts are not tight against the washer
cabinet, the washer may vibrate.
4� Adjust levelness of washer
LEVEL WASHER
IMPORTANT: Leveling your washer properly reduces excess noise
and vibration.
For washers with an adjustable right front foot, lower the right
front foot until it contacts the oor. Using pliers, rotate the foot
up to an additional 1
1
/
2
turns.
Move the washer to its nal location. Rock the washer back
and forth to check whether all four feet are stable and in rm
contact with the oor. If the washer rocks, your model may
be one that comes with 3 feet preset at the factory. It will be
necessary to adjust the right front foot to level the washer. If
all 4 feet were preset at the factory, minor adjustments may be
needed to level the washer on your oor.
Check the levelness of the washer. First, place a level on the lid
near the console. Then place the level on the side of the washer
in the crease between the top of the washer and the cabinet.
Not Level Not Level LEVEL
2� Adjust front leveling foot
3� Check levelness of washer
1� Move washer to nal location
Place level here
Place level here
Place level here Place level here
 Loading...