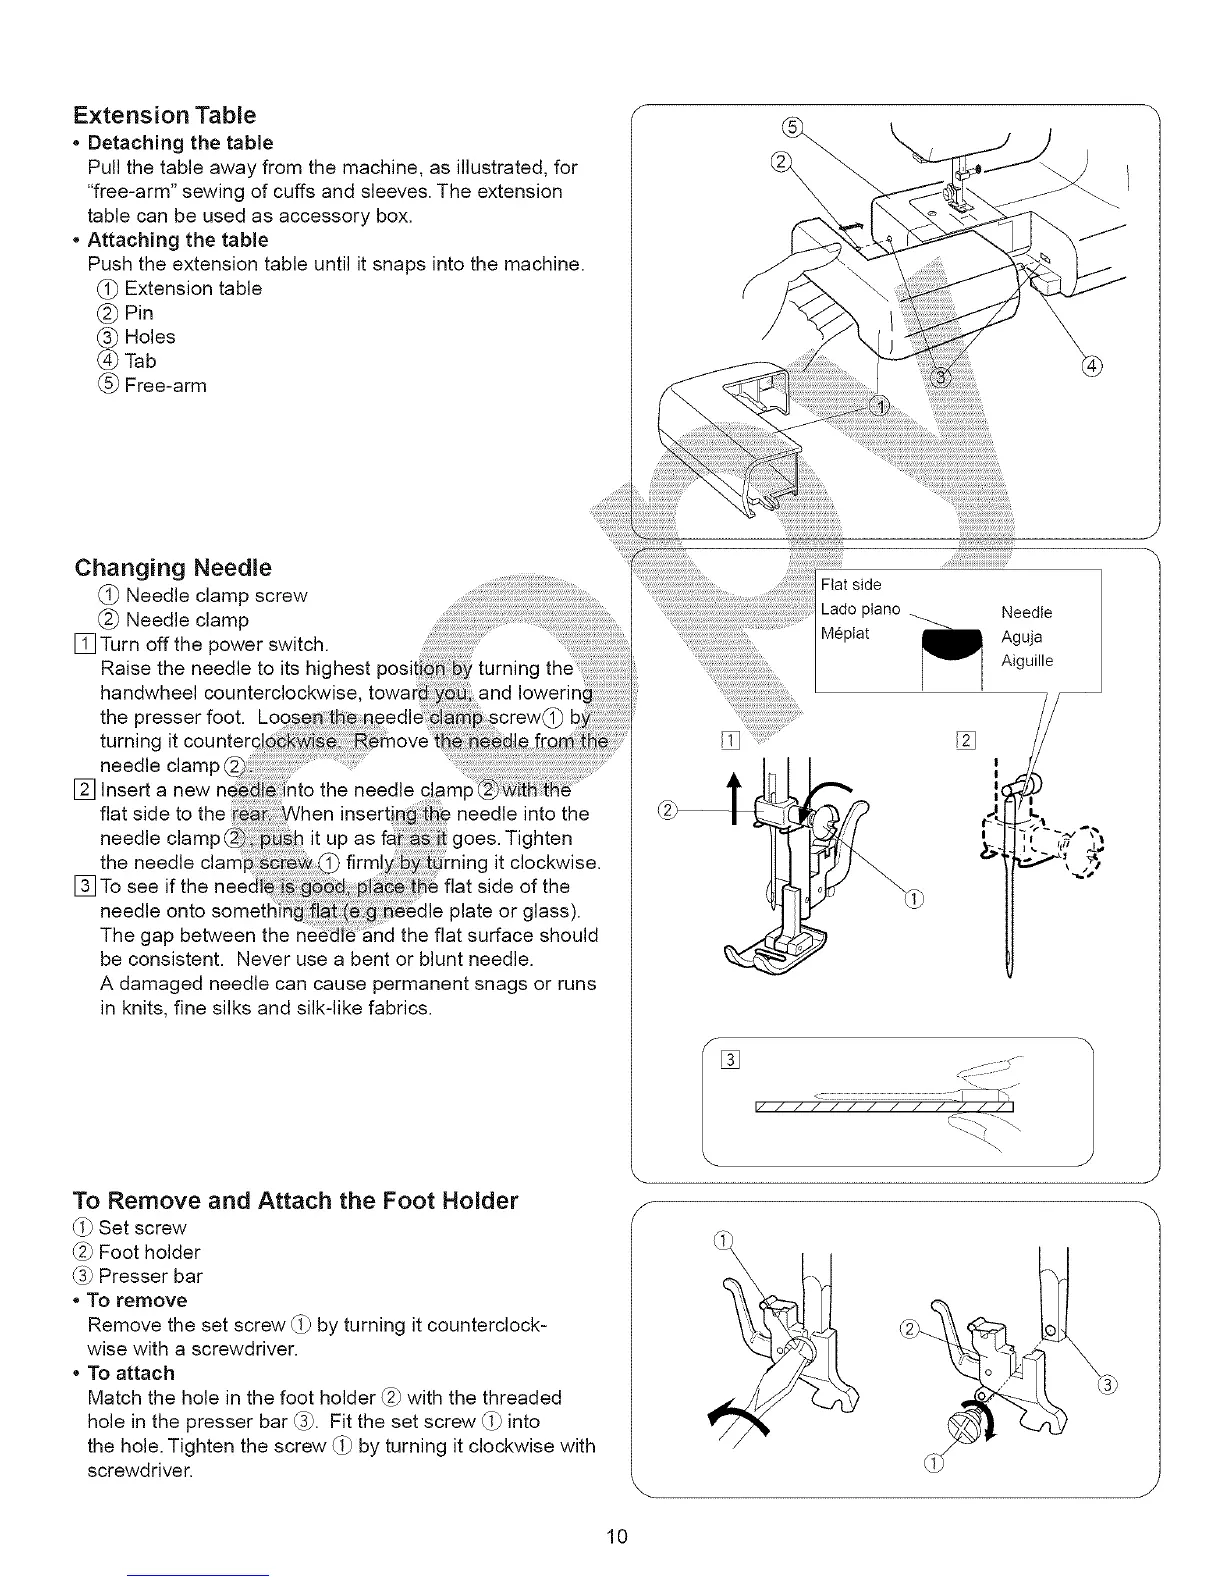
Extension Table
• Detaching the table
Pull the table away from the machine, as illustrated, for
"free-arm" sewing of cuffs and sleeves. The extension
table can be used as accessory box.
. Attaching the table
Push the extension table until it snaps into the machine.
(_ Extension table
® Pin
(_) Holes
@Tab
_) Free-arm
Changing Needle ........... : ....
_-_ ...... .... Flat side
k__ iNeeale clamp screw
: Laaopano
(_ Needle clamp Me at _ Needle
[]Turn off the power switch. ............ ..... / p / Aguja
Raise the needle to its highest turning the / I _ I Aiguille
handwheel counterclockwise, toward:_:_ and lowering .... ..... _
the presser foot.
turning it counterc_ _ove{_ _de frg_i : _ ......
[] flatneedlelnsertsideaclampnewto then{_i_ int°re_ Whenthe needle......... needle into the..... ..... __1_ _"_-J'_
---_ 41
needle clam p it up as goes. Tighten
.......... L ,,,, _
the needle clam_ _ ,_ firm!y _ _rning it clockwise. --,-_"' _,_
[] To see if the nee fla t side of the
needle onto plate or glass).
The gap between the the flat surface should
be consistent. Never use a bent or blunt needle.
A damaged needle can cause permanent snags or runs
in knits, fine silks and silk-like fabrics.
f
I/////// / / ////I
To Remove and Attach the Foot Holder
(_) Set screw
Foot holder
Presser bar
* To remove
Remove the set screw (_L)by turning it counterclock-
wise with a screwdriver.
To attach
Match the hole in the foot holder _ with the threaded
hole in the presser bar _. Fit the set screw _ into
the hole. Tighten the screw (_L)by turning it clockwise with
screwdriver.
J
10