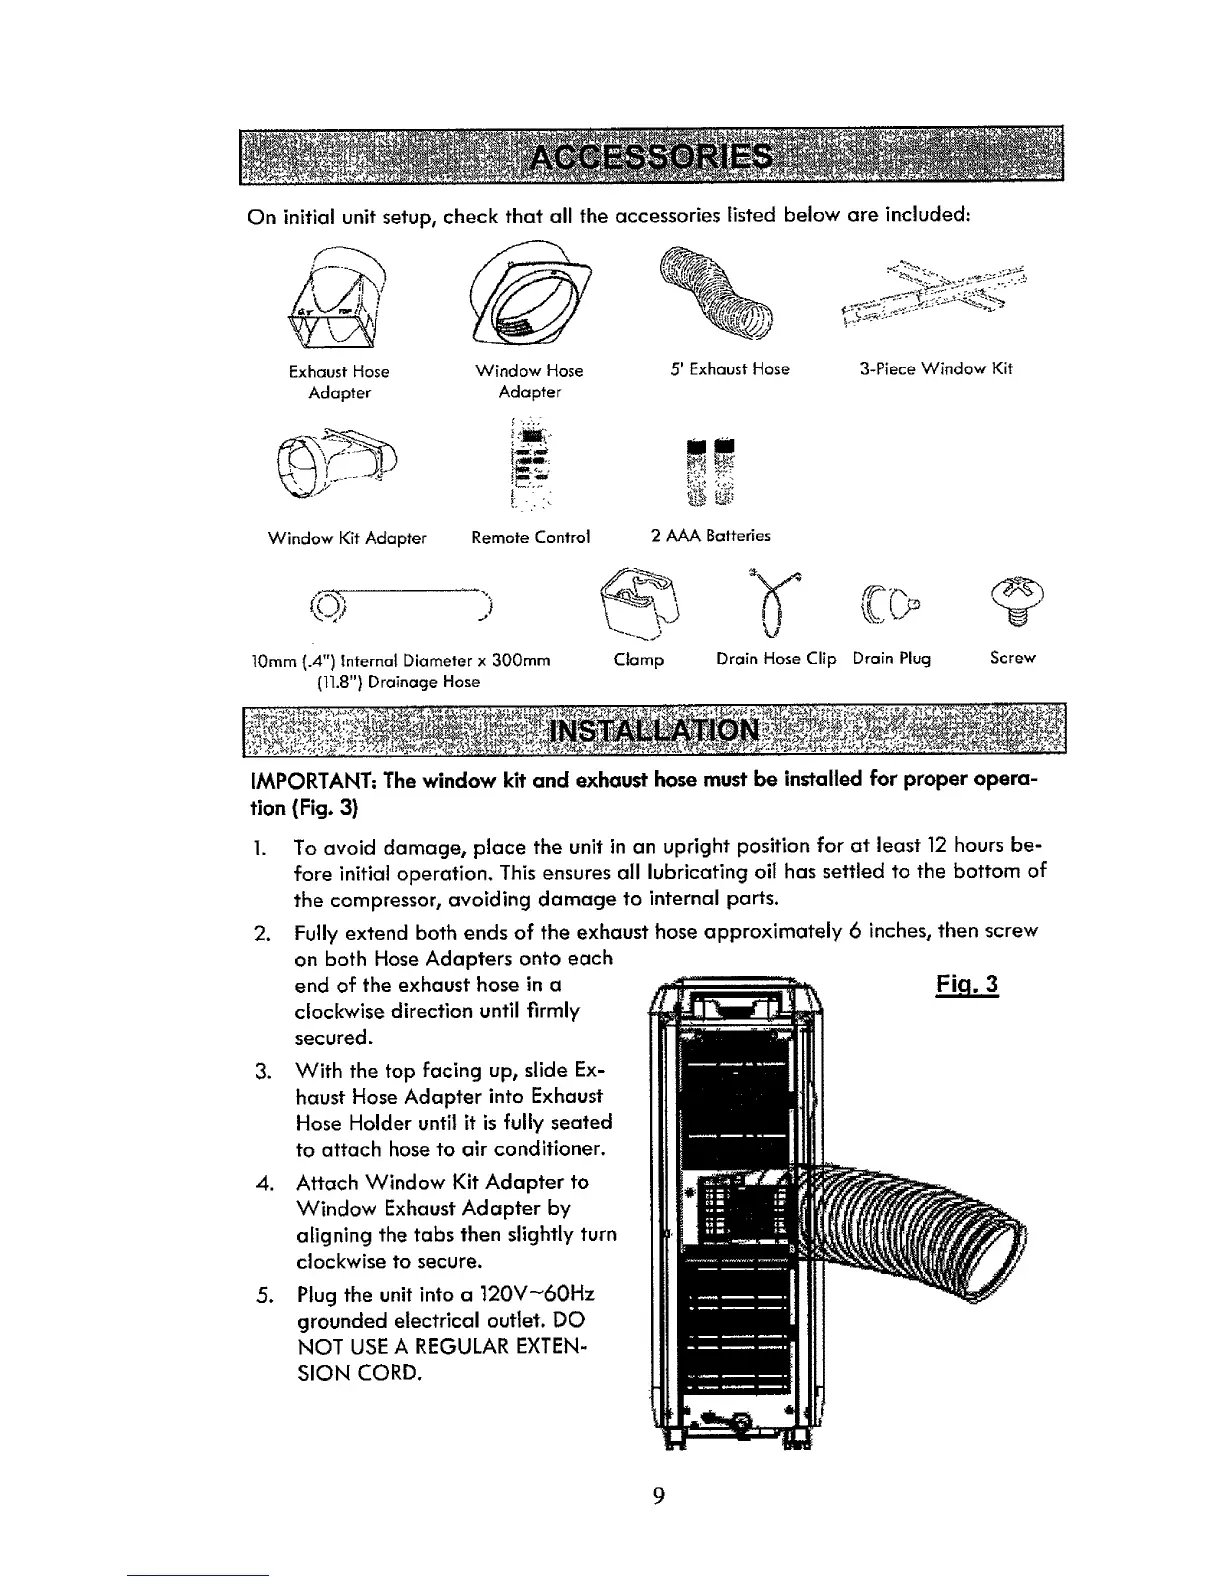
On initial unit setup, check that all the accessories listed below are included:
Exhaust Hose Window Hose
Adapter Adapter
" -.2-.;
l
Window Kit Adapter
Remote Control
5' ExhaustHose
2 AAA Batteries
3-Piece Window Kit
10mm(.4") Internal Diameterx 300ram
(tl.8") Drainage Hose
Clamp Drain HoseClip Drain Plug Screw
I_,.,_'_ _r'_ ,.,-__- _l!._,_:o._.:_._-',_ _,_|:l_l__l:e_l'l_.ll_;_._-_;,_:_: "; _:_._2_.__b$_%_|
IMPORTANT: The window kit and exhaust hose must be installed for proper opera-
tion (Fig. 3)
2_
3_
.
,
To avoid damage, place the unit in an upright position for at least 12 hours be-
fore initial operation. This ensures all lubricating oil has settled to the bottom of
the compressor, avoiding damage to internal parts.
Fully extend both ends of the exhaust hose approximately 6 inches, then screw
on both Hose Adapters onto each
end of the exhaust hose in a
clockwise direction until firmly
secured.
With the top facing up, slide Ex-
haust Hose Adapter into Exhaust
Hose Holder until it is fully seated
to attach hose to air conditioner.
Attach Window Kit Adapter to
Window Exhaust Adapter by
aligning the tabs then slightly turn
clockwise to secure.
Plug the unit into a 120V_60Hz
grounded electrical outlet. DO
NOT USE A REGULAR EXTEN-
SION CORD.



 To Next Page