Do you have a question about the Kenmore 721.80039 and is the answer not in the manual?
Guidance and preparation steps before beginning the installation process.
General safety precautions, including handling and weight considerations for the appliance.
Crucial warnings and instructions to prevent electric shock during installation.
Details the electrical specifications and power supply requirements for the oven.
Emphasizes the mandatory grounding of the appliance for electrical safety.
Instructions to prevent exposure to microwave radiation by ensuring safe operation and door closure.
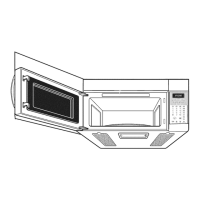
Ensures adequate space and structural support for safe and proper installation of the oven.
Emphasizes grounding and outlet requirements to prevent electrical hazards.
Strict warning against removing the grounding prong to maintain electrical safety.
Lists and describes standard components used for the ventilation system.
Provides guidelines and limitations for the total length of the ductwork system.
Instructions specific to preparing the blower for room-vented (recirculating) installation.
Steps to prepare the blower unit for a wall-vented installation configuration.
Steps to prepare the blower unit for a roof-vented installation configuration.
Guidance on using templates to mark and prepare the installation area on the wall and cabinet.
Instructions for drilling necessary holes in the wall and upper cabinet, with safety warnings.
Emphasizes the requirement for securing the mounting plate to a wall stud for stability.
Specific preparation steps for wall and roof venting, including exhaust adaptor attachment.
| Model Number | 721.80039 |
|---|---|
| Brand | Kenmore |
| Power | 1000 watts |
| Turntable Diameter | 12.4 inches |
| Child Safety Lock | Yes |
| Type | Microwave Oven |
| Control Type | Electronic |
| Cooking Modes | Microwave |
| Features | Express Cook |