7
Before Using Your Range
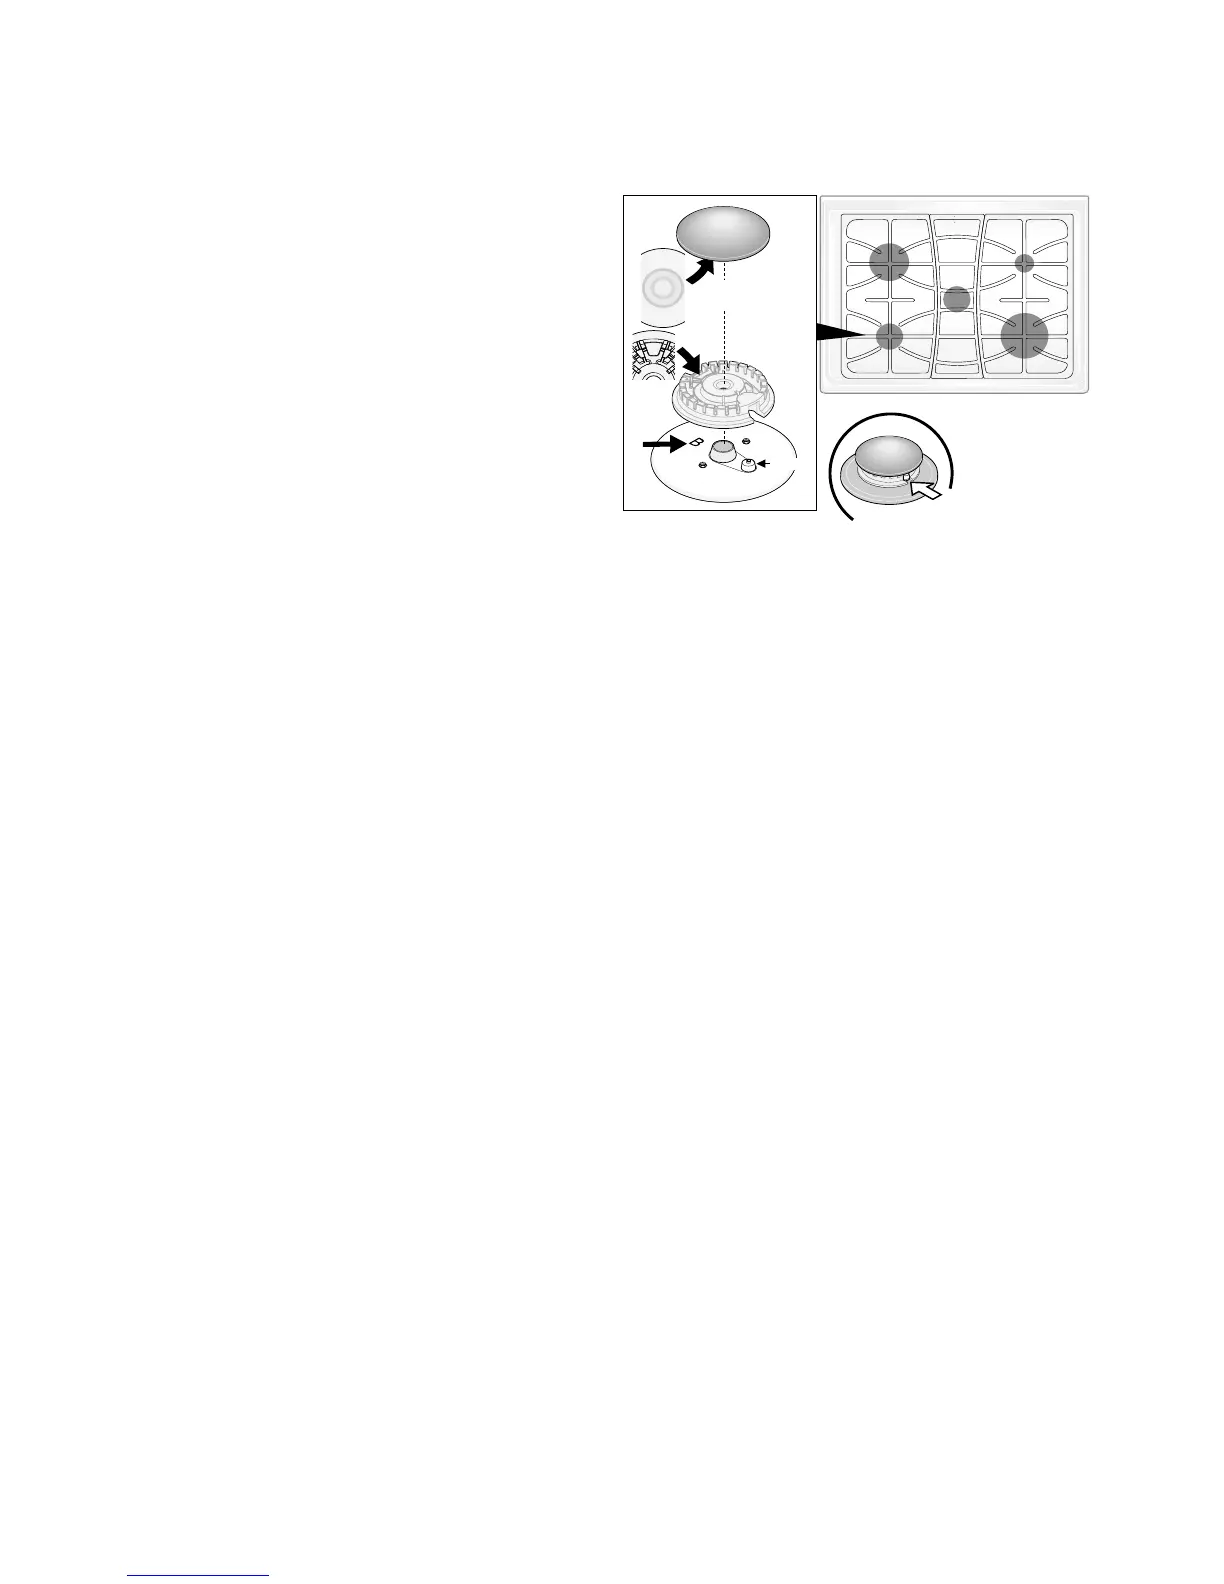
Assembly of Burner Heads & Burner Caps
Your range is shipped with the Burner Heads and Burner Caps in the correct locations. Packing material may be located
between the Burner Heads and the cooktop.
a. Be sure to follow the installation instructions before
installing and using your new range.
b. Remove all packing tape from cooktop area. Remove all
Burner Caps and Burner Heads.
c. Discard all packing material located under Burner Heads.
d. To replace Burner Heads & Caps, match the letters
located under center of Burner Caps with the letters
located inside Burner Heads (Fig. 1).
e. Match the letters stamped on Burner Skirts with Burner
Heads and Burner Caps (See Fig. 1). Replace the Burner
Heads and Caps on cooktop (See Fig. 2). Carefully align
the Electrodes into slot of each Burner Head (Fig. 3).
Note: The Burner Heads should sit flat on Cooktop
Burner Skirts.
f. Unpack Burner Grates and position on the cooktop.
The following instructions apply to all burners except the right
front double burner. For assembly instructions for the double
burner see the General Care & Cleaning section.
Fig. 2
Fig. 3
Fig. 1
Electrodes must
align into slot for each Burner
Head, except right front
burner.
Fig. 1
B
Burner
Head
Burner
Cap
Burner Skirt
B
Electrode
B
B
F
A
E
ENGLISH