19
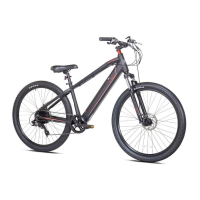
SEAT & SEAT POST ASSEMBLY
1. Loosen the seat clamp nuts.
2. Insert the top portion of the seat post into the seat clamp. Be sure the seat post is
completely inserted into the seat clamp and butted tightly against the underside of the seat.
3. Tighten seat clamp nuts securely.
4. Insert the seat post (with seat attached) into the bike frame. Be sure that the seat post is
inserted past the minimum insertion line.
5. Tighten the seat post binder bolt securely at the desired height.
6. Adjust the angle of the seat so that the top of the seat is parallel to the ground or
comfortable to the rider.
7. Retighten the seat clamp nuts securely (torque requirement 15-20 ft. lbs). Check for
tightness by attempting to twist the seat along with rocking it up and down. If the seat is
loose, be sure to tighten the clamp nuts and binder bolt securely.
THE SEATPOST “MINIMUM INSERTION” / “MAXIMUM HEIGHT” MARK SHOULD NOT
BE VISIBLE WHEN THE SEAT POST IS INSERTED INTO THE SEAT MAST OF THE BIKE. DO
NOT RAISE THE SEAT POST BEYOND THIS MARK. THE SEAT POST OR FRAME MAY BREAK
CAUSING YOU TO LOSE CONTROL AND FALL.
ALWAYS CHECK TO MAKE SURE SEAT POST ADJUSTING MECHANISM IS TIGHTENED
SECURELY BEFORE RIDING. RIDING WITH AN IMPROPERLY TIGHTENED SEAT POST CAN
ALLOW THE SEAT TO TURN OR MOVE AND CAUSE THE RIDER TO LOSE CONTROL
SADDLE HEIGHT: In order to obtain the most comfortable riding position and relation to the
rider’s leg length. The correct saddle height should not allow leg strain from over-extension,
and the hips should not rock from side to side when pedaling. While sitting on the bicycle
with one pedal at it’s lowest point, place the ball of your foot on the pedal. The correct saddle
height will allow the knee to be slightly bent in this position. To obtain maximum comfort, the
rider should not over extend his or her reach when riding. There should be a slight bend in the
rider’s elbows.
ASSEMBLING YOUR BIKE