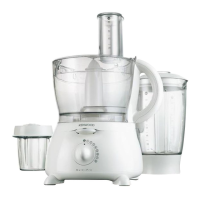
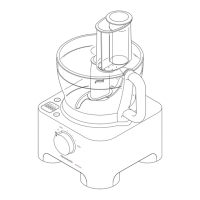
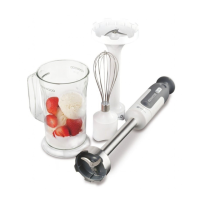
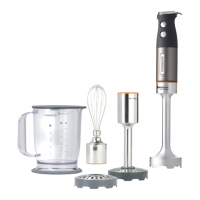
to use your food processor
●
When using the food processor bowl, the liquidiser
outlet cover must be fitted and locked in position or
the processor will not work. Ensure the ▼ on the
outlet cover lines up with the ▲ on the power unit.
1 Fit the bowl. Place the handle towards the back, lower and turn
clockwise until it locks .
2 Then fit the detachable shaft over the power unit fixed shaft.
3 Fit an attachment over the drive shaft.
●
Always fit the bowl and attachment onto the machine before
adding ingredients.
4 Fit the lid onto the bowl - turn clockwise until the arrow on the
lid aligns with the line on the outlet cover.
5 Switch on and select a speed.
●
The processor won’t work if the lid or outlet cover
are fitted incorrectly.
●
Use the pulse (P) for short bursts. The pulse will operate for as
long as the lever is held in position.
6 Reverse the above procedure to remove the lid, attachments and
bowl.
●
Always switch off before removing the lid.
important
●
Your processor is not suitable for crushing or grinding coffee
beans, or converting granulated sugar to caster sugar.
●
When adding almond essence or flavouring to mixtures avoid
contact with the plastic as this may result in permanent marking.
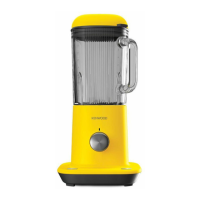
to use your liquidiser
1 Fit the sealing ring into the blade unit - ensuring the seal is
located correctly. Leaking will occur if the seal is
damaged or not fitted correctly.
2 Screw the jug onto the blade unit.
3 Put your ingredients into the jug.
4 Put the filler cap in the lid, then turn.
5 Turn the lid in a clockwise direction to lock onto the jug.
6 Remove the liquidiser outlet cover by turning in an anti-clockwise
direction.
7 Place the liquidiser onto the liquidiser outlet and turn to lock .
important
●
The liquidiser attachment will work only with the
processor bowl and lid in position.
●
When using the liquidiser outlet we recommend that
there are no tools in the bowl.
8 Select a speed or use the pulse control.
hints
●
When making mayonnaise, put all the ingredients, except the oil
into the liquidiser. Then with the machine running, pour the oil into
the filler cap and let it run through.
●
Thick mixtures, eg pates and dips, may need scraping down. If
it’s difficult to process, add more liquid.
●
When crushing ice, add 15mls (1tbsp) water to 6 ice cubes. Use
the pulse control.
●
Allow all liquids to cool to room temperature before placing them
in the liquidiser.
●
Only operate the liquidiser with the lid in place.
●
To ensure the long life of your liquidiser, never run it for longer
than 60 seconds. Switch off as soon as you’ve got the right
consistency.
●
Don’t process spices - they may damage the plastic.
●
The machine won’t work if the liquidiser is fitted incorrectly.
●
Don’t put dry ingredients into the liquidiser before switching on. If
necessary, cut them into pieces; remove the filler cap; then with
the machine running, drop them through one by one.
●
Don’t use the liquidiser as a storage container. Keep it empty
before and after use.
●
Never blend more than 1
1
⁄2 litres (2pts 12floz) - less for frothy
liquids like milkshakes.
3
choosing a speed for all functions
tool/attachment function speed maximum
capacities
knife blade One stage cake mix 1 – 6 1.5Kg/3lb 5oz total weight
Rubbing fat into flour 3 – 6 340g/12oz flour weight
Adding water to combine pastry ingredients
Chopping/pureeing/pates 6 600g/1lb 6oz meat
knife blade with Soups and milkshakes 1 – 6 1.5 litres/2pts 12fl.oz
maxi-blend canopy Start at low speed and increase to maximum
whisk egg whites 6 6 egg whites
egg & sugar for fatless sponges 6
cream 3 – 6 500mls
dough tool yeasted mixes 6 500g/1lb 2oz flour weight
discs - slicing/ Firm food items such as carrots,
shredding/ hard cheeses 3 – 6
chipping Softer items such as cucumbers,
tomatoes 1 – 3
rasping disc Parmesan cheese, Potato for
German potato dumplings 6
citrus press Citrus fruits 1
liquidiser All processing 6 1.5 litres/2pts 12fl.oz
mill All processing 6
centrifugal juicer Fruit and vegetables 6 450g/1lb
 Loading...