EasyManua.ls Logo

Kenwood KDC-252U - User Manual

Kenwood KDC-252U
24 pages
Print Icon
To Next Page IconTo Next Page
Loading...
KENWOOD
lfll/1
Designed for
-lliii6
Windows
..,._TM
MediaTM
KDC-X396
KDC-352U
KDC-252U
KDC-202U
KDC-MP252U
KDC-MP152U
KMR-350U
CD-RECEIVER
INSTRUCTION
MANUAL
AMPLI-TUNER
LECTEUR
DE
CD
MODE D'EMPLOI
REPRODUCTOR
DE
DISCOS
COMPACTOS
RECEPTOR
DE
FM/
AM
MANUAL
DE
INSTRUCCIONES
JVC
KENWOOD
Corporation
Made
for
works with
~
iPod
C
iPhone
PANDORA
internet
radio
Take
the
time
to
read
through
this instruction manual.
Familiarity with
installation
and
operation procedures
Y!ill
help
you obtain
the
best
performance from
your new
CO-receiver.
For
your
records
Record
the
serial
number, found
on
the
back
of
the unit,
in
the
spaces
designated
on
the warranty
card,
and
in
the
space
provided
below.
Refer
to the
model
and
ser
i
al
numbers whenever
you
call
upon your Kenwood
dealer
for
information
or
service
on
the product.
Model
KDC
-X
396/
KDC-352U/
KDC-252U/
KDC-202U/
KDC-MP252U/
KDC-MP152U/
KMR-350U
Serial
number
__
_
US
Residents
Only
©
2011
JVC
KENWOOD
Corporation
GET0743-001
A
(KW/KO)

Other manuals for Kenwood KDC-252U

Question and Answer IconNeed help?

Do you have a question about the Kenwood KDC-252U and is the answer not in the manual?

Summary

Safety and Maintenance Procedures

Essential Safety Precautions

General warnings, cautions, and handling advice for safe operation.

Preparation and Initial Setup

Faceplate and Unit Reset Operations

Procedures for attaching/detaching the faceplate and resetting the unit to factory settings.

Basic Unit Operations

Clock and Initial Configuration

Listening to Radio Broadcasts

Radio Tuning and Station Settings

How to select bands, tune stations, and adjust radio settings.

Media Playback and Device Connection

Connecting USB and iPod Devices

Steps to connect USB drives and Apple iPod/iPhone devices.

Controlling Media Playback

iPod and iPhone Integration

iPod;iPhone Operation and Settings

Alphabetical song search, App Control mode, and settings adjustments for iPod/iPhone.

Pandora Internet Radio Usage

External Audio Component Input

Advanced Audio Customization

Unit Settings and Troubleshooting

Troubleshooting Common Operational Issues

Solutions for problems like no sound, unit not turning on, or poor radio reception.

Troubleshooting Error Messages

Resolving Specific Unit Error Codes

Explains various error codes (e.g., "NO DISC", "ERROR 99", "iPod ERROR") and their remedies.

Installation and Connection Guide

Unit Installation and Wiring Procedures

Steps for installing the unit, including wiring basics and safety warnings.

Wiring Connection Details

Wire Identification and Connection Points

Explains the purpose and connection points for each wire in the harness.

Unit Installation and Removal Procedures

Mounting the Unit in Your Vehicle

Procedures for mounting the unit, including specific methods for Japanese cars.

Overview

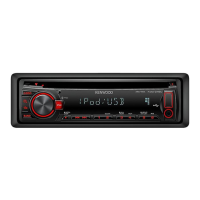
This document describes a CD-receiver from Kenwood, available in several models: KDC-X396, KDC-352U, KDC-252U, KDC-202U, KDC-MP252U, KDC-MP152U, and KMR-350U. It functions as a CD-receiver, ampli-tuner, and reproductor de discos compactos (CD player/tuner). The manual provides instructions for installation, operation, and maintenance.

Function Description

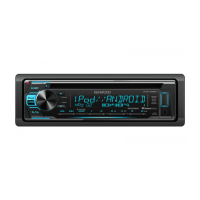
The Kenwood CD-receiver is designed to provide audio entertainment in a vehicle. It supports various audio sources including CDs, USB devices, iPods/iPhones, AM/FM radio, and external auxiliary components. For specific models (KDC-X396, KDC-352U, KDC-252U, KMR-350U), it also integrates with Pandora® internet radio.

Usage Features

Basic Operations:

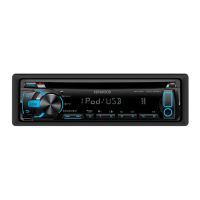
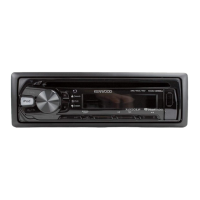
The unit features a display window that shows various information, including source, track/station details, and settings. A volume knob controls audio levels and serves as a multi-function button for menu navigation. Other buttons include SRC (source selection), Q (search/music search), O/BAND (band selection), and numbered preset buttons (1-6). The faceplate is detachable for security.

Power On/Off:

Pressing SRC turns the unit on. Pressing and holding SRC turns it off. For the KMR-350U model, the power automatically turns off after approximately 20 minutes in standby mode.

Source Selection:

The SRC button cycles through available sources: TUNER, USB/iPod, PANDORA, CD, AUX, and STANDBY. Playback starts automatically once a source is selected and ready (e.g., disc loaded, USB device connected). Pandora® is selectable only when an iPhone or iPod touch with the Pandora® app is connected and the [PANDORA SRC] setting is enabled.

Volume Control:

The volume knob adjusts the audio level.

Turning the volume knob selects items in menus, and pressing it confirms selections.

Radio Listening:

  1. Select "TUNER" as the source using SRC.
  2. Use Q repeatedly to select an FM band (FM1/FM2/FM3) or AM.
  3. Press ◄◄◄ or ►►► to search for a station. Holding these buttons for about 2 seconds memorizes the current station, while a brief press recalls a memorized station.

Direct Access Tuning (with remote controller RC-405 for specific models):

  1. Press FM+/AM- to select a band.
  2. Press DIRECT to enter Direct Access Tuning mode. The display shows "- - - -".
  3. Enter the desired frequency using the number buttons.
  4. Press ◄◄◄ or ►►► to search for the frequency. This mode automatically cancels if no operation is performed for 10 seconds after step 3.

CD/USB Device/iPod Listening:

  1. Turn on the power with SRC.
  2. Insert a disc into the loading slot or connect a USB device/iPod. Playback starts automatically.
  3. Press button 6 (►II) to pause/resume playback.

Repeat Play:

Press button 4 (REP) repeatedly to select repeat modes: TRACK/TRAC REPEAT, FILE REPEAT, FOLDER/FOLD REPEAT, or REPEAT OFF.

Random Play:

Press button 3 (ALL RDM) or X repeatedly to select random modes: DISC RANDOM, FOLDER/FOLD RANDOM, or RANDOM OFF. For MP3/WMA/iPod, holding button 3 (ALL RDM) or X selects "ALL RANDOM."

Selecting a Folder/Track/File:

  1. Press Q to enter Music Search mode.
  2. Turn the volume knob to select a folder/track/file, then press to confirm. Press button 5 to return to the root folder or previous folder. Press and hold Q to cancel Music Search mode.

Direct Music Search (with remote controller RC-405 for specific models):

  1. Press DIRECT to enter Direct Music Search Mode.
  2. Enter the track number using the number buttons.
  3. Press ◄◄◄ or ►►► to search for the music.

iPod/iPhone Specific Features (for KDC-X396, KDC-352U, KDC-252U, KDC-MP252U, KMR-350U):

  • Connecting an iPod/iPhone: Requires a KCA-iP102 connection cable (optional accessory).
  • Selecting a Song by Alphabet: Enter Music Search mode (Q), select a category, then press Q again to enter alphabet search mode. Turn the volume knob to select characters, use ◄◄◄/►►► to move the entry position, then press the volume knob to start searching.
  • App & iPod Control Mode: Press and hold the iPod button to switch between "MODE ON" (control iPod from the iPod) and "MODE OFF" (control iPod from the unit).

Pandora® Internet Radio (for KDC-X396, KDC-352U, KDC-252U, KMR-350U):

  1. Open the Pandora® application on your device.
  2. Connect the device to the USB terminal. Broadcasting starts automatically from the current station.
  3. Use button 1 (-) for thumbs down and button 2 (+) for thumbs up.
  4. Press ►►► to skip a song.
  5. Press button 6 (►II) to pause/resume playback.
  • Station Search Mode: Press Q to enter, then turn the volume knob to select [A-Z] (alphabetical order) or [BY DATE], then press to confirm. Select the desired station and confirm.

Listening to Other External Components:

  1. Select "AUX" as the source using SRC.
  2. Turn on the external component and start playing.
  3. Adjust the volume with the volume knob.

Function Settings:

Access [FUNCTION] mode by pressing the volume knob. Navigate to [SETTINGS] or [AUDIO CONTROL]/[AUDIO CTRL] to adjust various audio and display parameters.

  • Clock Adjustment: In [SETTINGS], select [CLOCK] then [CLOCK ADJUST]/[CLOCK ADJ]. Adjust hour and minute using the volume knob.
  • Initial Settings: In [FUNCTION] mode, select [INITIAL SET]. Options include [PRESET TYPE] (NORMAL/MIX), [KEY BEEP] (ON/OFF), [PANDORA SRC] (ON/OFF), [BUILT-IN AUX]/[BUILTIN AUX] (ON/OFF), [CD READ] (1/2), [SWITCH PRE] (REAR/SUB-W), and [SP SELECT] (OFF/5/4/6x9/6/OEM).
  • Audio Control: Adjust [SUB-W LEVEL], [BASS LEVEL], [MID LEVEL], [TRE LEVEL], [PRESET EQ] (NATURAL/USER/ROCK/POPS/EASY/TOP40/JAZZ/POWERFUL), [BASS BOOST] (LV1/LV2/LV3/OFF), [LOUDNESS] (LV1/LV2/OFF), [BALANCE], [FADER], [SUBWOOFER SET]/[SUB-W SET] (ON/OFF), [HPF] (THROUGH/100HZ/120HZ/150HZ), [LPF SUBWOOFER]/[LPF SUB-W] (THROUGH/85HZ/120HZ/160HZ), [SUB-W PHASE] (REVERSE/NORMAL), [SUPREME SET] (ON/OFF), and [VOLUME OFFSET].
  • Display & Key Settings: Navigate to [DISP & KEY] (for KDC-X396, KDC-352U) or [DISPLAY] (for other models). Adjust [COLOR SELECT] (VARIABLE SCAN/COLOR 01-24/USER), [DISP DIMMER] (ON/OFF), [TEXT SCROLL] (AUTO/ONCE/OFF), and [KEY DIMMER] (LV1/LV2/OFF).

Muting upon Phone Call Reception:

Connect the MUTE lead to your telephone using a commercial telephone accessory. When a call comes in, "CALL" appears, and audio pauses. Press SRC to resume audio during the call. Audio resumes automatically when the call ends.

Maintenance Features

Cleaning the Unit:

Wipe the panel with a dry silicon or soft cloth. Avoid using solvents.

Cleaning the Connector:

If the unit malfunctions due to dirty connectors between the unit and faceplate, detach the faceplate and gently clean the connector with a cotton swab. Be careful not to damage the connector.

Handling Discs:

  • Do not touch the recording surface.
  • Do not stick tape or other accessories on the disc.
  • Clean discs from the center outward with a dry silicon or soft cloth.
  • When removing discs, pull them out horizontally.
  • Remove rims from the center hole and disc edge before inserting.

Resetting the Unit:

If the unit fails to operate properly, press the reset button. This restores factory settings.

Faceplate Attachment/Detachment:

Instructions are provided for safely attaching and detaching the faceplate to prevent damage and ensure proper connection.

Remote Controller Battery Replacement:

If the remote controller's effectiveness decreases, replace the CR2025 battery. Ensure correct polarity and dispose of used batteries promptly. Keep batteries out of reach of children.

Installation/Connection:

The manual provides a detailed guide for installation, including:

  1. Disconnecting the car battery terminal.
  2. Making proper input and output wire connections using the provided wiring harness.
  3. Installing the unit into the car, either with or without the mounting sleeve.
  4. Reconnecting the car battery terminal.
  5. Resetting the unit.

Warnings and Cautions:

  • Always stop the car before operating the unit.
  • Avoid putting metallic objects inside the unit to prevent short circuits.
  • Adjust volume to hear outside sounds to prevent accidents.
  • Be aware of condensation that may cause disc read errors; remove the disc and wait for moisture to evaporate.
  • Ensure proper grounding to the car's chassis.
  • Do not expose the faceplate to direct sunlight, excessive heat, or humidity.
  • Insulate unconnected wires with vinyl tape.
  • Mount the unit at an angle of 30° or less.
  • If a fuse blows, check for short circuits before replacing it with one of the same rating.
  • Connect speaker wires correctly to avoid damage.
  • Installation and wiring require skills; consult professionals if needed.

Kenwood KDC-252U Specifications

General IconGeneral
MP3 playbackYes
Playback disc formatsCD audio
Audio formats supportedMP3, WMA
AM band range530 - 1700 kHz
FM band range87.9 - 107.9 MHz
Supported radio bandsAM, FM
DIN size1 DIN
Impedance8 Ω
Product colorBlack
Frequency range20 - 20000 Hz
CD changer capacity1 discs
Signal-to-Noise Ratio (SNR)105 dB
Display typeFluorescent
Display number of lines1 lines
FilterLow-Pass Filter
File format systemFAT 16/32
Amplifier output power88 W
Weight and Dimensions IconWeight and Dimensions
Dimensions (WxDxH)182 x 158 x 53 mm

Videos

How to Access Pandora on Kenwood KDC-252U Radio

Related product manuals