L
Laura LewisAug 25, 2025
What to do if my Kenwood Car Receiver says 'PLEASE EJECT'?
- SStacey CaseAug 26, 2025
If your Kenwood Car Receiver displays 'PLEASE EJECT', try resetting the unit. If that doesn't work, consult your nearest service center.
What to do if my Kenwood Car Receiver says 'PLEASE EJECT'?
If your Kenwood Car Receiver displays 'PLEASE EJECT', try resetting the unit. If that doesn't work, consult your nearest service center.
What to do if Kenwood Car Receiver does not turn on?
If your Kenwood Car Receiver does not turn on, try resetting the unit.
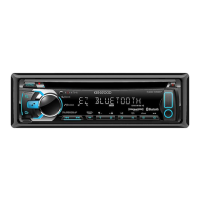
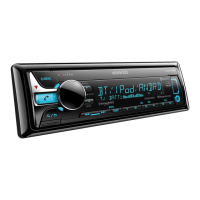
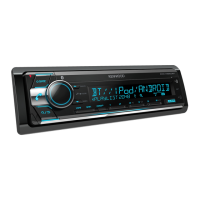
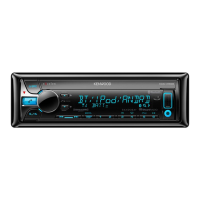
| Brand | Kenwood |
|---|---|
| Model | KDC-X599 |
| Category | Car Receiver |
| Language | English |
Instructions for finding radio stations using manual and auto scan methods.
Configuration options for radio tuning, memory, mono, and traffic information.
How to begin playing music from CD, USB, iPod, or Android devices.
Guide to creating and storing custom radio stations within the Pandora application.
How to find pre-existing stations in your Pandora account.
Guide to finding stations on iHeartRadio by category or city.
Instructions for initiating SiriusXM satellite radio playback.
How to connect an external audio device via the auxiliary input.
Instructions for connecting and positioning the external microphone.
Step-by-step guide for establishing a Bluetooth connection with a device.
Managing mobile phone functions like calls and voice quality settings via Bluetooth.
Procedures for initiating calls via call history, phonebook, or direct dialing.
Manual dialing and using voice commands for calling and controlling phone functions.
Controlling audio content from a Bluetooth-connected device.
Streaming internet radio services like Pandora and iHeartRadio via Bluetooth.
Advanced equalizer settings for sound customization, including bass, mid, and treble adjustments.
Selecting pre-defined equalizer settings for different music genres.
Step-by-step guide for installing the unit into a dashboard.
Alternative installation method without using the standard mounting sleeve.
Procedure for safely detaching the unit from its mounting.
Detailed diagram and instructions for connecting the unit's wiring harness.