Do you have a question about the Keter DENALI 200 US GAL and is the answer not in the manual?
Retain for future reference and read carefully before assembly.
Contact details for customer service and inquiries.
Exercise caution with metal edges and always wear work gloves for safety.
Check all parts and components for damages or missing items prior to construction.
Assemble YP (x1) and WX (x2) parts, ensuring correct outside orientation.
Connect FD (x1) to the structure, ensuring correct outside orientation.
Insert ZX (x2) and WX (x2) into the base and side structure for stability.
Place and secure the top frame using S25 screws (x13).
Install YP (x1) rear panel, ensuring proper alignment and fit.
Connect ABT (x2) and Q1 (x2) parts to create the lid support mechanism.
Attach the lid frame using S25 screws (x5), ensuring correct alignment.
Add stability by securing the base with S25 screws (x16).
Install CD (x1) and MG (x1) components using S25 screws (x6).
Attach TON (x2) and LMH (x2) hinges using S14 screws (x4).
Secure lid hinges with WL1 (x1), M (x1), S14 (x1) and WL2 (x1), S14 (x8).
Install lock mechanism components; strongly recommended to lock the box.
Do not use water to extinguish burning polypropylene; use other means.
Assemble per instructions, wear safety goggles, and follow tool manufacturer guidelines.
Avoid abrasive cleaners, hot items, corrosive substances, and do not stand on the lid.
To prevent suffocation risk, do not allow children to play inside the box.
| Material | Resin |
|---|---|
| Weather Resistant | Yes |
| UV Resistant | Yes |
| Lockable | Yes |
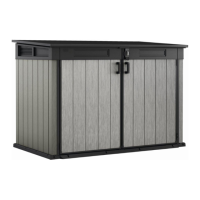
| Capacity | 200 US gallons |