This document is a user's guide for Kidde Smoke Alarms, specifically models i12020ACA, i12040ACA, and P12040CA. It provides comprehensive information on the installation, operation, and maintenance of these devices, emphasizing their role in a family's home safety plan. The guide stresses the importance of reading all instructions thoroughly and saving the manual for future reference.
Function Description
Kidde Smoke Alarms are designed to detect products of combustion, providing early warning of potential fires to occupants. Models i12020ACA and i12040ACA utilize ionization technology, which is effective at detecting invisible fire particles associated with fast flaming fires. The P12040CA model is also a smoke alarm, though its specific detection technology isn't detailed in the same way as the ionization models. These alarms are suitable for both single station and multiple station installations, allowing up to 24 devices to be interconnected. Interconnected alarms provide a synchronized warning, meaning if one alarm senses smoke, all interconnected units will sound an alarm.
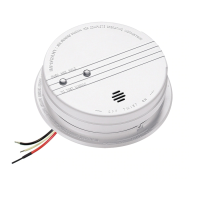
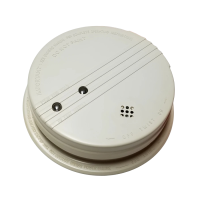
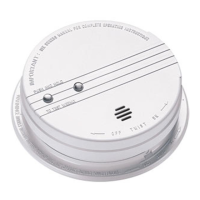
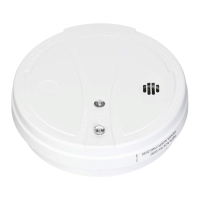
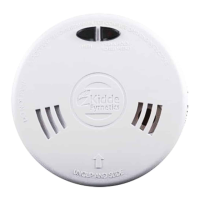
The alarms are equipped with LED indicators to communicate their status. A green LED indicates the presence of AC power, confirming the unit is operating from its primary power source. A red LED, located under the Test/Hush button, has multiple modes:
- Standby Condition: Flashes every 40 seconds to indicate proper operation.
- Alarm Condition: Flashes one flash per second when smoke is detected, and the horn sounds continuously until the air is cleared. In interconnected systems, only the originating alarm's red LED will flash, while all other units will sound an alarm without flashing.
- Alarm Memory (i12020ACA and i12040ACA only): The red LED illuminates for about 1.5 seconds every 20 seconds to visually indicate that an alarm has been activated. This memory feature remains active until the Test button is pressed to reset it or until it times out after 11 to 13 hours. In an interconnected setup, only the originating alarm's memory is activated.
- Hush® Mode: Flashes every 10 seconds to indicate the alarm is in Hush® mode.
Usage Features
The smoke alarms are designed for ease of use and offer features to enhance their functionality and minimize nuisance alarms.
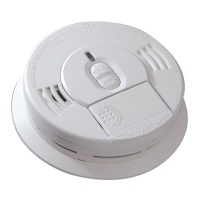
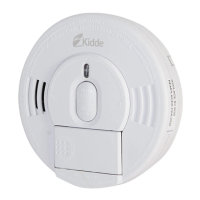
- Test/Hush Button: This prominent button serves a dual purpose.
- Testing: Pressing and holding the button for at least 5 seconds initiates a self-test, sounding the alarm if all electronic components, circuitry, horn, and battery (if applicable) are functioning correctly. Weekly testing is required to ensure proper operation.
- Hush® Control Feature: Available on some models (i12040ACA and P12040CA are mentioned as having a low battery HUSH feature, and the general Hush® Control Feature is described), this feature allows temporary silencing of the alarm when activated by known non-hazardous conditions, such as cooking smoke. If the smoke is not too dense, pressing the Hush® button will silence the alarm, the red LED will flash every 10 seconds, and some units may chirp every 40 seconds for up to 8 minutes. The alarm automatically resets to normal sensitivity after approximately 8 minutes. This feature can be used repeatedly until the air is clear, but dense smoke will override it, causing a continuous alarm.
- Battery Backup (i12040ACA and P12040CA): These models are equipped with a 9V battery backup, ensuring continued operation during AC power failures. A battery lockout feature prevents the battery door from closing if the battery is not installed correctly, emphasizing the importance of proper battery installation.
- Low Battery Warning: For models with battery backup, a low/missing battery monitor circuit causes the alarm to "chirp" approximately every 30-40 seconds for at least seven days when the battery is low, prompting replacement.
- Alarm Tamper Resist Feature: A locking pin is provided to deter unauthorized removal of the alarm from its mounting plate, making it tamper-resistant. This is particularly useful in preventing children from playing with the unit. The pin must be removed using long-nose pliers to change the battery or remove the alarm.
- Interconnectivity: The alarms can be interconnected with other compatible Kidde alarms and accessories, as well as specified brands and models of interconnect compatible alarms, to create a comprehensive fire warning system. This allows for a maximum of 24 Kidde devices in a multiple station arrangement, with specific limits for smoke alarms and total alarms. All interconnected units must be powered from a single circuit.
Maintenance Features
Regular maintenance is crucial for the continued reliable operation of Kidde Smoke Alarms.
- Battery Replacement: For models i12040ACA and P12040CA, the 9V battery should be replaced at least once a year, or at the same time clocks are changed for daylight saving time. The manual provides a list of approved 9V carbon-zinc, alkaline, and lithium batteries for replacement. The low battery chirp serves as a reminder to replace the battery.
- Smoke Sensing Chamber Operation Monitoring: The alarm will "chirp" approximately 20 seconds after the red LED flash if abnormal operation of the smoke-sensing chamber is detected. This indicates a need to replace the alarm.
- Cleaning: While not explicitly detailed as a "maintenance feature" in the provided text, the guide implies the need to keep the alarm free from dust, dirt, and grease, as these can cause nuisance alarms or failure to alarm. It also advises against painting the alarm.
- Replacement Schedule: Alarms failing a test, not operating normally, or those more than 10 years old must be replaced.
- Self-Testing: Weekly testing is a required maintenance activity to ensure the alarm's functionality.
- No User Repair: The manual explicitly states, "Do not try to repair the smoke alarm yourself." For service, users are directed to the Warranty section. The unit is sealed, and the cover is not removable, reinforcing that internal repairs are not user-serviceable.
- Warranty Information: A five-year limited warranty is provided, covering defects in material, workmanship, or design under normal use and service. The warranty outlines the process for returning defective alarms for repair or replacement and specifies conditions that void the warranty, such as damage, modification, abuse, or improper maintenance. The back cover of the unit should not be removed, as this will void the warranty.