Chapter 5: Installation
P/N 3101890-EN • REV 006 • ISS 21JUN18 77
• Save the initial database, and then after installing the option cards define the cabinet configuration and device
loops in the VM-CU and save it as a different version. This method eliminates doubling your workload by
having to edit two databases as you add cabinets to the system.
• If the cabinet contains amplifiers and a VM-PMI, do the following:
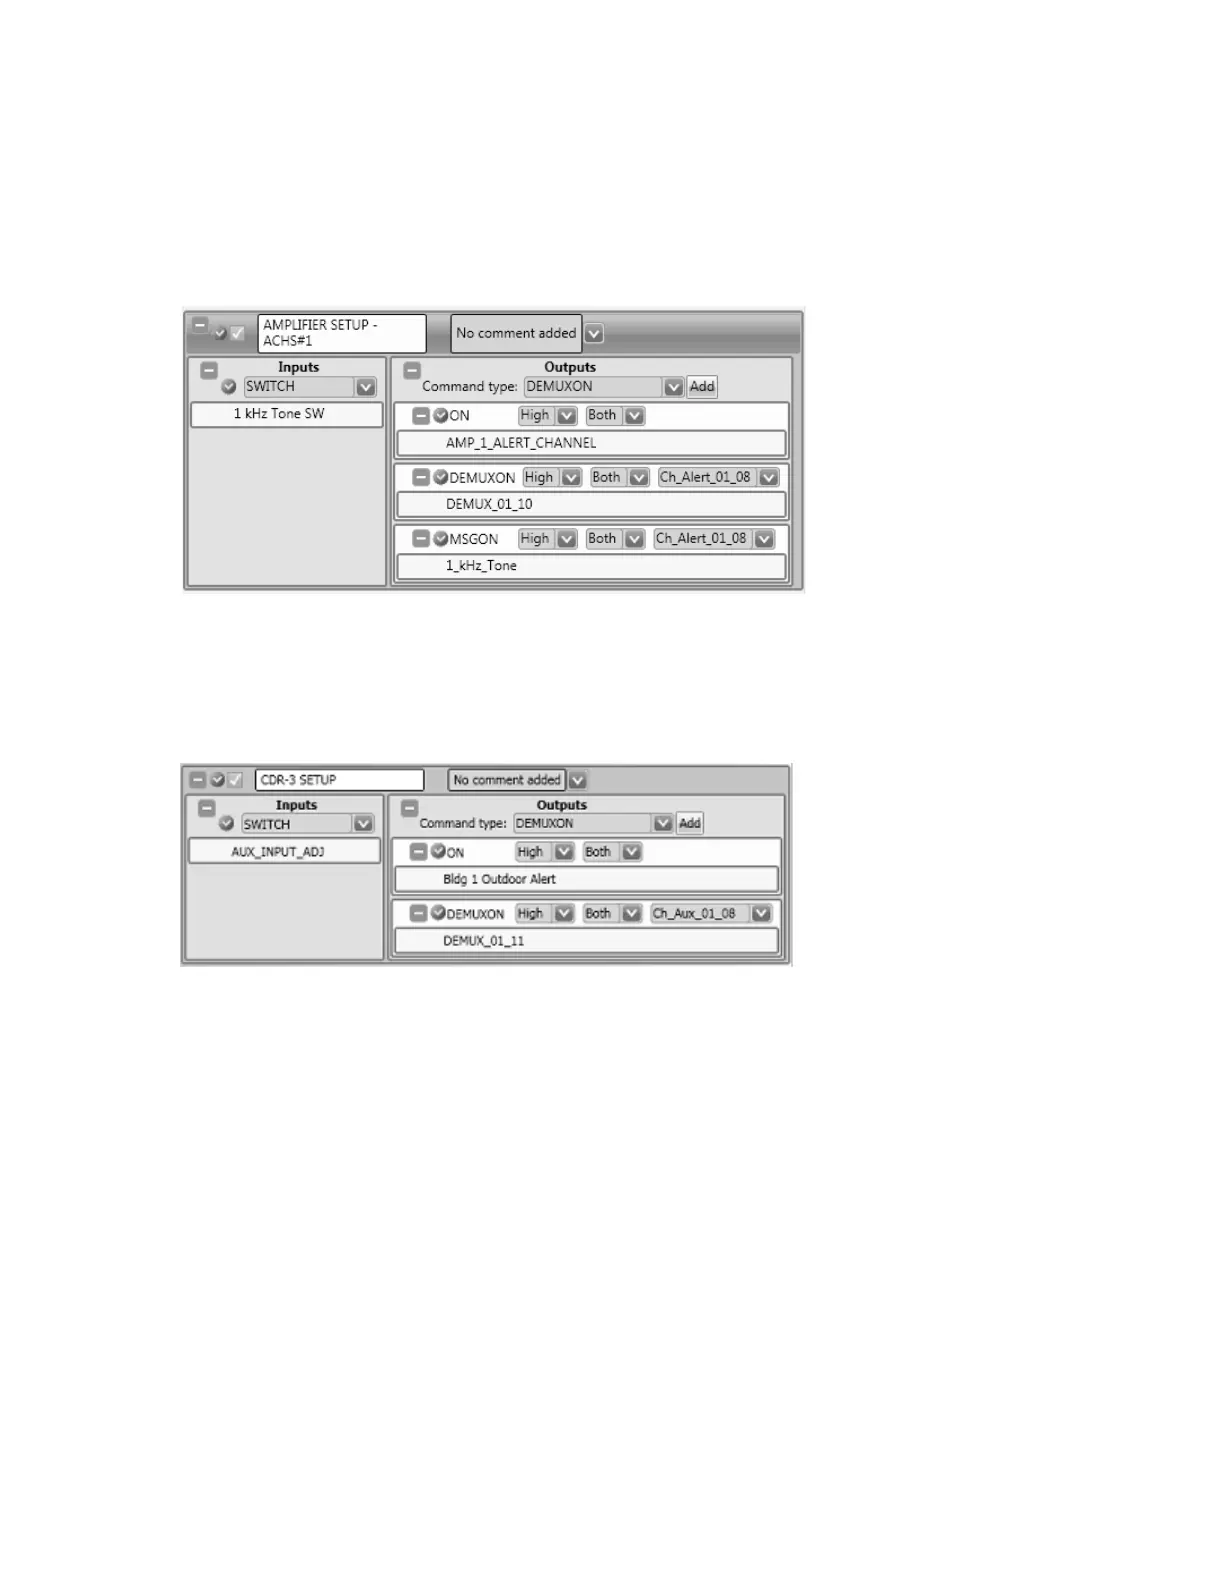
• From the VM-CU, program a control-indicating module switch to send a 0.7 VRMS, 1 kHz tone to the
amplifiers. Label the switch 1KHZ_TONE and add a correlation similar to the one below to the
correlations file.
• Record an audio message that consists of the 1 kHz tone in the Audio Message Recorder Clip Library
and label it 1KHZ_TONE. Refer to the VM-CU Help topic for instructions on recording messages.
• If a CDR-3 Bell Coder is installed and connected to the AUX input on a VM-PMI, do the following:
• From the VM-CU, program a control-indicating module switch to turn on the amplifiers and select the
auxiliary channel. Label the switch AUX_INPUT_ADJUST and add the following rule to the rules file:
System installation sequence
Follow these basic instructions when installing a panel. See the installation sheet that came with a component for
specific instructions.
Notes
• Make sure the installation location is free from construction dust and debris, and is not subject to extreme
temperature ranges and excess humidity.
• Ensure sufficient floor and wall space, to avoid obstructions during installation and servicing.
• When installing the cabinet, use fasteners that can support the full weight of the cabinet, including standby
batteries.
• Be sure to tighten the fasteners firmly to prevent the cabinet from vibrating.
• Remove a panel component from its protective antistatic packaging only for inspection or installation.