Turning On your Router
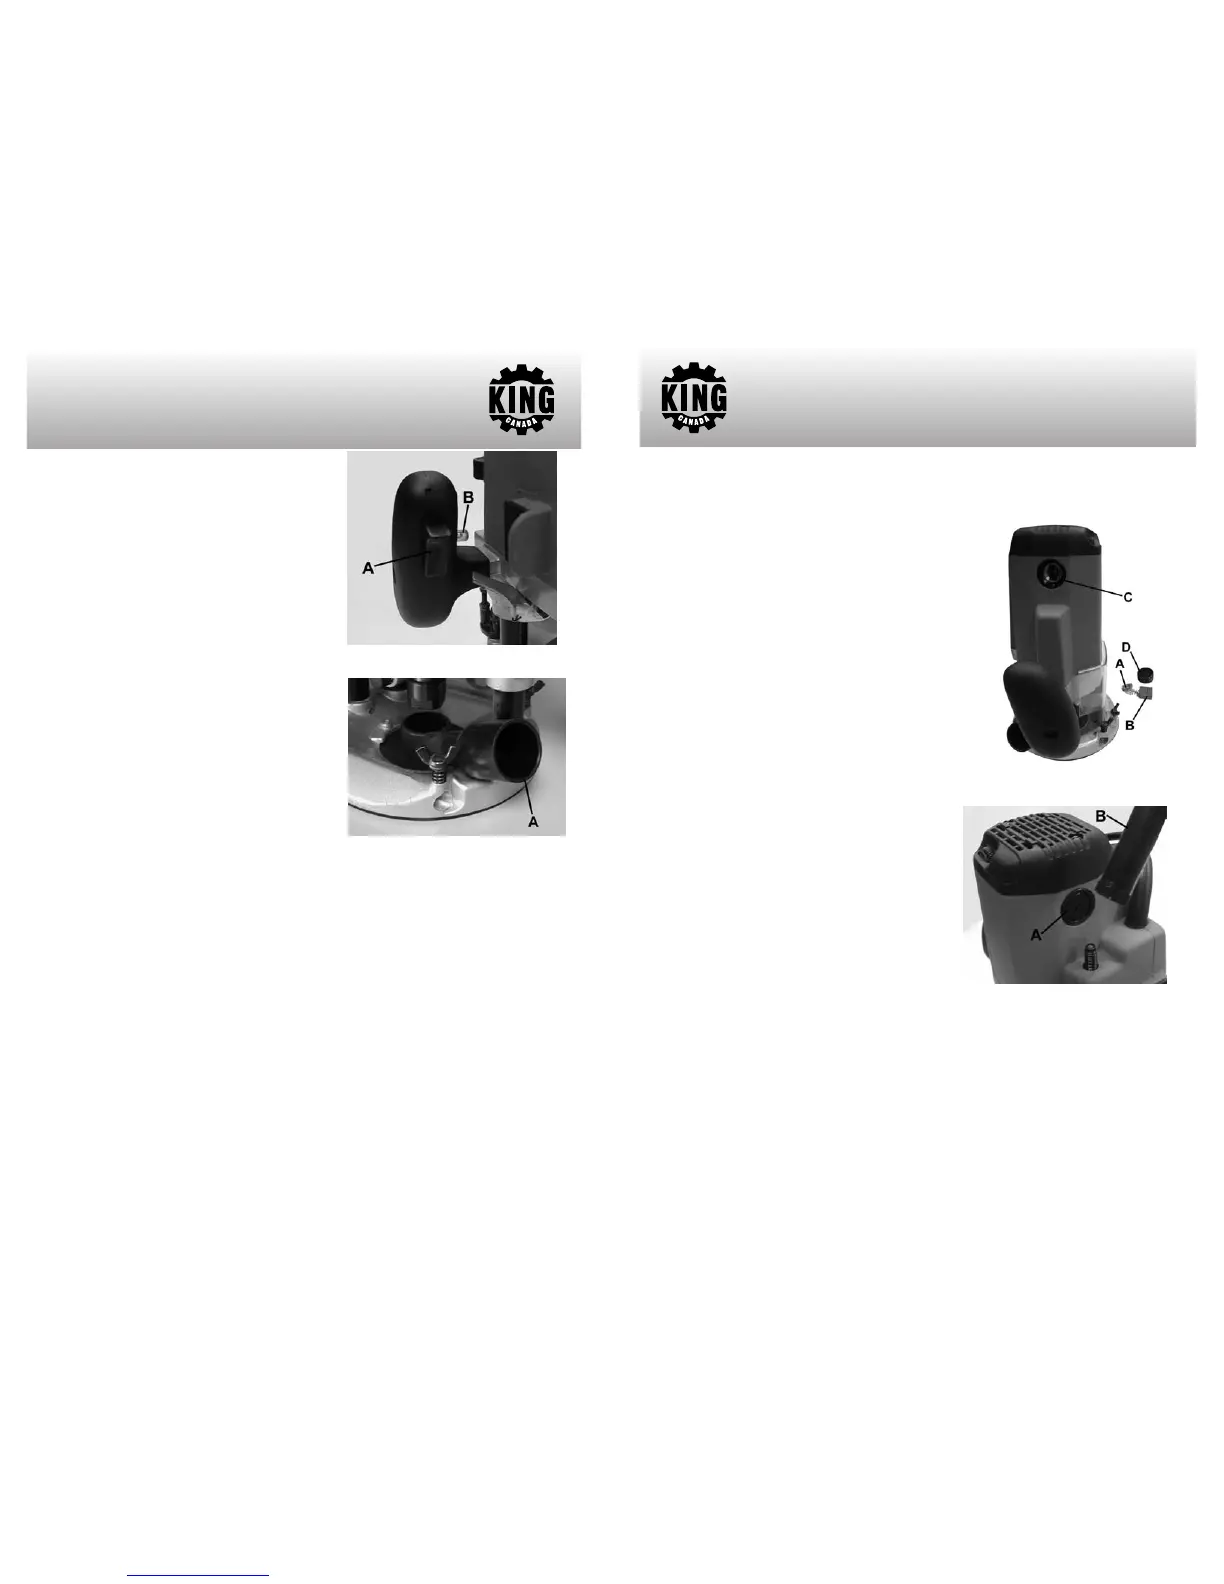
To turn the router on, pull the trigger (A) Fig.8 on
the right handle. To stop the router, release the
trigger.
Your router comes with a lock-on button (B) which
allows continuous operation without holding the
trigger. To lock the trigger in the lock-on position,
pull and hold the trigger and then press the lock-
on button, release trigger. The trigger will stay
engaged until you disengage it. To disengage the
trigger lock-on button, simply pull the trigger once
more and release.
Dust Collection Port
This router is equipped with a dust collection port
(A) Fig.9. It is highly recommended that you adapt
a dust collection system or vacuum to the dust
collection port to minimize airborne dust. This will
also help keep your work area clean of wood
chips. King Canada has a full line of small to large
dust collectors and fittings to meet your needs.
For more information, please contact your near-
est King Canada distributor.
Note: It is necessary to remove the dust collection port from the base in order to install the
template guide. To remove the dust collection port (A) Fig.9, turn the router upside down,
remove the 2 flat head screws which secure it in place. Replace with template guide and
secure in place using the same 2 flat head screws.
Optional Accessories
15pc. Anti-kickback Carbide Router Bit Sets with either 1/4” shanks (model: K-1514) or
1/2” shanks (model: K-1512) are available as optional accessories, please contact your
nearest King Canada distributor.
OPERATION
FIGURE 8
FIGURE 9
MAINTENANCE
CAUTION:
Always be sure that the tool is unplugged before attempting to perform inspection or
maintenance.
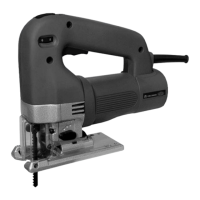
Replacing Carbon Brushes
Remove and check the carbon brushes (A)
Fig.10 regularly. Replace when they wear down
to the limit mark (B). Keep the carbon brushes
clean and free to slip in the carbon brush holders
(C). Both carbon brushes should be replaced at
the same time. Use only identical carbon
brushes.
Use a flat head screwdriver to remove the carbon
brush caps (D). Take out the worn carbon
brushes, insert the new ones and secure the
carbon brush caps.
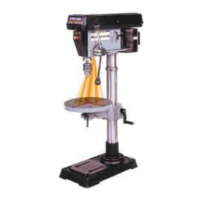
NOTE:
The right side carbon brush and cap (A) Fig.11
are obstructed by the height adjustment knob (B).
CAUTION: Make sure the plunge lock lever is in
the locked position before removing height
adjustment knob (B). It is necessary to unscrew
and remove this knob to gain access to the
carbon brush cap. Re-install the height adjust-
ment knob after inserting new carbon brush.
After replacing carbon brushes, you should run
the router for about 10 minutes (with no load).
WARNING: Certain cleaning agents and solvents
can damage plastic parts. Some of these are: gasoline, carbon tetrachloride,
chlorinated cleaning solvents, ammonia and household detergents which contain
ammonia. Avoiding use of these and other types of cleaning agents will minimize the
possibility of damage.
WARNING: All repairs, electrical or mechanical, should only be done by a qualified
technician. Contact the nearest King Canada Service Center. Use only identical
replacement parts, any other parts may create a hazard.
PARTS DIAGRAM & PARTS LISTS
Refer to the Parts section of the King Canada web site for the most updated parts
diagram and parts list.
FIGURE 10
FIGURE 11