Do you have a question about the KING CANOPY Universal 10ft X 13ft and is the answer not in the manual?
Instructions for sorting and arranging frame components by size and shape.
Guidance on building the central part of the canopy frame first, before adding sides.
How to unfold and position the canopy cover onto the assembled frame.
Detailed steps for securing the cover using elastic ball straps in a zigzag pattern.
Instructions for inserting leg pipes into connectors and attaching end leg pipes.
Procedure for pushing foot pads onto the bottom of each leg.
How to use curtain clips and drawstrings to secure corner legs to the cover.
Guideline for positioning anchors at least 36 inches away from each leg for stability.
Instructions for tying anchor cable or rope around the top connector of each leg.
How to tie the other end of the rope through the anchor eye and pull taut.
Keep flame and heat sources away, no cooking, no flammable liquids, no fireworks, cleaning and water advice.
Report missing/defective parts within 30 days with proof of purchase and photos for free replacement.
Canopy components have a 1-year warranty against defects in material and workmanship.
Canopy not guaranteed under strong weather; remove cover or take down unit during predicted severe weather.
Use canopy only for temporary shade, avoid weather, anchor properly, clean gently, store dry.
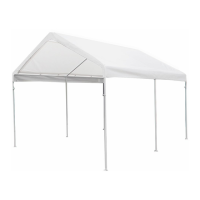
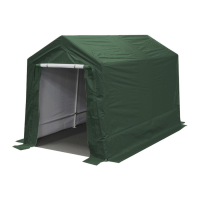
The King Canopy Universal 10ft x 13ft is a temporary outdoor structure designed to provide shade and protection from light weather conditions. It is not intended for use as a permanent structure and should not be relied upon for protection against severe weather, including strong winds, heavy rain, snow, or ice. The canopy is designed for quick and easy assembly and disassembly, making it suitable for various temporary outdoor events or storage needs.
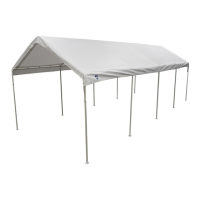
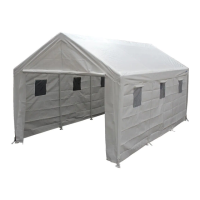
The primary function of the King Canopy Universal is to offer a shaded area, protecting against sun exposure, light rain, tree sap, and birds. It features a sturdy frame assembly that supports a white drawstring cover. The cover is designed to be attached to the frame using elastic ball straps, ensuring a snug fit. The canopy's structure includes a roof assembly and leg poles, which are connected to form a stable unit. The design emphasizes ease of setup, with clear instructions for assembling the frame and attaching the cover.
The canopy is equipped with a white drawstring cover, which is secured to the frame using elastic ball straps. These straps are designed to be inserted through grommets in the cover and then wrapped around the frame poles, providing a taut and finished appearance. The drawstring cover allows for adjustments to achieve a tighter fit, and the ball straps can be shortened by tying additional knots if needed. The cover is made from a fabric that meets flammability requirements (CPAI-84 Sec 6 and NFPA 701) but is not fireproof and will burn if in continuous contact with a flame source.
For stability, the canopy requires anchoring to the ground. An anchoring kit, though not included, is essential for preventing the canopy from acting like a kite in windy conditions. The anchoring process involves screwing anchors into the ground at a recommended distance from each leg and then tying anchor cables or ropes from the canopy's leg connectors to the anchors. This ensures that the structure remains secure, especially in moderate winds.
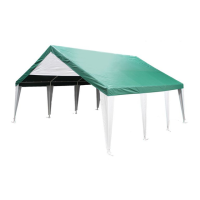
The King Canopy Universal is designed for straightforward use, with a focus on temporary applications. The assembly process begins by separating and arranging all frame pieces according to their size and shape. The roof rafters are formed using 68-inch and 78-inch pipes, while additional 78-inch pipes are designated for the legs. It is crucial to assemble the center frame first, followed by each side. A key step in the assembly is to attach the cover to the roof frame before inserting the leg poles. This sequence simplifies the cover installation and ensures proper positioning.
Once the cover is placed over the frame, it is secured using elastic ball straps. The straps are attached starting from the four corners, then continuing in a zigzag pattern along both sides, front, and back of the canopy. This method ensures that all straps are secured and the cover is taut. The design allows for the elastic cord of the ball strap to be hidden under the cover by wrapping it around the pole and under the ball, providing a cleaner look.
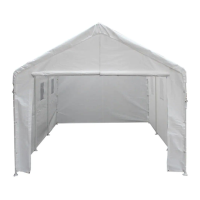
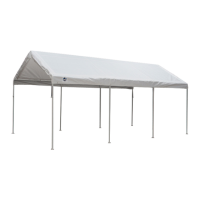
After the cover is secured to the roof frame, the leg poles are connected. The pipes for the middle poles are inserted into the 3-way and 4-way connectors first, followed by the end leg pipes. Foot pads are then pushed onto the bottom of each leg, though these pads are not intended for anchoring the canopy. Hook and loop fastening strips are connected down the length of each leg, and curtain clips are slipped onto the corner legs. These clips, along with drawstrings sewn into the cover, help secure the cover to the leg poles, with the drawstring ball inserted into the clip slot and pulled tight to wedge the clip onto the pipe.
The canopy is explicitly designed for temporary use and should not be considered a permanent structure. Users are advised to remove the canopy cover or disassemble the entire unit if severe winds or other harsh weather conditions are expected. This precaution is vital to prevent damage to the canopy and ensure safety.
Proper maintenance is essential to prolong the life of the King Canopy Universal. The fabric cover requires specific care to maintain its condition and integrity. It is important to keep all flame and heat sources away from the tent fabric, as it is not fireproof and will burn if exposed to continuous contact with a flame. Therefore, cooking or storing flammable liquids underneath or near the canopy is strictly prohibited. Similarly, igniting or storing fireworks near the canopy is not allowed.
Cleaning the cover should be done with mild soap and water only, using a hand-washing method. Bleach, dry cleaning, washing machines, or dryers should not be used, as these can damage the fabric. When cleaning, it is recommended to wash the cover while the canopy is open and without the legs extended. Harsh detergents or abrasives should also be avoided.
To prevent damage and maintain the canopy's structural integrity, it is crucial to prevent rain water, snow, or ice from accumulating on top of the cover. Any accumulation should be removed promptly. Additionally, nothing should be hung or suspended from the frame, grommets, truss system, or ball straps of the unit.
After use, especially before storing, the canopy cover should be completely dry to prevent mildew. If the canopy is wet or damp, it should not be put away. For best results and to avoid small tears, it is recommended that the top be removed and stored in a carry bag after each use.
Regular checks of the anchoring system are also part of the maintenance routine. The anchor ropes should be checked and tightened frequently to ensure maximum stability and protection against wind damage. This vigilance is particularly important given that the canopy can act as a kite in windy conditions if not properly secured.
In case of missing or defective parts, King Canopy offers a 1-year limited warranty (90-day limited on Value King Brand items). Users must report any discrepancies within 30 days of purchase and provide proof of purchase and photos of the defective part. Replacement parts can be obtained by contacting customer service, even if the warranty has expired, though non-warranty replacements may require a fee and return of the original part for inspection.
| Dimensions | 10ft x 13ft |
|---|---|
| Type | Universal |
| Category | Tent |
| Frame Material | Steel |
| Canopy Material | Polyester |
| Water Resistance | Water-resistant |
| UV Protection | Yes |
| Material | Polyester |