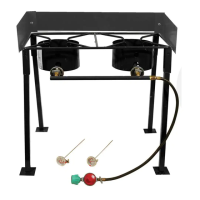
17
LIGHTING AND OPERATING INSTRUCTIONS
THE COOKER MUST NOT BE LIT UNTIL THE PRECEDING
PLACEMENT INSTRUCTIONS HAVE BEEN COMPLETELY FOLLOWED.
*Your model has multiple manual valves that work independently. Follow below instructions
for each manual valve and casting.
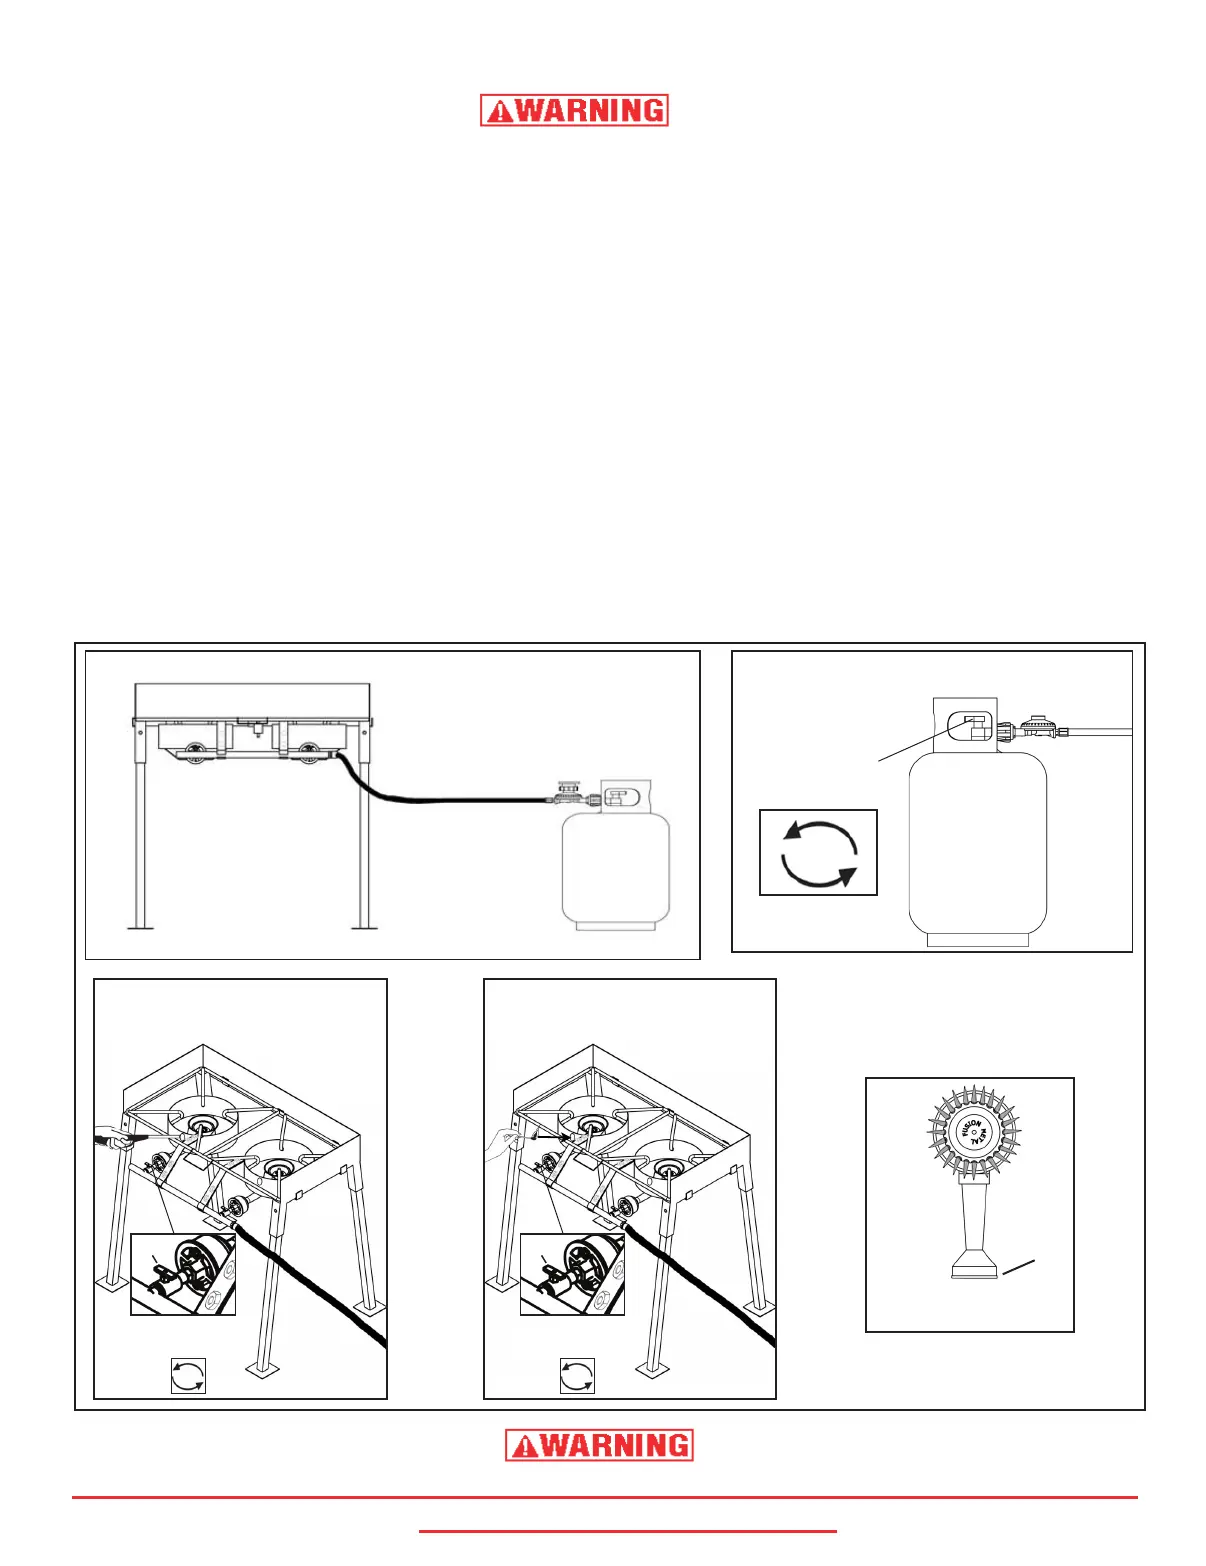
1. Check the cooker to make sure that it is set up as per the diagram (Figure 1).
2. Make certain the manual valves are turned to the “OFF” position by turning them clockwise until they reach the
stop position.
3. Open the cylinder control valve by turning it counterclockwise as per the diagram (Figure 2).
4. Insert a multipurpose lighter through the hole in the shroud as per Figure 3, or use a paper book match placed above
casting as per Figure 4. Turn the manual valve control toward the “ON” position until ignition occurs. Turning the manual
valve counterclockwise increases the gas flow to the burner and hence the flame size.
When lighting the burner, if ignition does not occur in 3 to 5 seconds, turn the manual valve(s) and cylinder control off.
Wait 5 minutes for gas to disperse. Repeat procedure.
5. Check that the flame is blue and that the flames are emitted from every port in the casting (Figure 5). If not, rotate the air
shutter position until there is a blue flame. Opening the shutter too much will cause the flame to “Lift” off the burner.
If there is a yellow flame, or if some ports have no flame, this indicates there may be an obstruction in the venturi tube
or ports. Check the maintenance instructions on page 19 for more information regarding a yellow flame.
6. Always monitor the flame throughout the cooking process. If at any point in the cooking process the flame is accidentally
extinguished, immediately turn the manual valve(s) and cylinder valve OFF. Wait 5 minutes for gas to disperse and
relight the cooker according to the lighting instructions (#1 - #5) in this section.
NEVER PUT HANDS OR FACE DIRECTLY OVER BURNER WHILE LIGHTING OR
WHILE THE APPLIANCE IS LIT.
MULTIPURPOSE
LIGHTER
PAPERBOOK
MATCH
FIGURE 3
FIGURE 4
FIGURE 5
Air Shutter
FIGURE 1
* Model May Vary From Picture
Turn Manual Valve
toward ON
(Counterclockwise)
CYLINDER CONTROL VALVE
Turn cylinder
valve toward ON
(Counterclockwise)
20 lb. LP
Gas Cylinder
FIGURE 2
Manual
Valve
Turn Manual Valve
toward ON
(Counterclockwise)
Manual
Valve