1. Lift the rear deector guard (20) and hold it in place.
2. Lift the grass catcher hooks (18b) off the rods and place the grass catcher (18) on
the ground.
3.
Remove the grass clippings from the discharge chute (24) into the grass catcher (18).
Use a proper tool such as a brush.
WARNING! Never use your hands or feet to remove grass clippings from the
discharge chute (24)!
4. Empty the grass clippings onto a compost heap.
5. Re-t the grass catcher hooks (18b) onto the rods.
Grass catcher inspection
During use the grass catcher (18) material is subjected to normal wear and tear. An
excessively worn grass bag may allow the objects to be thrown towards the operator.
Replace a worn grass bag to prevent possible injury.
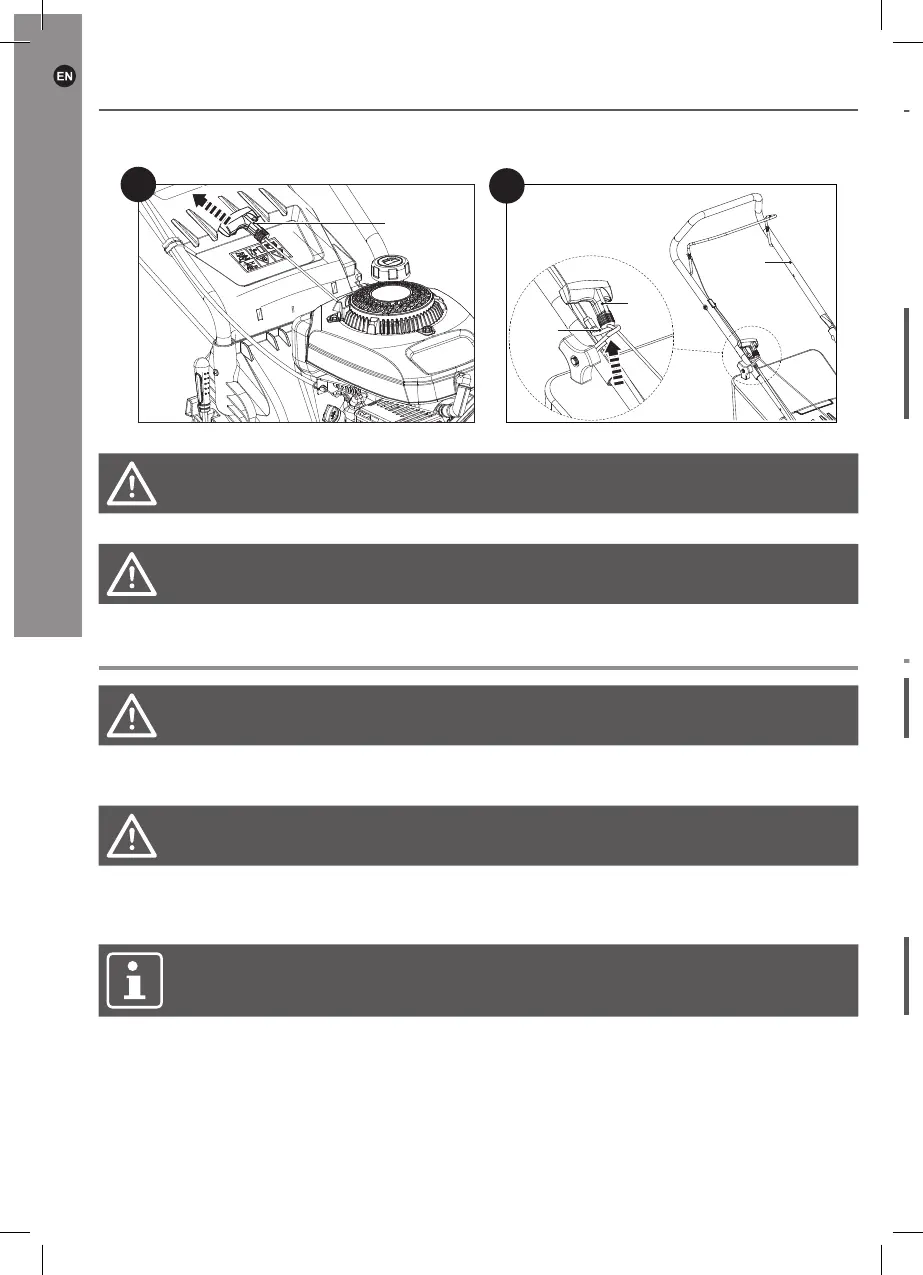
Cutting height adjustment
WARNING! Before adjusting the cutting height, stop the engine and wait until
the blade (25) comes to a complete stop.
This product can be adjusted to 5 different height settings. The cutting height depends on
the kind of lawn and its actual height. When mowing high grass, start with the maximum
cutting height and make a second cut with lower cutting height. New or thick grass may
require a higher cutting height and a narrower cutting path.
1.
Pull the lever for cutting height adjustment (15) towards the wheel (12) (Fig. 12, step 1),
and then move it forward or backward to the desired cutting height (Fig. 12, step 2).
2. Release the lever (15) and ensure it engages into place properly (Fig. 12, step 3).
NOTE: If you are not sure what cutting height should be selected, start with a
maximum height and check the appearance of the lawn after mowing a small
area. Adjust the setting if necessary.