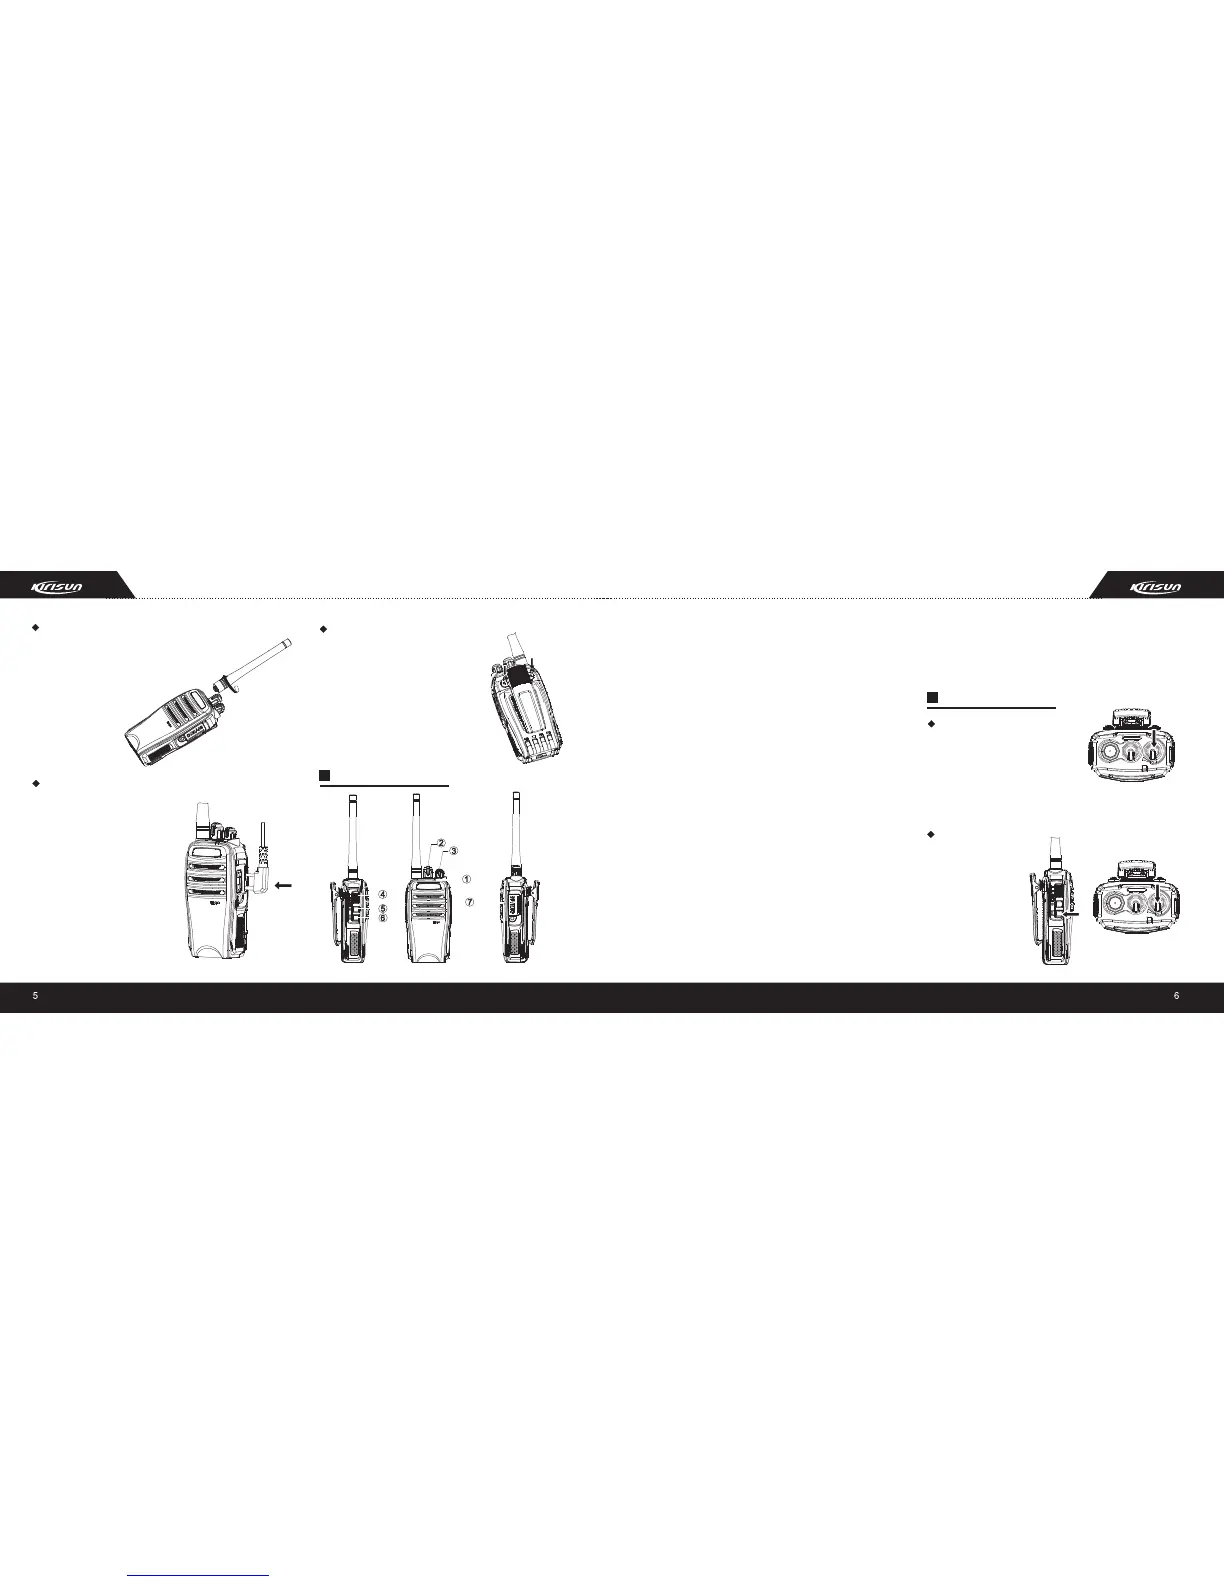
Installing the Antenna
Hold the base of the antenna and turn the
antenna clockwise into the connector on
the top of the radio until secure.
Installing the External Speaker/MIC
Open the cover for external
speaker/MIC jacks, and then
insert the external speaker/MIC
plug into the jacks on the radio.
Note: When using the external
speaker/MIC, the radio will not
be waterproof.
Installing/Removing the Belt Clip
When installing, match the two
screw holes to the holes on the
back of the radio, use screw to
fasten it; when removing, use
screwdriver to remove these two
screws, take off the belt clip.
Radio Overview
1.LED indicator
Red LED lights when transmitting; green LED lights when
receiving. An alarm sound sends out when the radio is in low
power while transmitting.
2.Channel selector knob
Rotate it to select channel 1-16.
3.On/OFF/Volume knob
Rotate it clockwise to turn on the radio. Rotate it counter-
-clockwise until a click sound is heard to turn off the radio.
Rotate it to adjust the volume.
4.PTT button
Press and hold it and speak to the microphone to transmit;
release it to receive.
5.Voice prompt
Press it to hear which channel the radio is in in stand-by state.
6.Monitor button
Press it to disable squelch circuit, and receive background
noise. Release it to turn off the background noise.
Note: If you want to check out whether there are interference
in this channel, press this button. Then rotate Volume knob to
hear the noise.
7.Speaker/MIC jack
Connect the external speaker and MIC to the radio.
Basic Operation
Power On
Turn the On-Off/Volume Control
Knob clockwise until a click is heard
to turn on the radio. The radio will
make a sound of “Di…” If programmed, the current channel
number will be annunciated.
Adjusting the Volume
Press Monitor button to
enter into the monitor
state. Then rotate
ON/OFF/Volume
knob to adjust the
volume.