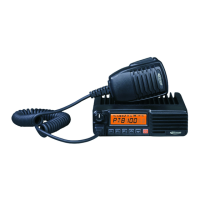
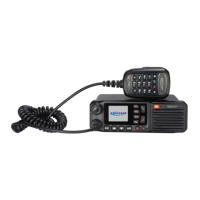
PT8000 Service Manual
12
9 DMM
Input impedance: above 10M/V DC, capable of
measuring voltage, current and resistance.
10
Audio signal
generator
Frequency range:2-3000Hz
Output level: 1-500mV
11
RF power
attenuator
Attenuation: 40dB or 50dB
Supporting power : higher than 50W
12
Standard signal
generator
Frequency range:10MHz-1000MHz
Output level: 0.1uV-32mV (-127dBm~-17dBm)
13 Oscilloscope
Frequency range: DC~20MHz
Test range: 10mV-20V
14
Audio
frequency
voltmeter
Test range: 10mV-10V
Recommendation: Item 6, 7, 8, 10, 11, and 12 listed in the
table can be replaced by HP8920 general test set.
8
1
1
2
3
48
5
7
6
18
(PTT)
(MBL)
(PSB)
(GND)
(HOOK)
(ME)
(MIC)
(CM)
Figure 7.1 External Microphone Interface Definition
7.2 Adjustment
How to enter PC Tuning Mode:
* Firstly, enter PC Test Mode. Refer to Chapter 4.
* Click “Edit” in the main menu of KSP8000 programming
software, and then click “Entry Tuning” in the pull-down menu to
enter the Tuning Mode.
* Then the “Tuning Item List” screen will pop up. Double click
the item you want to adjust, and then you can adjust the
parameters.
* Exit the PC Test Mode after adjustment.
7.2.1 VCO
a. Adjust the channel to its high frequency point (See Table 7.2).
b. Under the receiving status, measure the voltage of PD by DMM.
Then adjust the PD voltage to be 3.5V ± 0.3V by tuning the
trimming capacitor C122.
c. Under the transmitting status, measure the voltage of PD by
DMM. Then adjust the PD voltage to be 3.5V ± 0.3V by tuning
the trimming capacitor C39.
d. Adjust the channel to its low frequency point (See Table 7.2).
e. Under the receiving status, measure the voltage of PD by DMM,
the value should be larger than 0.6V.
f. Under the transmitting status, measure the voltage of PD by
DMM, the value should be larger than 0.6V.
Table 7.2 High/Center/Low Frequency Point for PT8000
Low Freq Point Center Freq Point High Freq Point
PT8000(2) 400.125MHz 425.125MHz 449.975MHz
PT8000(3) 438.125MHz 464.125MHz 489.975MHz
7.2.2 Tx deviation (set the HP8920 to be in the Tx status, and set
the filter to be 50Hz~15kHz)
a. Input audio signal of 120mV, 1000Hz to the MIC jack of the
radio.
b. Set the channel to its low frequency point (See Table 7.2).
c. Press and hold the PTT key while adjusting VR2 to make the
deviation be 4.2kHz.
d. Observe the deviation of other channels, which should be larger
than 3.5kHz.
7.2.3 PLL frequency (set the HP8920 to be in the Tx status)
In the “Tuning Mode”, double click “Frequency Stability”,
and adjust the value within the range of 0~255 to make the Tx
frequency reach the rated value (within ±100Hz).
7.2.4 Tx power (set the HP8920 to be in the Tx status)
a. In the “Tuning Mode”, double click Tx “High Power”, and
adjust the five frequency points of “Lowest”, “Low”, “Mid”,
“High” and “Highest” respectively within the range of 0~255 to
make the Tx power be 22W. Meanwhile, observe the operating
current, which should be no larger than 7A.
b. In the “Tuning Mode”, double click Tx “Low Power”, and
adjust the five frequency points of “Lowest”, “Low”, “Mid”,
“High” and “Highest” respectively within the range of 0~255 to
make the Tx power be 5W.
7.2.5 DCS waveform balance (set the HP8920 to be in the Tx
status, and set the filter to be 20Hz ~ 300Hz)
In the “Tuning Mode”, double click “DCS DEV”, and adjust
VR1 to make the waveform into square wave.
7.2.6 DCS DEV (set the HP8920 to be in the Tx status, and set the
filter to be 20Hz ~ 300Hz)
a. In the “Tuning Mode”, double click “DCS DEV”, and select
“Wideband”. Adjust the five frequency points of “Lowest”, “Low”,
“Mid”, “High” and “Highest” respectively within the range of
0~255 to make the deviation be 0.75kHz.
b. In the “Tuning Mode”, double click “DCS DEV”, and select
“Narrowband”. Adjust the value within the range of 0~255 to
make the deviation be 0.35kHz.

 Loading...