0
5 TESTING INSTALLATION
Remove installation debris from under dishwasher, foam door pads on each side and near top of tank, and
all internal packing material and labels. NOTE: Do not remove white plastic glides on sides of door or white
plastic bumpers on front corners of lower rack.
Close door and latch handle. Press “Cancel Cycle”
button; timer will automatically advance to off. Lift
door handle and wait for timer to reset itself. Latch door handle and press “Heavy Wash” button. Run
dishwasher through the complete cycle to make certain it is operating properly. Turn off electrical power,
remove lower panel and check for leaks. Reinstall lower panel and turn on electrical power.
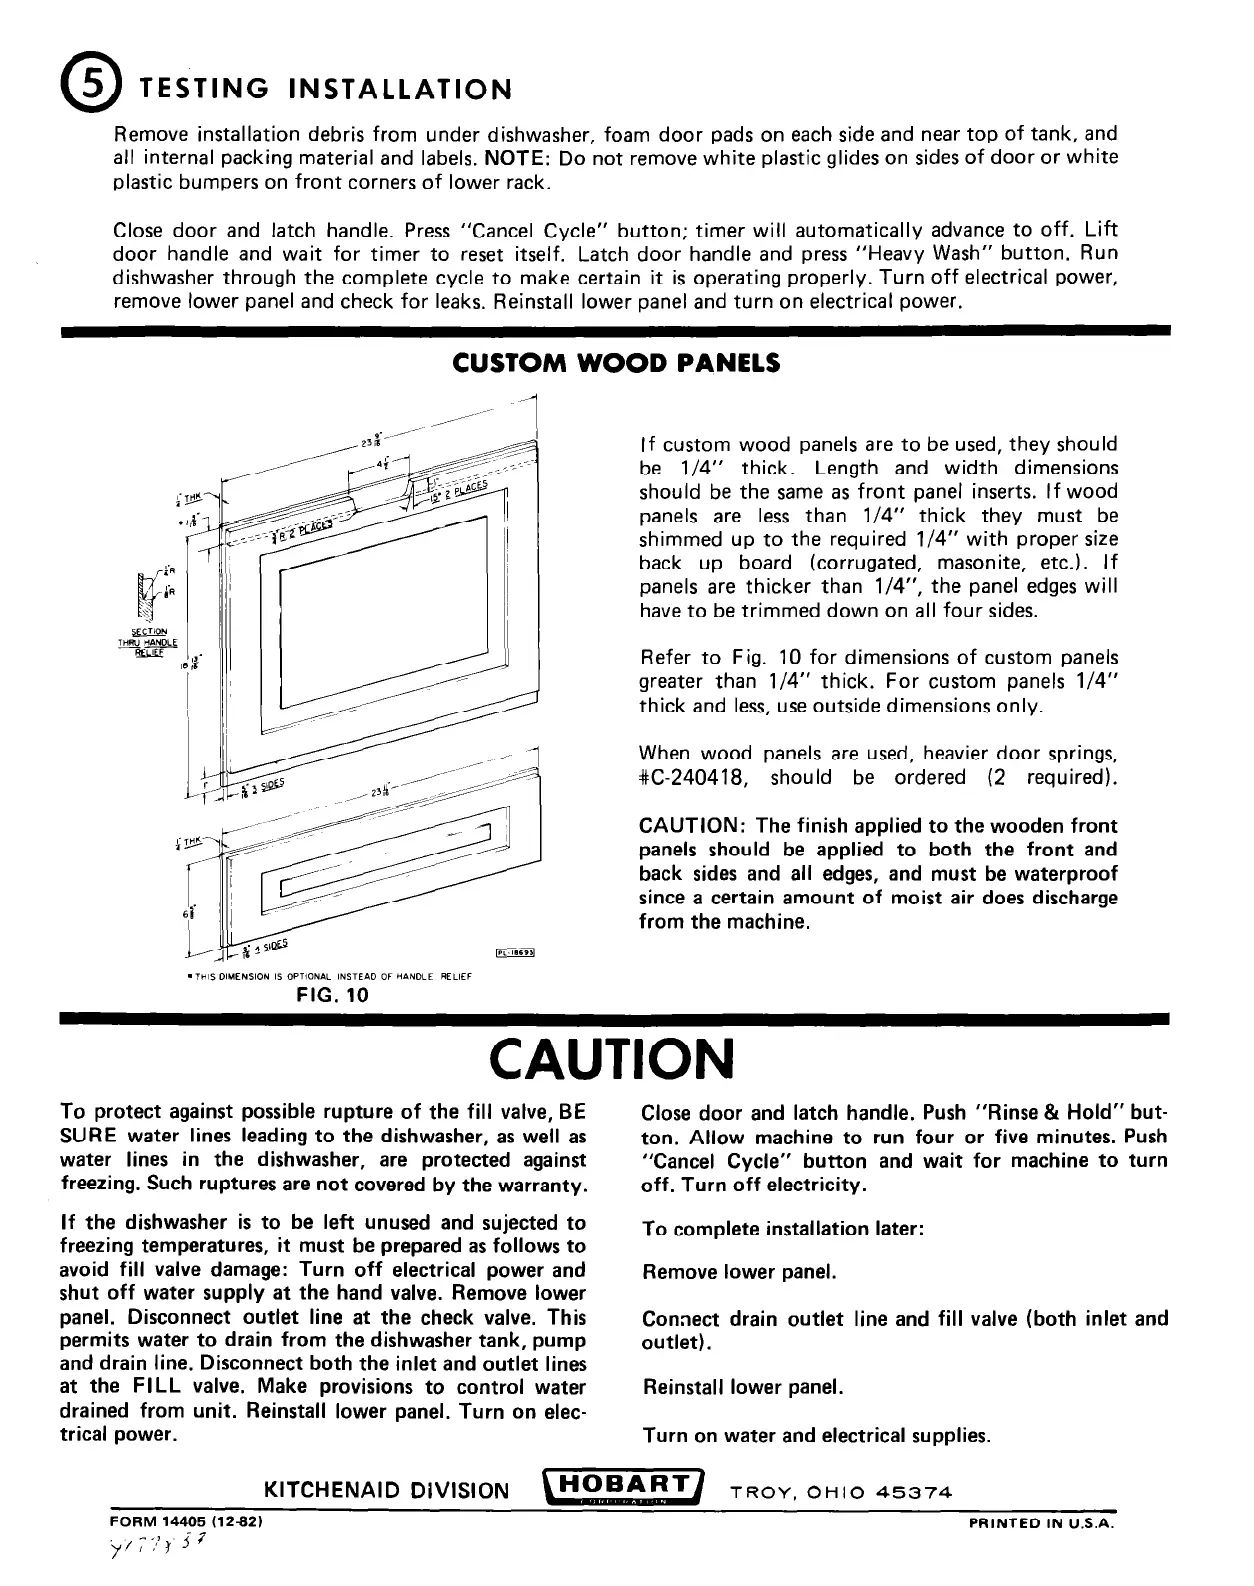
CUSTOM WOOD PANELS
If custom wood panels are to be used, they should
be l/4” thick.
Length and width dimensions
should be the same as front panel inserts. If wood
panels are less than l/4” thick they must be
shimmed up to the required l/4” with proper size
back up board (corrugated, masonite, etc.). If
panels are thicker than l/4”, the panel edges will
have to be trimmed down on all four sides.
Refer to Fig. 10 for dimensions of custom panels
greater than l/4” thick. For custom panels l/4”
thick and less, use outside dimensions only.
When wood panels are used, heavier door springs,
#C-240418, should be ordered (2 required).
CAUTION: The finish applied to the wooden front
panels should be applied to both the front and
back sides and all edges, and must be waterproof
since a certain amount of moist air does discharge
from the machine.
CAUTION
To protect against possible rupture of the fill valve, BE
SURE water lines leading to the dishwasher, as well as
water lines in the dishwasher, are protected against
freezing. Such ruptures are not covered by the warranty.
If the dishwasher is to be left unused and sujected to
freezing temperatures, it must be prepared as follows to
avoid fill valve damage: Turn off electrical power and
shut off water supply at the hand valve. Remove lower
panel. Disconnect outlet line at the check valve. This
permits water to drain from the dishwasher tank, pump
and drain line. Disconnect both the inlet and outlet lines
at the FILL valve. Make provisions to control water
drained from unit. Reinstall lower panel. Turn on elec-
trical power.
Close door and latch handle. Push “Rinse & Hold” but-
ton. Allow machine to run four or five minutes. Push
“Cancel Cycle” button and wait for machine to turn
off. Turn off electricity.
To complete installation later:
Remove lower panel.
Connect drain outlet line and fill valve (both inlet and
outlet).
Reinstall lower panel.
Turn on water and electrical supplies.
KITCHENAID DIVISION
\HOBART]
TROY, OHIO 45374
FORM 14405 (1262)
PRINTED IN U.S.A.
r,;;?j j7