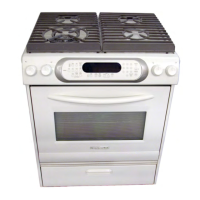
Do you have a question about the KitchenAid KGRA806P and is the answer not in the manual?
Outlines the objectives for service technicians, focusing on safety, troubleshooting, and repairs.
Explains the safety alert symbol, DANGER, and WARNING messages.
Illustrates the locations of model/serial number labels and tech sheets on the appliance.
Details on gas supply line, pressure, and connections for natural and LP gas.
Specifies electrical hookup, grounding, and circuit requirements for safe operation.
Step-by-step instructions for converting the range from natural gas to L.P. gas.
Guides on adjusting surface and oven burner flames for optimal performance.
Instructions for securely installing the anti-tip bracket to prevent accidental tipping.
Explains the function and airflow provided by the convection bowtie baffle system.
Identifies the physical locations of various components within the range for service access.
Provides detailed steps for removing the electronic oven control (EOC) assembly and user interface.
Step-by-step guide for accessing and removing ignition switches, gas valves, and thermal switches.
Instructions for safely removing the door latch, spark module, and control power supply.
Detailed procedure for removing the power supply transformer from the appliance.
Steps for removing the cooktop, individual surface burners, and their ignitors.
Instructions on how to remove the rear panel to access internal components.
Guides on how to remove the oven light socket assembly.
Procedures for removing the broil burner, its ignitor, and the Halo™ broil element.
Step-by-step instructions for removing the bake burner and its associated ignitor.
Procedures for removing the convection element and the convection fan motor.
Guides on how to remove the oven temperature sensor.
Instructions for removing the cooling fan assembly.
Steps to remove the Oven Thermal Overload Device (TOD).
Procedure for removing the gas distribution valve.
Steps to safely remove the power supply cord from the unit.
Instructions for removing a side panel of the appliance.
Detailed steps for removing and reinstalling the oven door.
Guides on how to remove the oven door gasket.
Procedures for removing decorative glass, handle, hinges, and door glass.
Explains how to test control and cooling fan thermal switches using an ohmmeter.
Details testing procedures for standard and TripleTier™ ignition switches.
Describes testing methods for standard and TripleTier™ gas valves.
Instructions for testing the door latch assembly motor and switches.
Procedure for testing the power supply transformer's resistance.
Guides on testing the resistance of the Halo™ broil element.
Steps for testing the resistance of the convection element.
Procedure for testing the resistance of the convection fan motor.
How to test the oven temperature sensor resistance at different temperatures.
Procedure for testing the resistance of the cooling fan motor.
Steps to test the Oven Thermal Overload Device (TOD) for continuity.
Procedure for testing the resistance of the gas distribution valve terminals.
Illustrates the keypad layout and corresponding functions for specific clock models.
Details pinouts for the display board and low voltage transformer.
Diagram showing the layout of components on the power board.
Illustrates the keypad layout and corresponding functions for specific clock models.
Details pinouts for the display board and low voltage transformer.
Diagram showing the layout of components on the power board.
Overview of the diagnostic mode, including how to engage relays and interpret displays.
Explains how error codes are displayed, lists common codes, and details diagnostic information.
Procedures for entering diagnostic mode and corrective actions for specific error codes.
Explains how to access and use hidden Electronic Oven Control (EOC) functions.
Guides on how to adjust oven temperature calibration for bake, broil, and clean cycles.
Provides comprehensive wiring diagrams for the appliance's electrical systems.
Illustrates simplified strip circuits for key functions like bake, broil, and cooling fan.
| Brand | KitchenAid |
|---|---|
| Model | KGRA806P |
| Category | Ranges |
| Language | English |