14 15
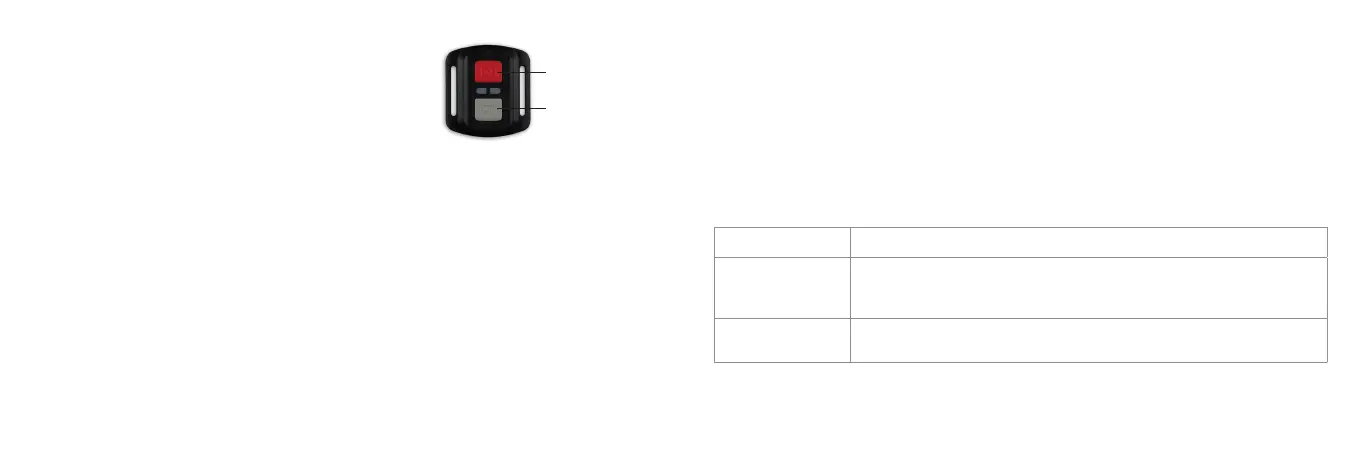
Using the remote control
Controlling video mode
1. Make sure the camera is in Video Mode
2. Press the Grey video button to start recording
3. Press the Grey video button to stop recording
Controlling photo modes
1. Make sure the camera is in the desired Photo Mode or press the Red photo button
to change to Photo Mode and take a photo simultaneously
2. PresstheRedphotobuttontotakeaphotoorstartatimer/timelapsesequence
3. PresstheRedphotobuttontostopthephotosequence
To turn o the camera
• Press and hold the Red photo button
Changing the camera settings
General settings
1. To enter the general settings menu, turn on the camera and press the Power/Mode Button (3)
4 times to enter the Settings mode.
2. Use the Up Button (11) and Down/Wi-Fi Button (13) to navigate through the menu.
3. Use the Shutter/Ok Button (1) to enter a heading.
In the general settings menu, you will nd the following options:
Red photo button
Grey video button
[continued...]
Menu Function
Video Resolution Change the video resolution for the video recording. Select a smaller movie size for
reducedlesizeorahighermoviesizeforbetterquality
[4K (25fps)] / [2.7K (30fps)] / [1080P (60fps)] / [1080P (30fps)]
Looping Video Choose to record video on a 10 minute loop
[O]/[On]